Chuẩn bị
Để bắt đầu xây dựng các ứng dụng dựa trên SAM, trước tiên chúng ta phải cài đặt SAM CLI, thiết lập thông tin xác thực AWS và khởi tạo một ứng dụng SAM đơn giản.
1. Cài đặt SAM CLI
Bạn có thể tham khảo: https://docs.aws.amazon.com/serverless-application-model/latest/developerguide/serverless-sam-cli-install.html
2. Thiết lập thông tin xác thực AWS
Nếu bạn đã thiết lập thông tin xác thực AWS từ các bài viết trước, bạn có thể bỏ qua bước này.
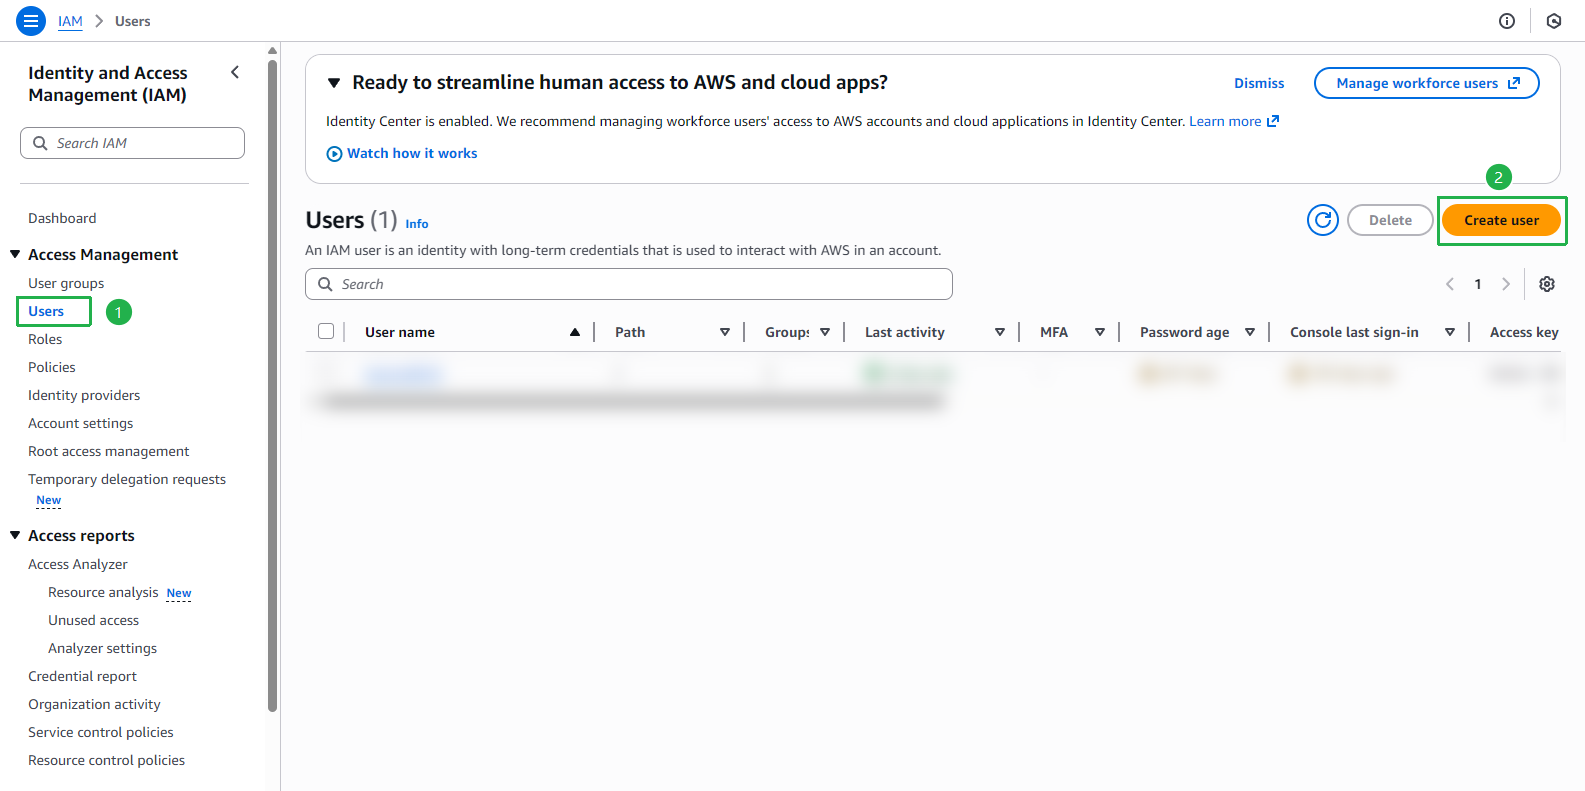
Mở IAM console.
Nhấp vào Users trên menu bên trái.
Nhấp vào nút Create user.
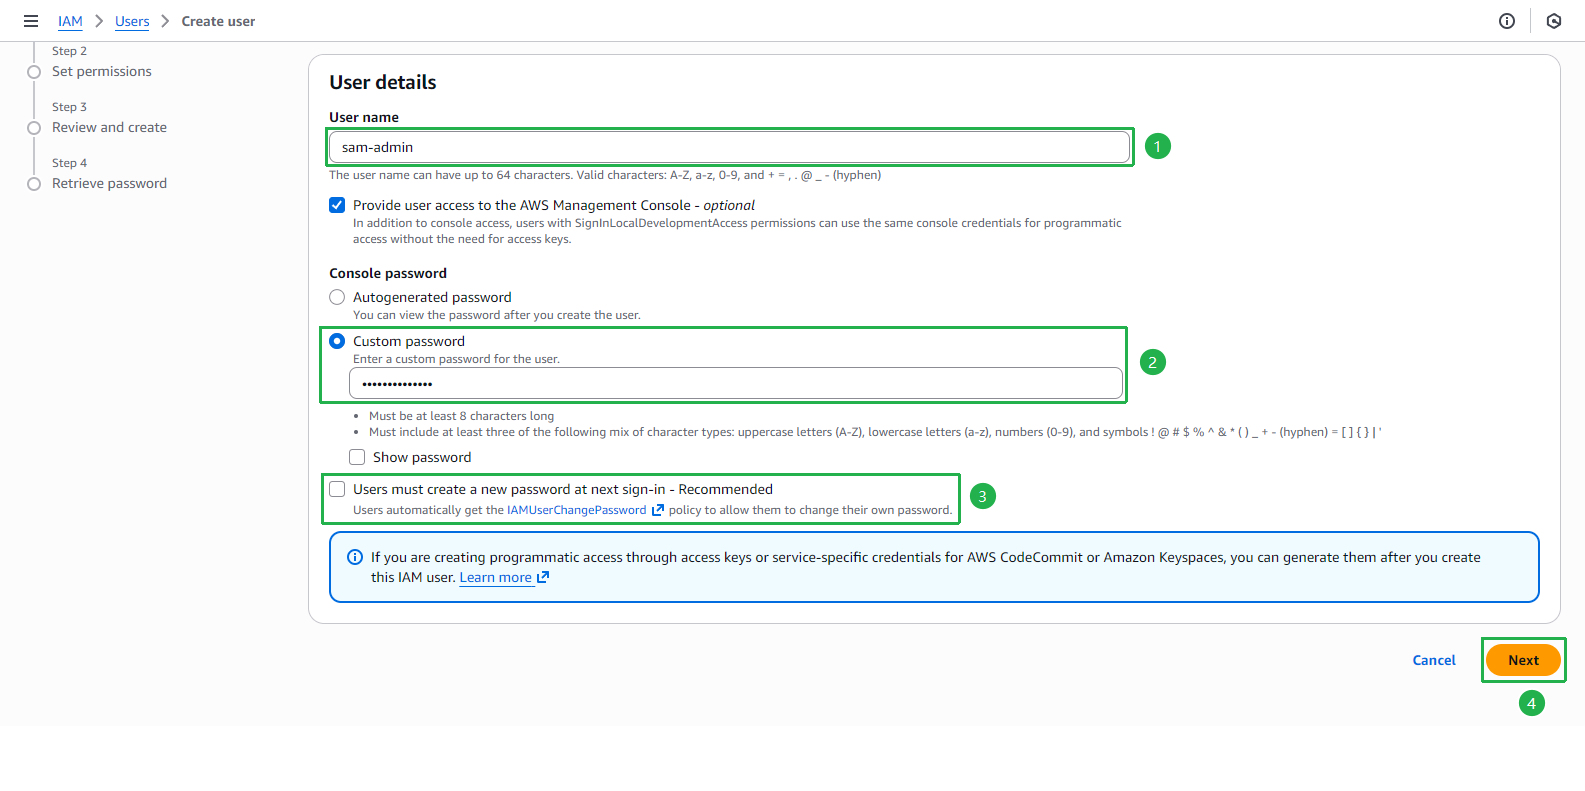
Tại trang Step 1: Specify user details:
- Nhập tên người dùng, chẳng hạn như:
sam-admin. - Chọn tùy chọn Provide user access to the AWS Management Console.
- Chọn I want to create an IAM user.
- Chọn Custom password, sau đó nhập mật khẩu của bạn.
- Bỏ chọn Users must create a new password at next sign-in.
- Nhấp vào Next.
- Nhập tên người dùng, chẳng hạn như:
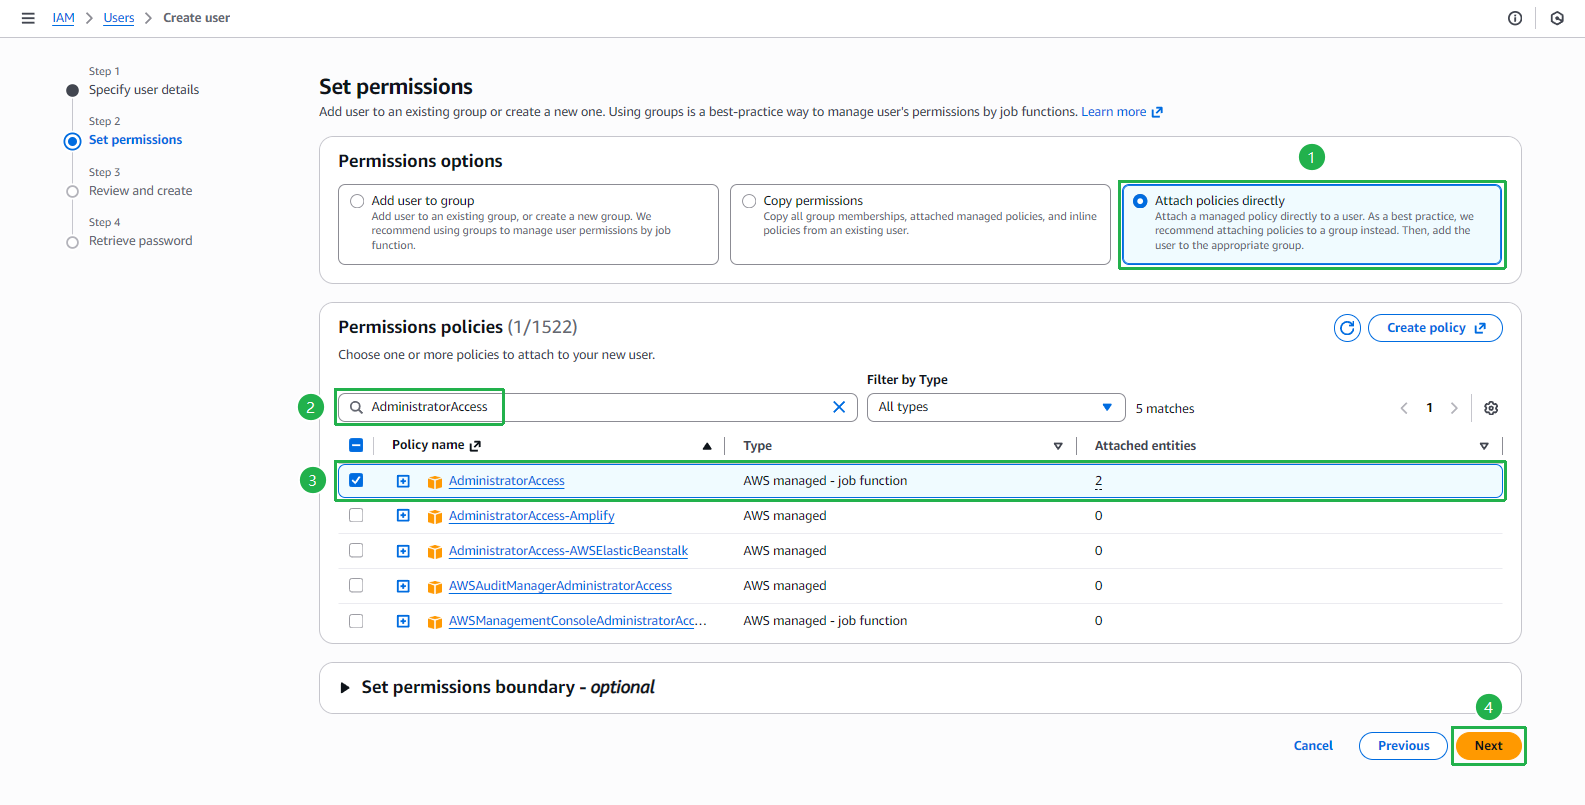
Tại trang Step 2: Set permissions:
- Chọn Attach policies directly.
- Tìm kiếm và chọn chính sách AdministratorAccess để người dùng có quyền truy cập đầy đủ vào các dịch vụ.
- Nhấp vào Next.
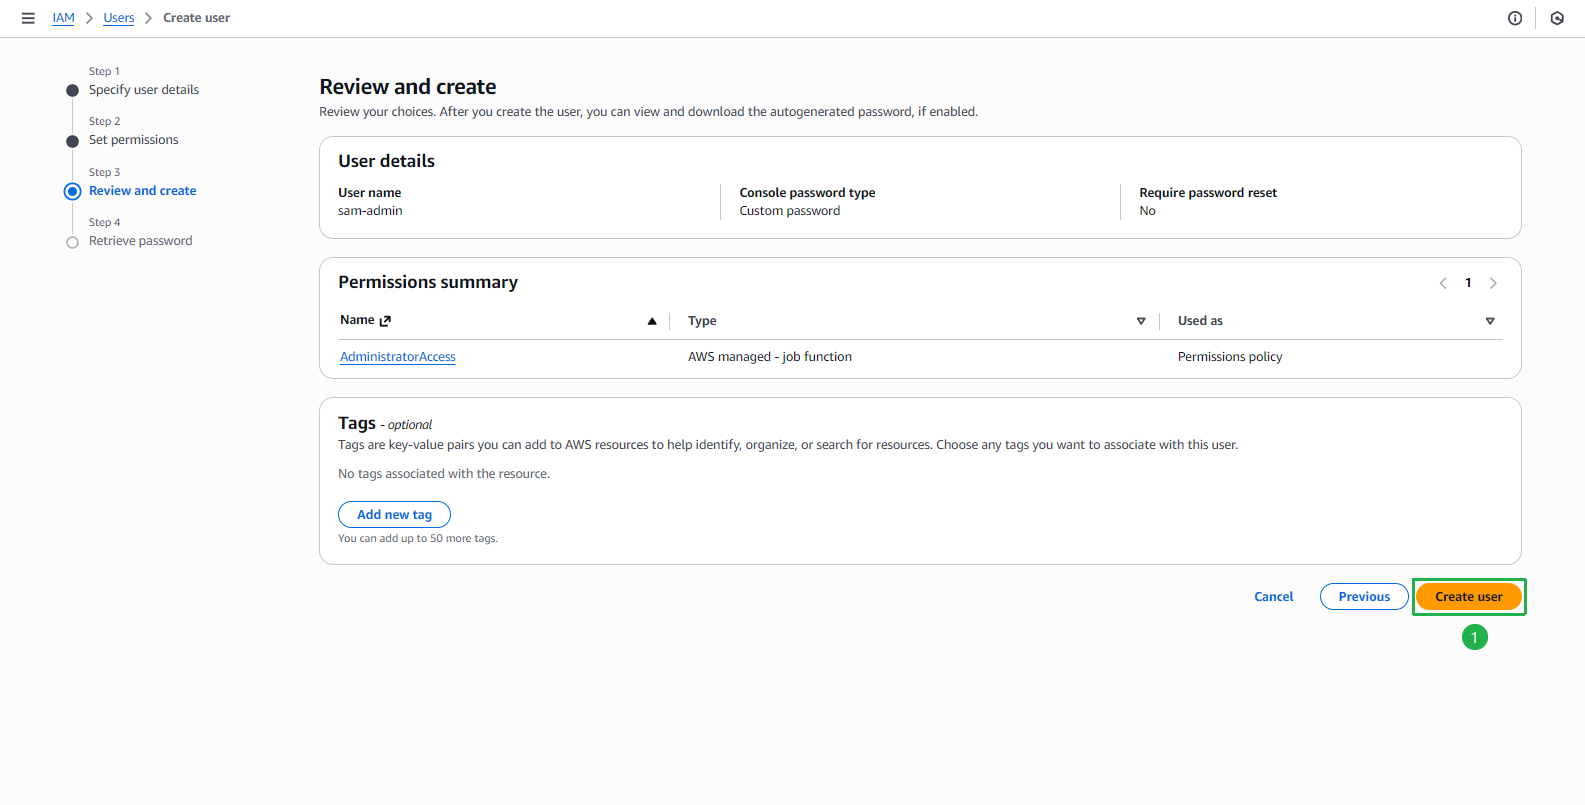
Tại trang Step 3: Review and create:
- Xem lại cấu hình và nhấp vào Create user.
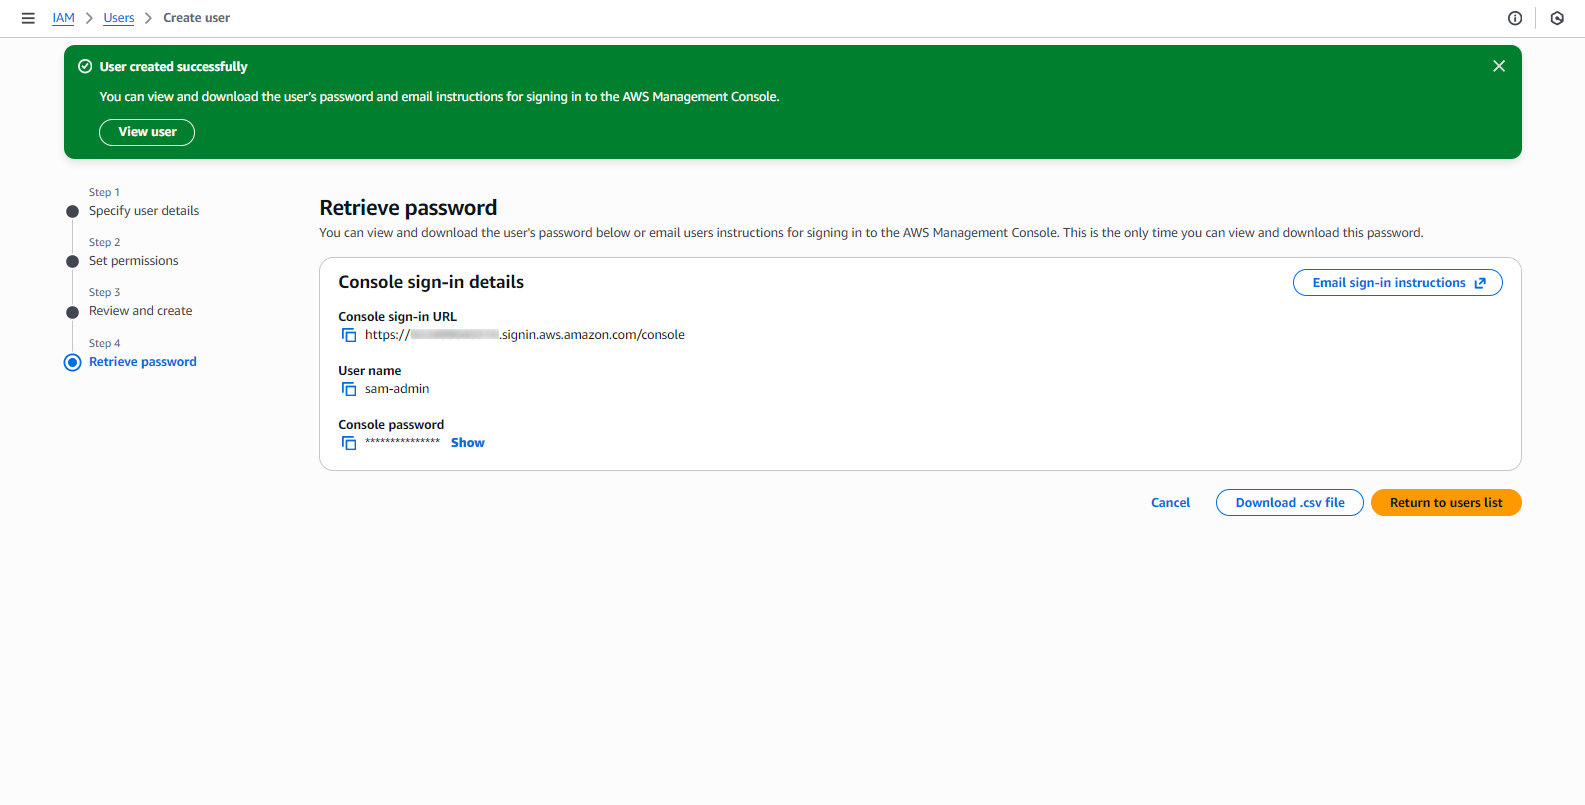
Tại trang Step 4: Retrieve password:
- Người dùng đã được tạo thành công.
- Nhấp vào Return to users list.
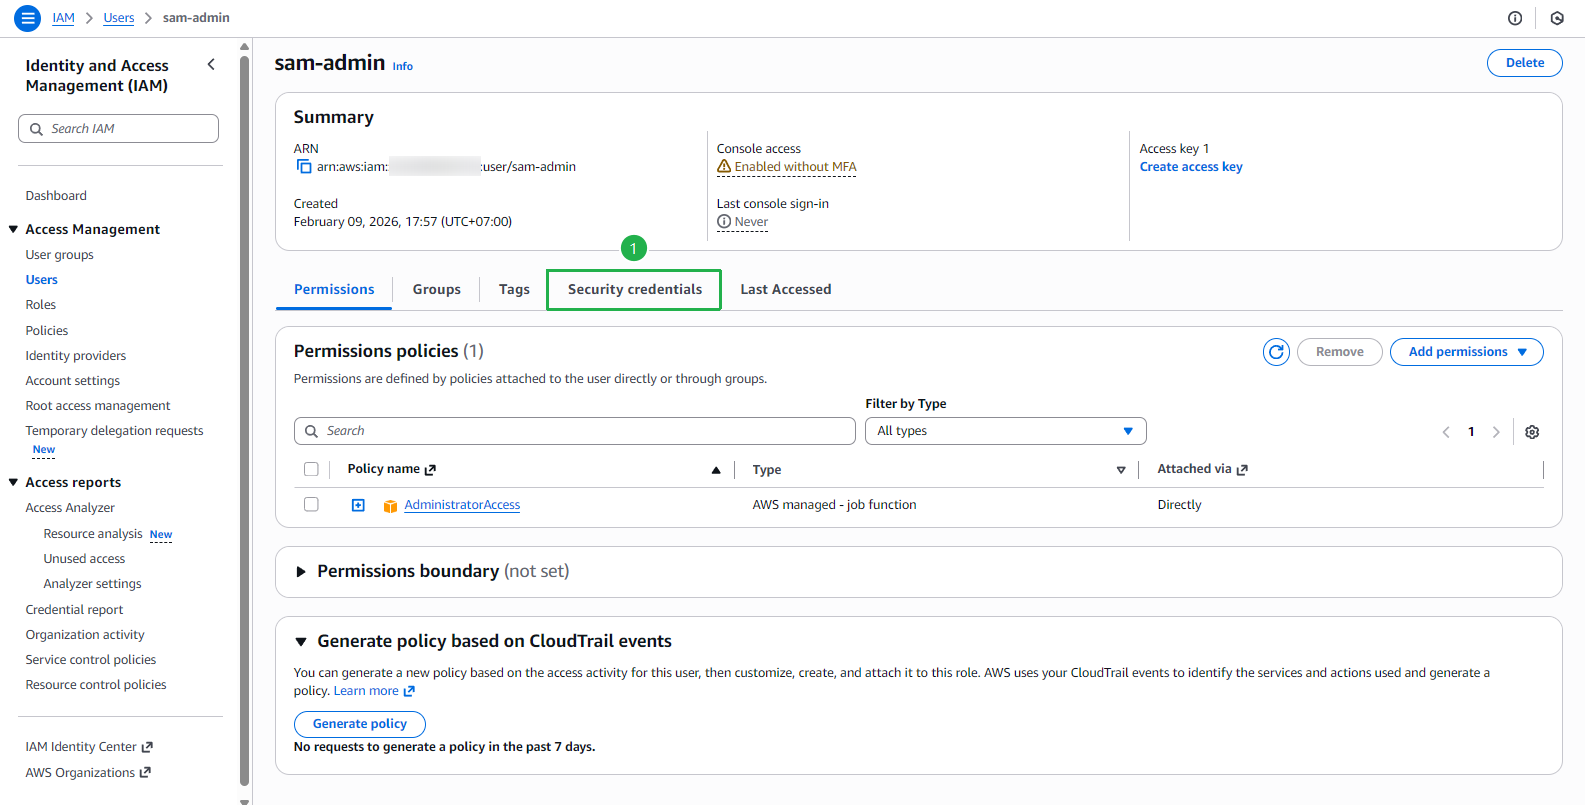
Tại trang sam-admin:
- Nhấp vào tab Security credentials.
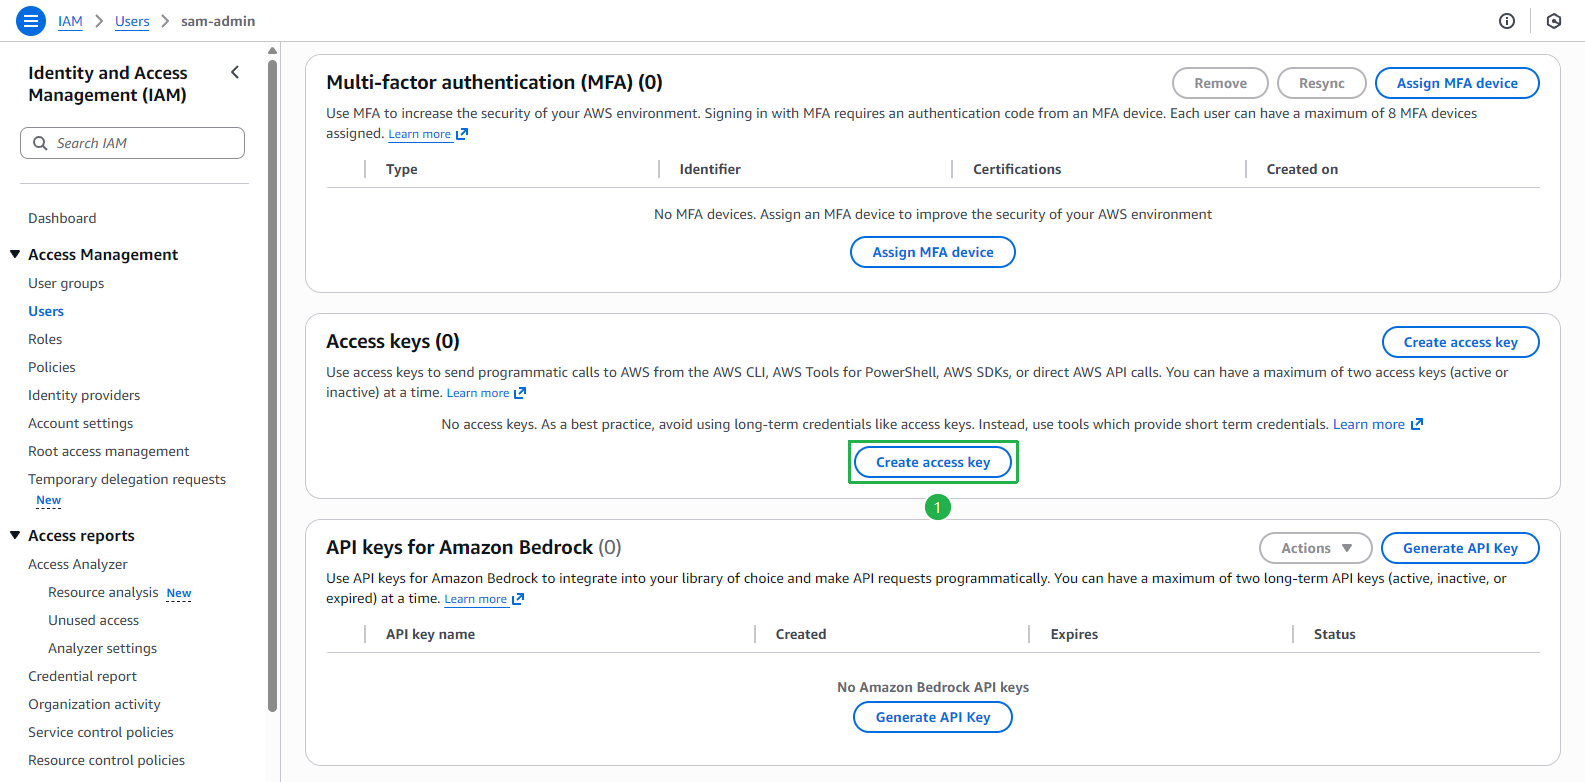
Cuộn xuống phần Access keys:
- Nhấp vào Create access key.
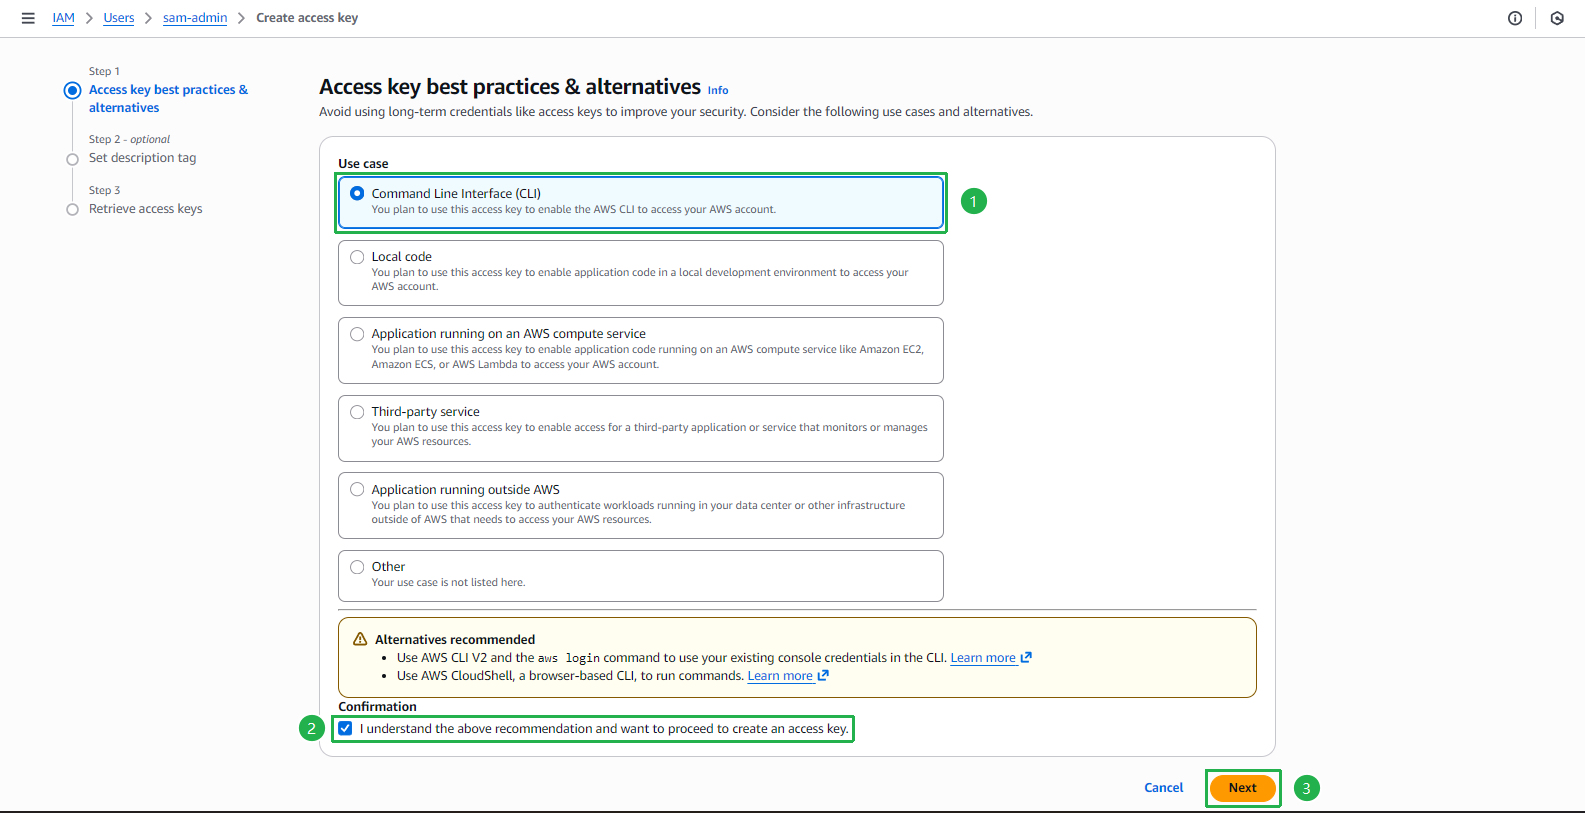
Tại Step 1: Access key best practices & alternatives:
- Đối với Use case, chọn Command Line Interface (CLI).
- Chọn I understand the above recommendation and want to proceed to create an access key.
- Nhấp vào Next.
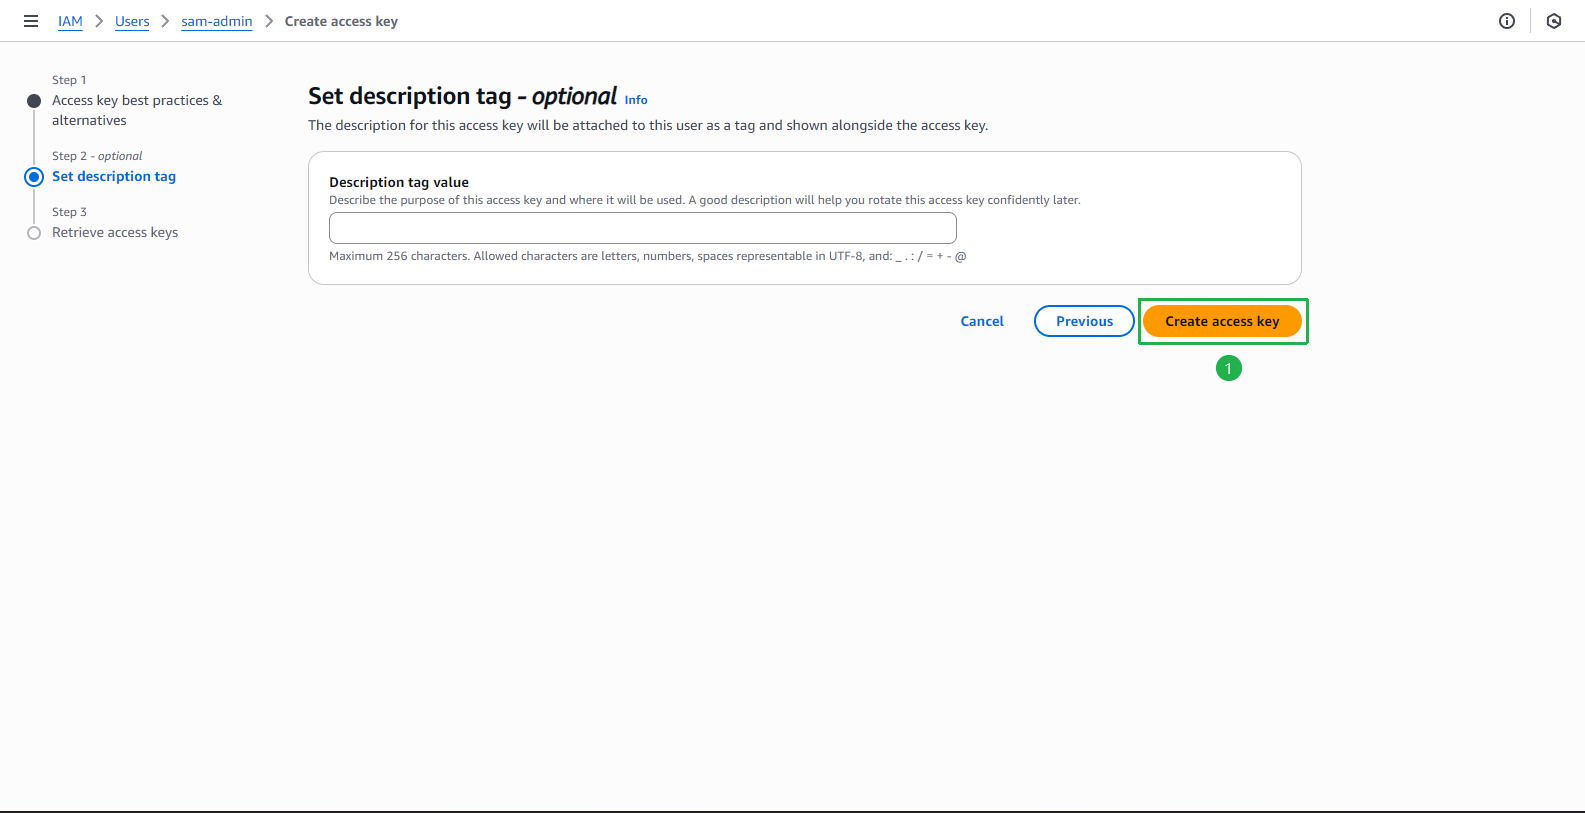
Tại Step 2: Set description tag:
- Nhấp vào Create access key.
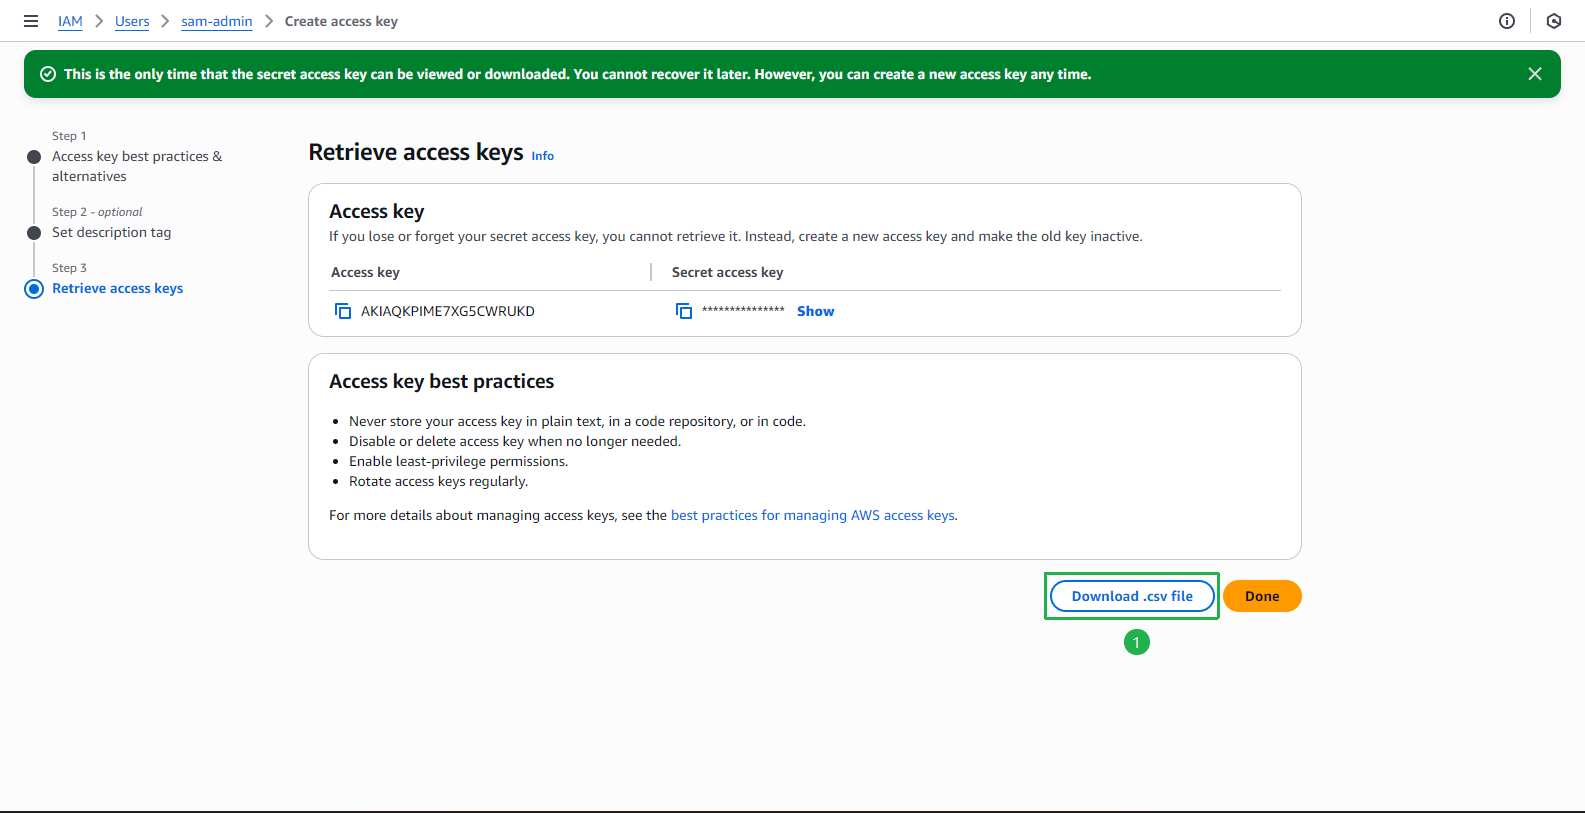
Tại Step 3: Retrieve access keys:
- Nhấp vào Download .csv file để tải xuống file chứa Access Key ID và Secret Access Key.
- Sau đó, nhấp vào Done.
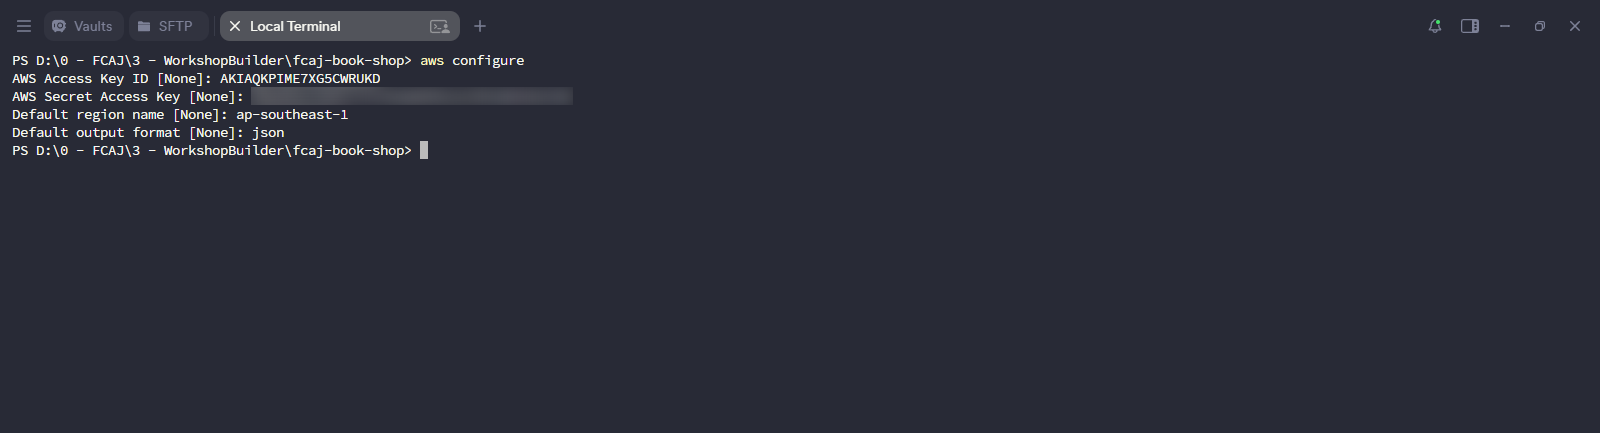
Chạy lệnh sau bằng terminal trên thiết bị của bạn:
aws configure- Nhập thông tin tương ứng với các cột trong tệp thông tin xác thực bạn đã tải xuống:
- AWS Access Key ID: Nhập Access Key ID.
- AWS Secret Access Key: Nhập Secret Access Key.
- Default region name: Nhập khu vực gần bạn nhất (ví dụ:
ap-southeast-1). - Default output format: Có thể nhập
jsonhoặc bỏ qua.
- Nhập thông tin tương ứng với các cột trong tệp thông tin xác thực bạn đã tải xuống:
3. Tạo dự án SAM mẫu
Chạy lệnh dưới đây tại thư mục nơi bạn muốn triển khai ứng dụng:
sam initChọn các tùy chọn sau:
Which template source would you like to use?
  1 - AWS Quick Start Templates
  2 - Custom Template Location
Choice: 1

Choose an AWS Quick Start application template
  1 - Hello World Example
  2 - Data processing
  3 - Hello World Example with Powertools for AWS Lambda
  4 - Multi-step workflow
  5 - Scheduled task
  6 - Standalone function
  7 - Serverless API
  8 - Infrastructure event management
  9 - Lambda Response Streaming
  10 - GraphQLApi Hello World Example
  11 - Full Stack
  12 - Lambda EFS example
  13 - Serverless Connector Hello World Example
  14 - Multi-step workflow with Connectors
  15 - DynamoDB Example
  16 - Machine Learning
Template: 1

Use the most popular runtime and package type? (python3.13 and zip) [y/N]: y

Would you like to enable X-Ray tracing on the function(s) in your application? [y/N]: N

Would you like to enable monitoring using CloudWatch Application Insights? [y/N]: N

Would you like to set Structured Logging in JSON format on your Lambda functions? [y/N]: N

Project name [sam-app]: fcaj-book-shop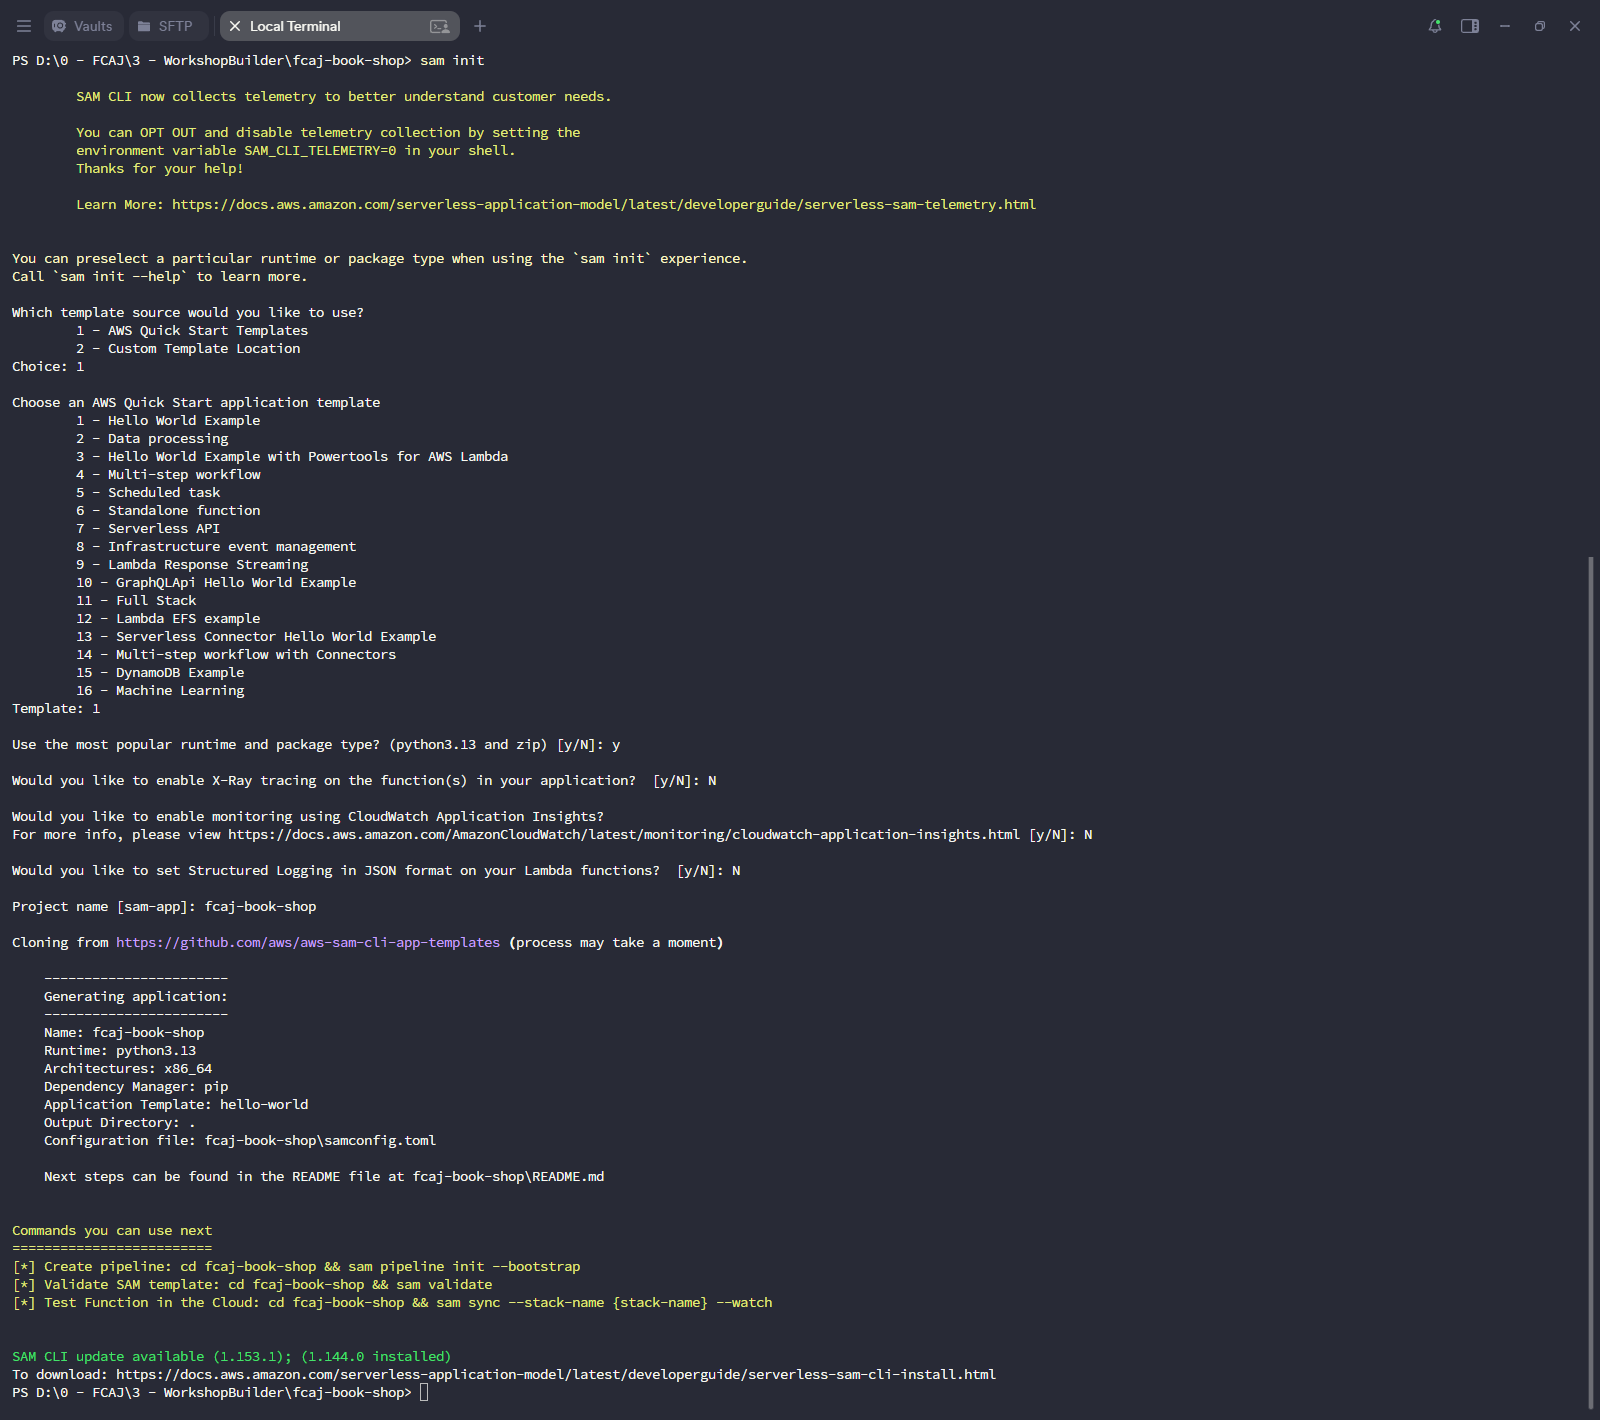
Bạn đã tạo thành công một dự án SAM mẫu. Tiếp theo, chúng ta sẽ chỉnh sửa dự án đó theo kiến trúc ứng dụng của chúng ta.