Preparation
To start building SAM-based applications, we must first install the SAM CLI, set up AWS credentials, and initialize a simple SAM application.
1. Install SAM CLI
You can refer to: https://docs.aws.amazon.com/serverless-application-model/latest/developerguide/serverless-sam-cli-install.html
2. Set up AWS Credentials
If you have already set up AWS credentials from previous posts, you can skip this step.
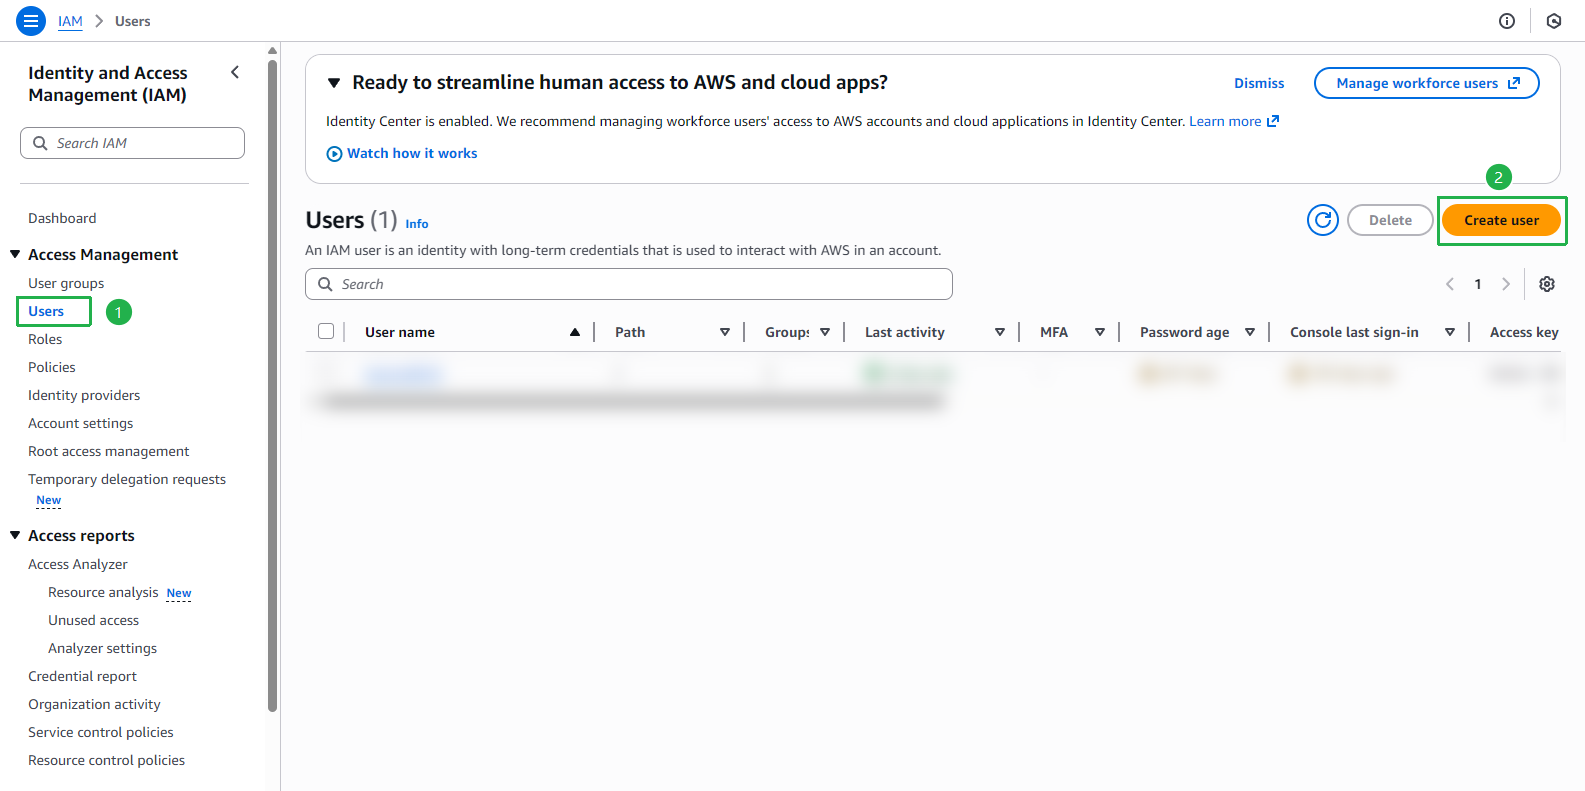
Open IAM console.
Click Users on the left menu.
Click the Create user button.
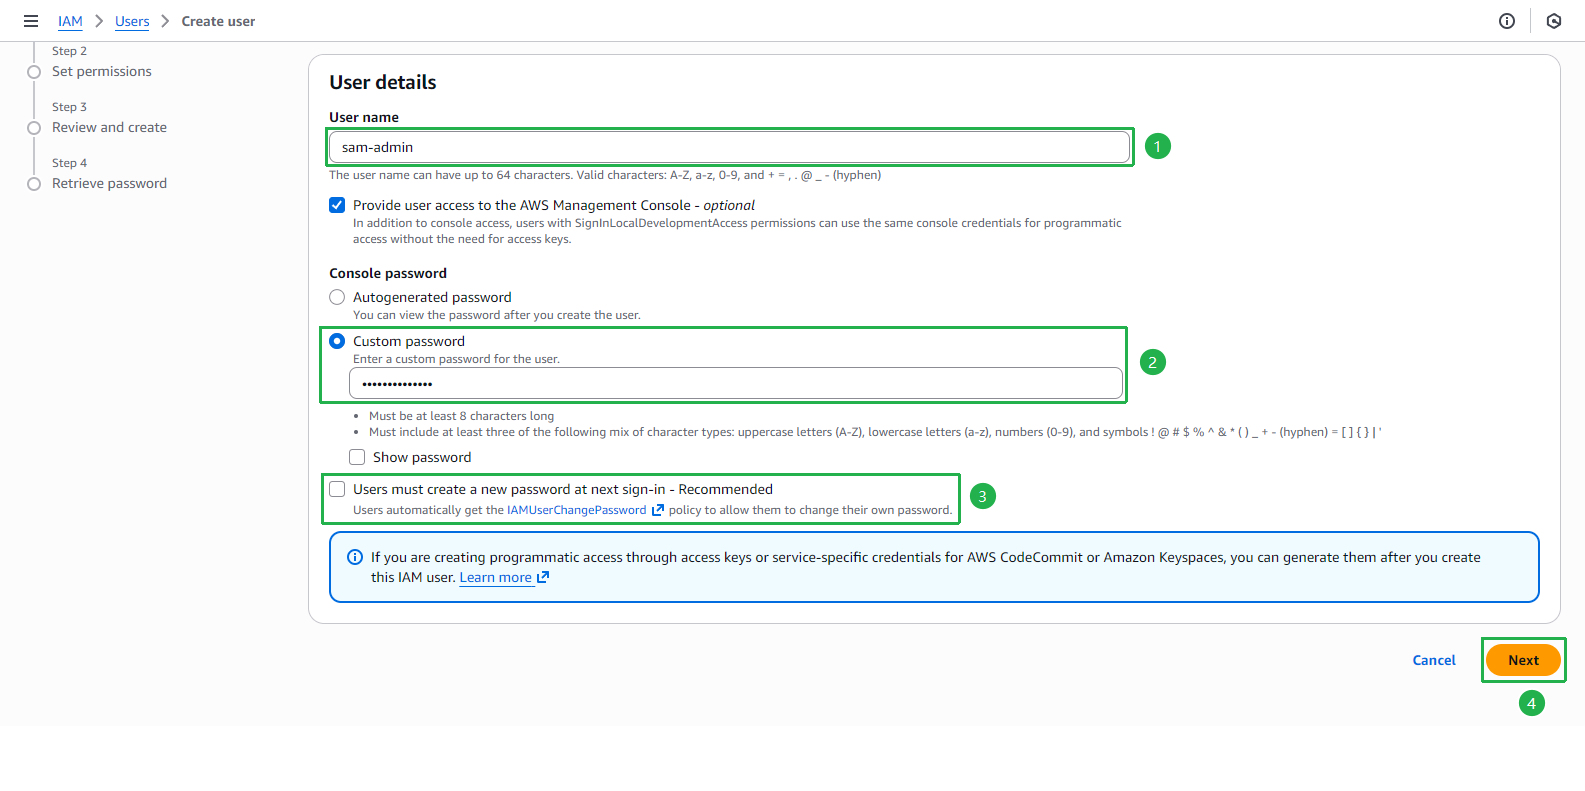
At Step 1: Specify user details page:
- Enter user name, such as:
sam-admin. - Check the option Provide user access to the AWS Management Console.
- Select I want to create an IAM user.
- Select Custom password, then enter your password.
- Uncheck Users must create a new password at next sign-in.
- Click Next.
- Enter user name, such as:
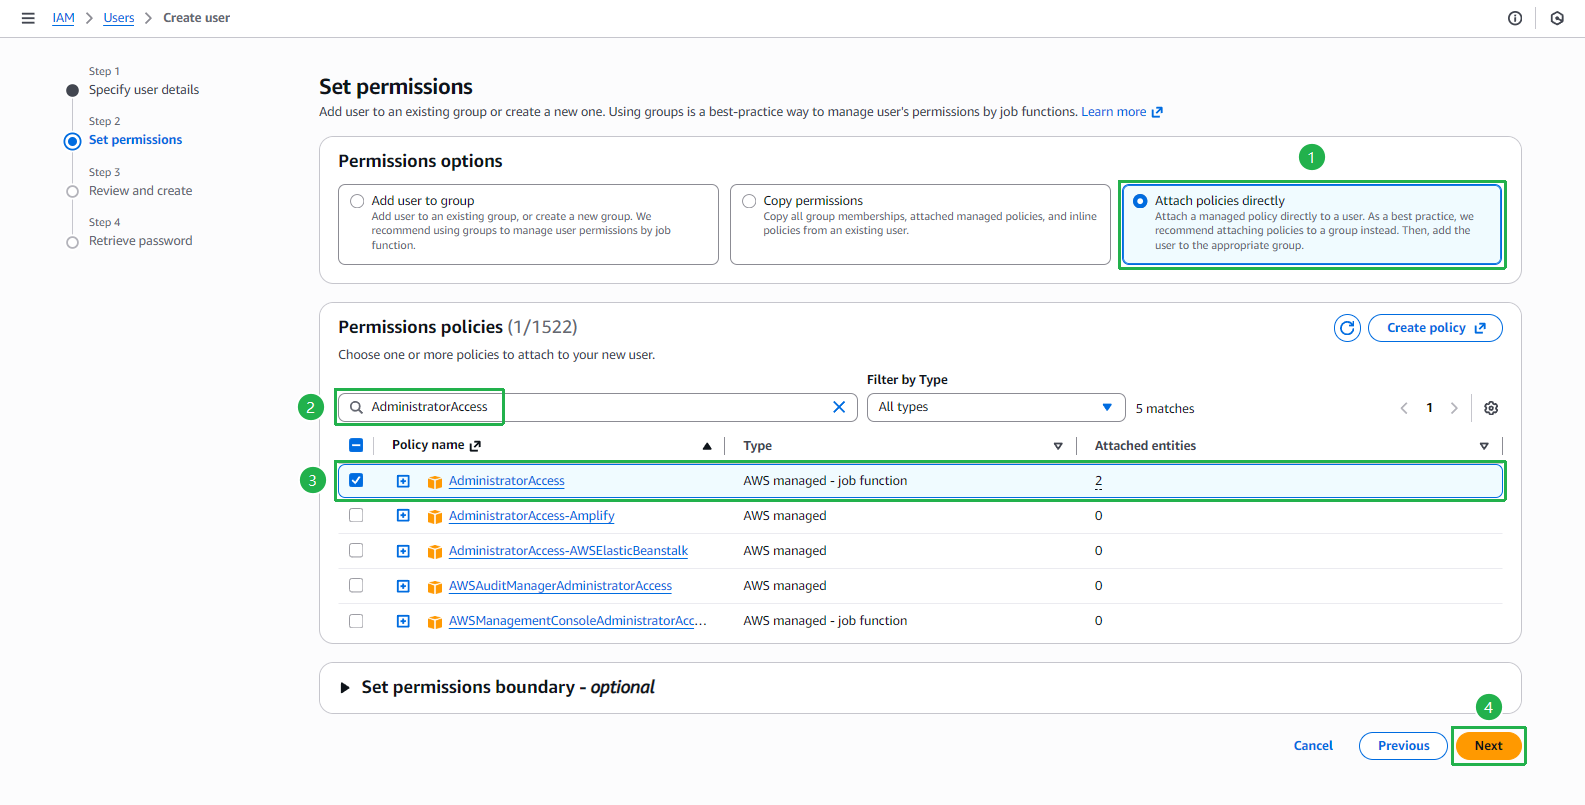
At Step 2: Set permissions page:
- Select Attach policies directly.
- Search and select the AdministratorAccess policy so the user has full access to services.
- Click Next.
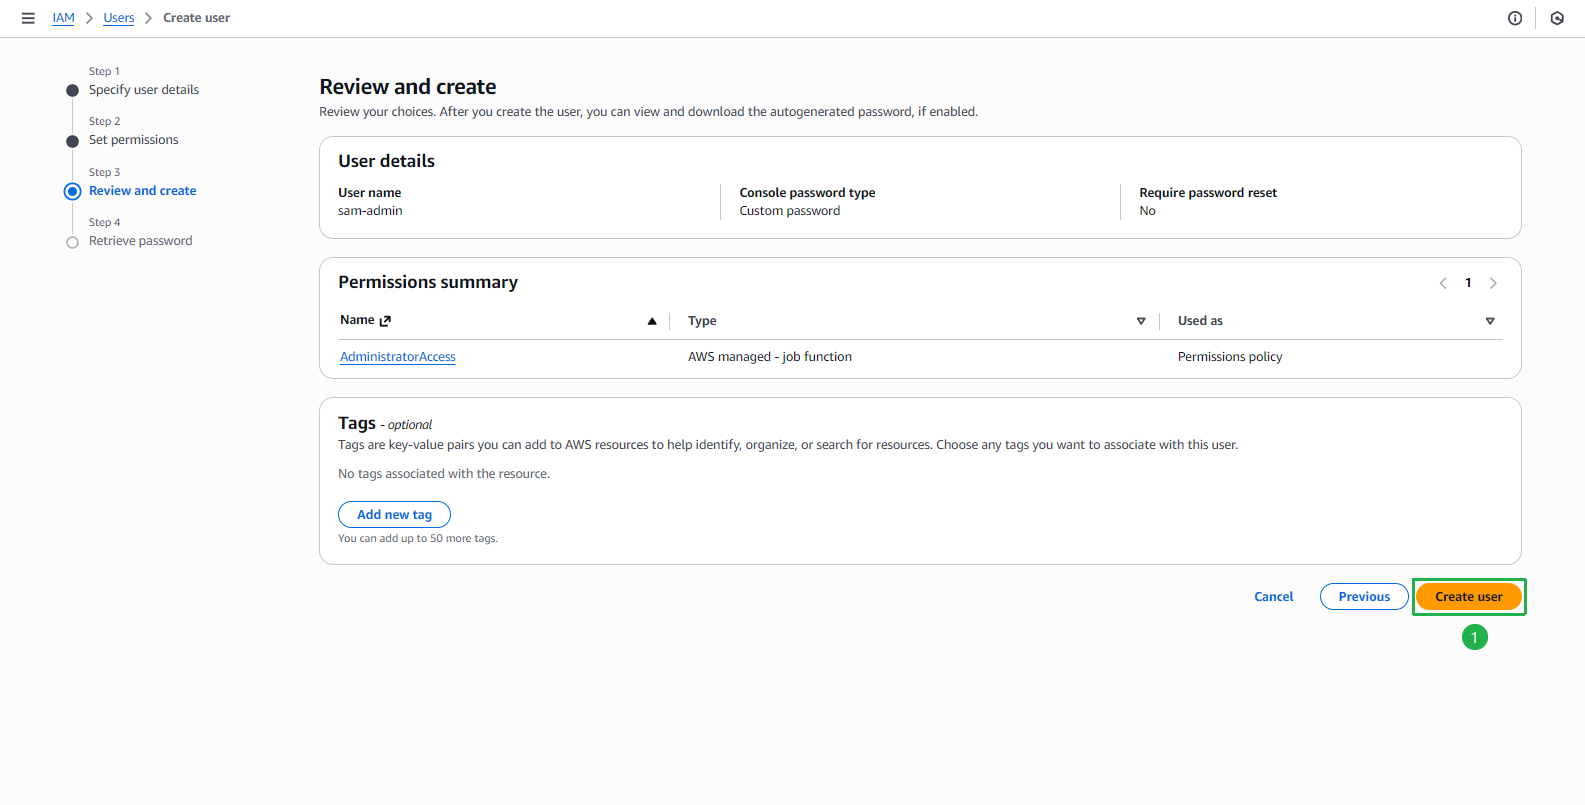
At Step 3: Review and create page:
- Review the configuration and click Create user.
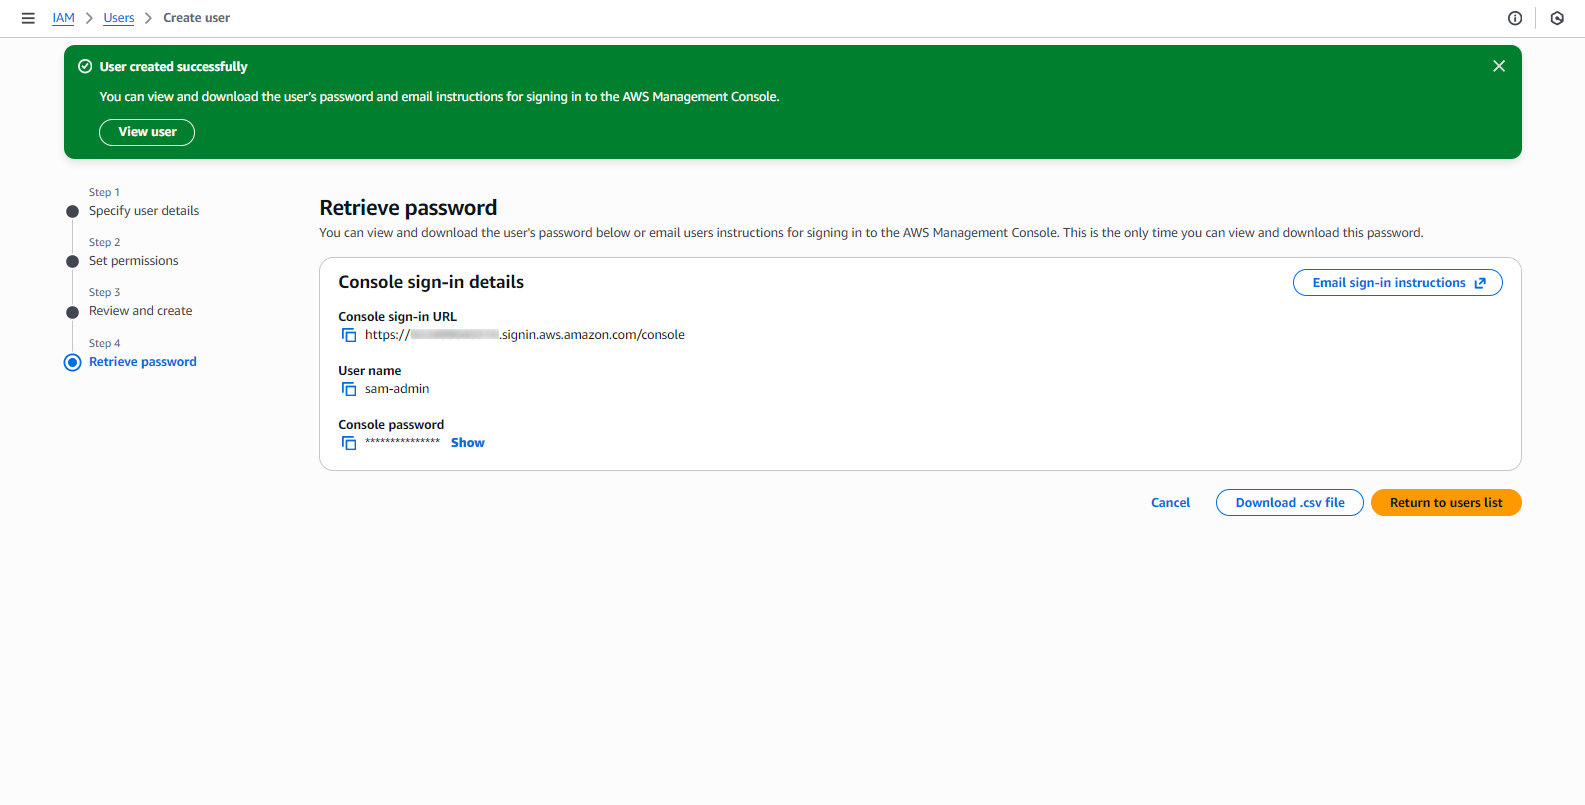
At Step 4: Retrieve password page:
- The user has been created successfully.
- Click Return to users list.
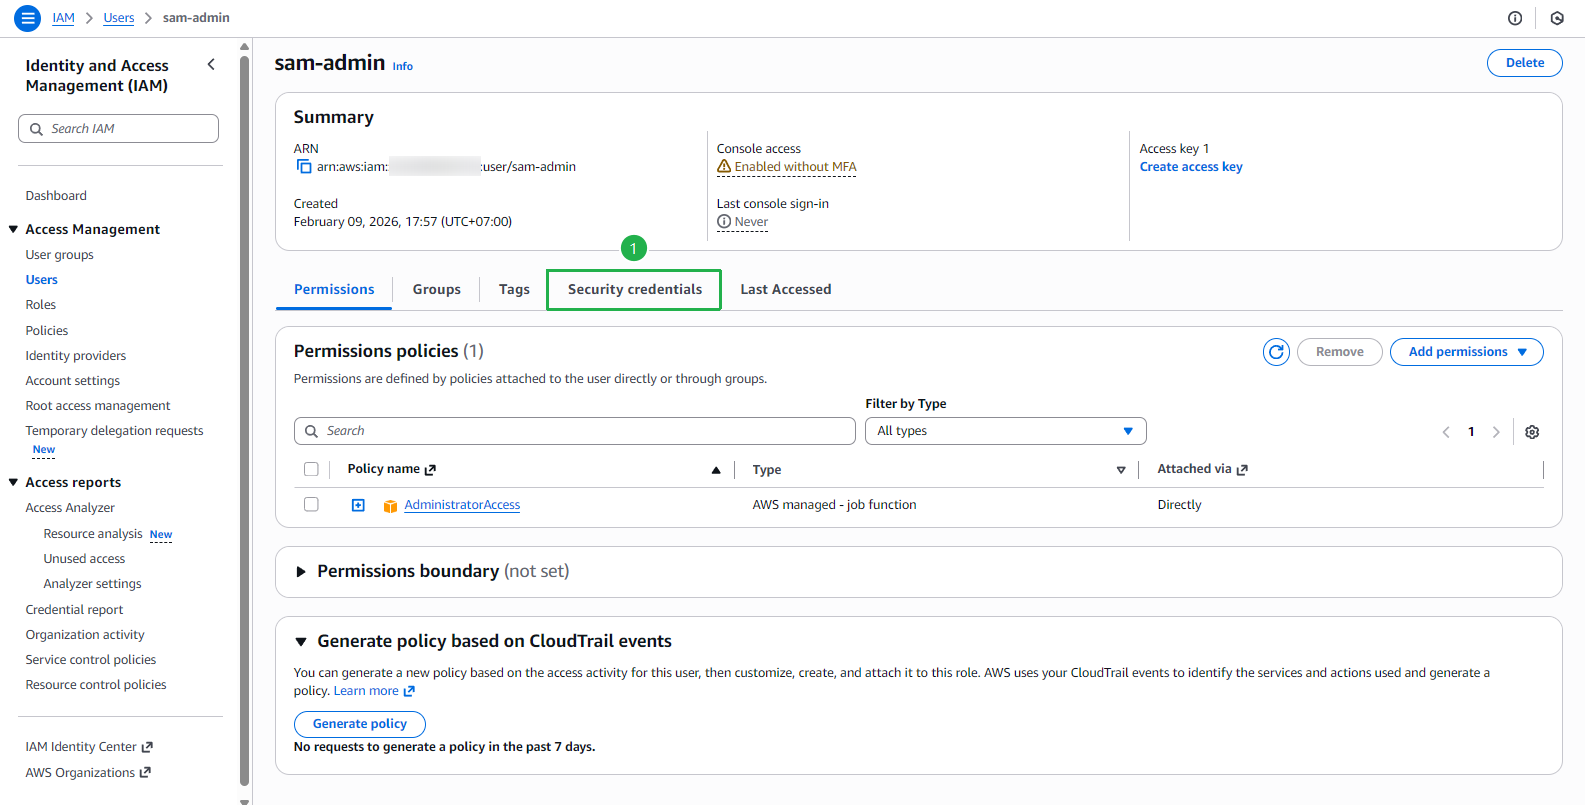
At sam-admin page:
- Click on the Security credentials tab.
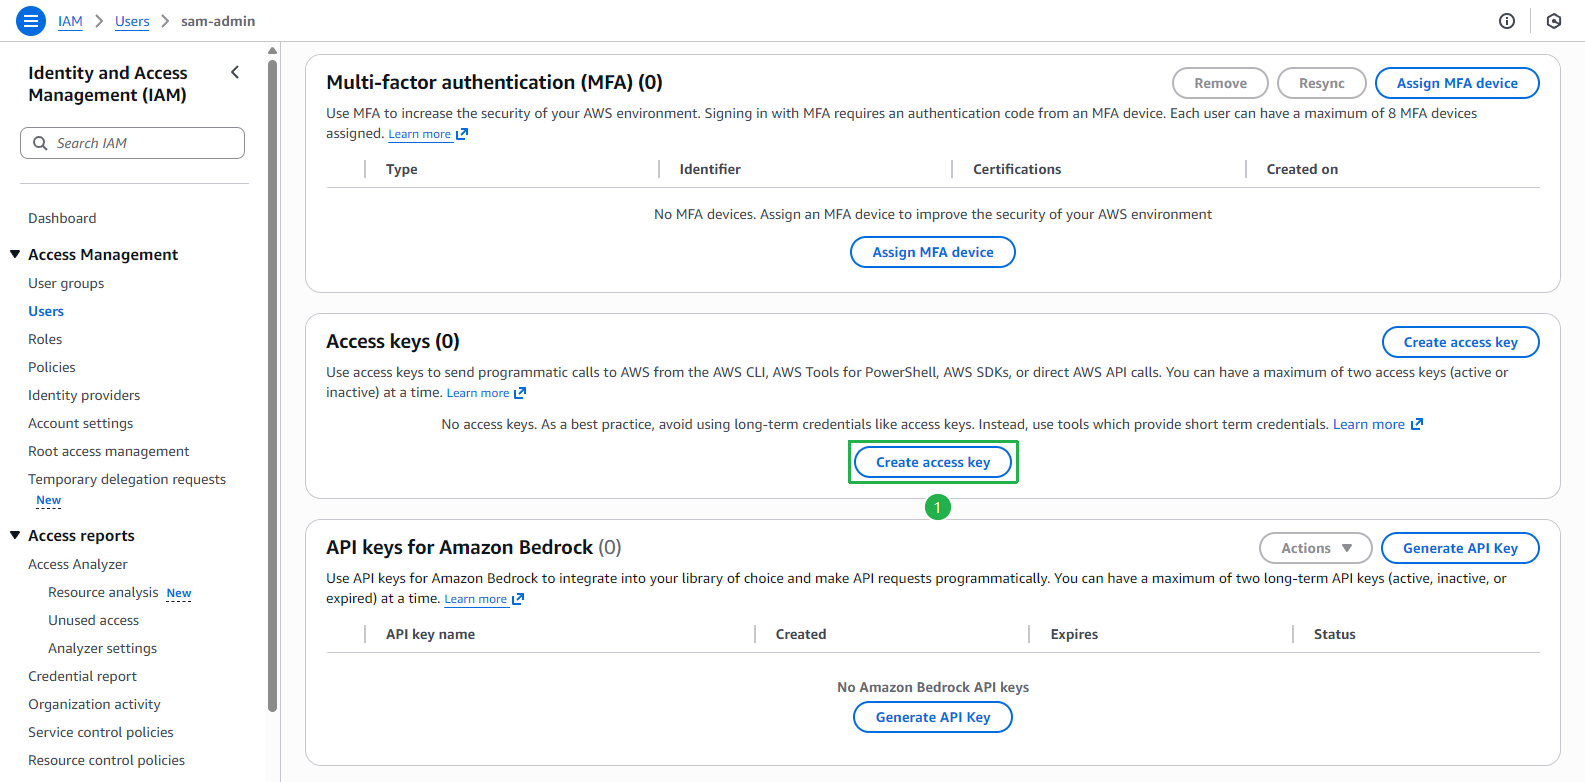
Scroll down to the Access keys section:
- Click Create access key.
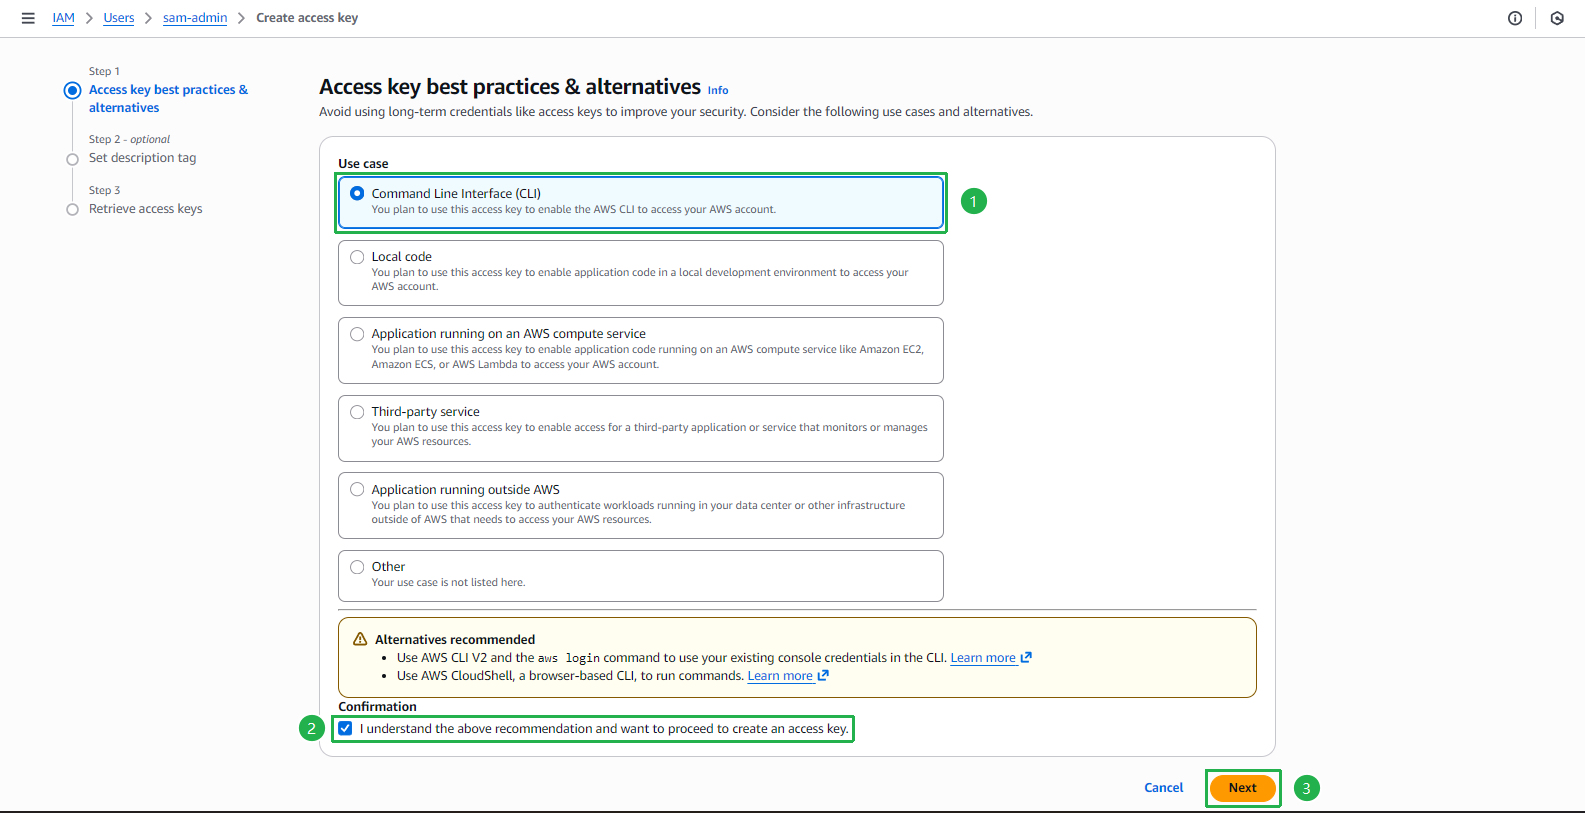
At Step 1: Access key best practices & alternatives:
- For Use case, select Command Line Interface (CLI).
- Check I understand the above recommendation and want to proceed to create an access key.
- Click Next.
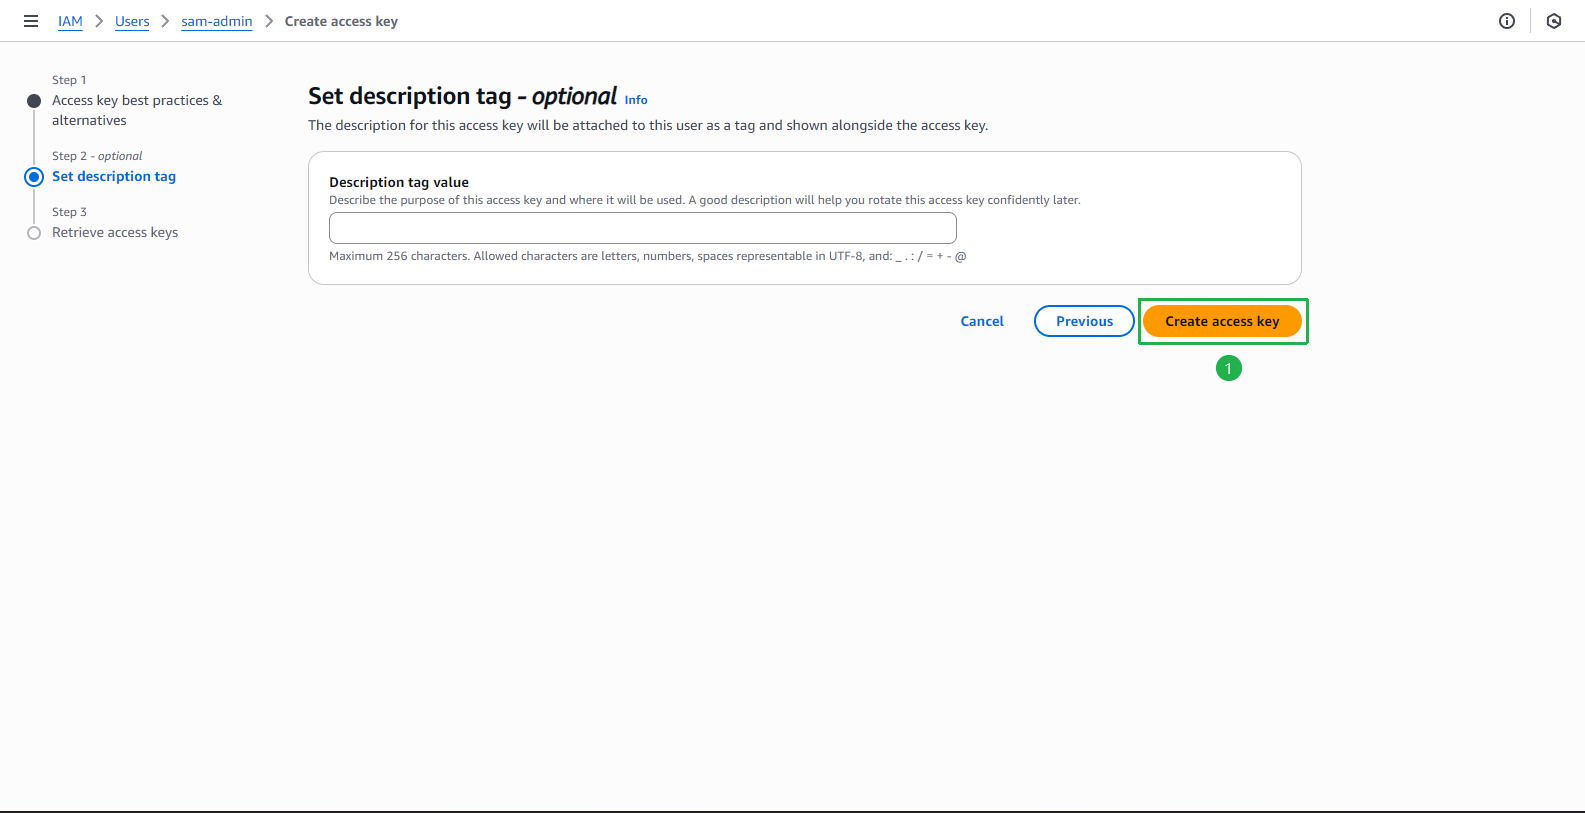
At Step 2: Set description tag:
- Click Create access key.
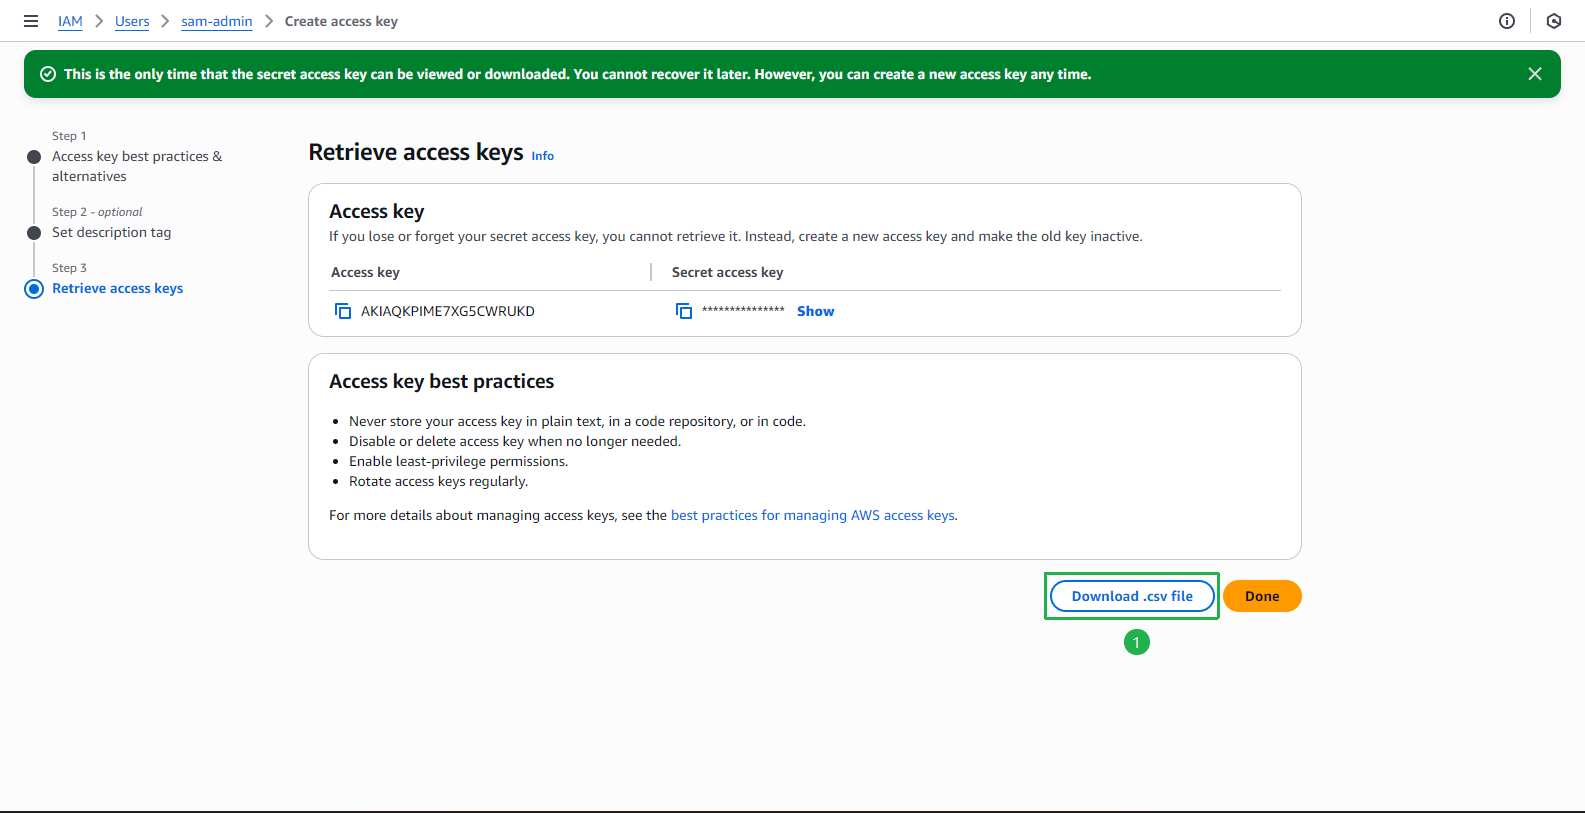
At Step 3: Retrieve access keys:
- Click Download .csv file to download the file containing the Access Key ID and Secret Access Key.
- Then, click Done.
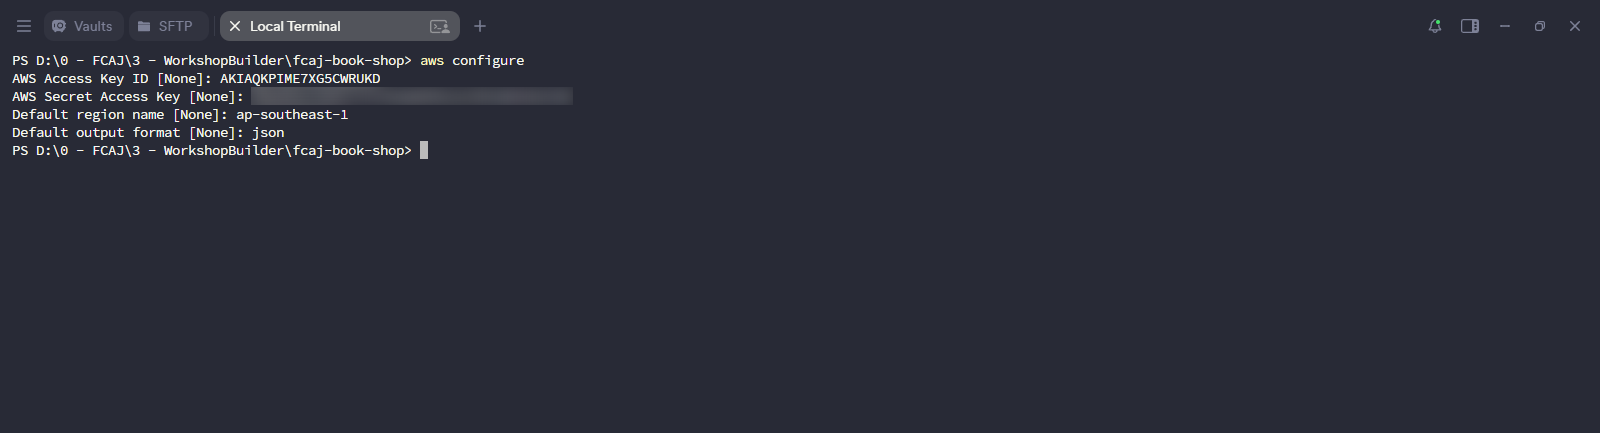
Run the following command using the terminal on your device:
aws configure- Enter the information corresponding to the columns in the credential file you downloaded:
- AWS Access Key ID: Enter the Access Key ID.
- AWS Secret Access Key: Enter the Secret Access Key.
- Default region name: Enter the region closest to you (e.g.,
ap-southeast-1). - Default output format: You can enter
jsonor skip this.
- Enter the information corresponding to the columns in the credential file you downloaded:
3. Create a Sample SAM Project
Run the command below at the directory where you want to deploy the application:
sam initThen select the following options:
Which template source would you like to use?
  1 - AWS Quick Start Templates
  2 - Custom Template Location
Choice: 1

Choose an AWS Quick Start application template
  1 - Hello World Example
  2 - Data processing
  3 - Hello World Example with Powertools for AWS Lambda
  4 - Multi-step workflow
  5 - Scheduled task
  6 - Standalone function
  7 - Serverless API
  8 - Infrastructure event management
  9 - Lambda Response Streaming
  10 - GraphQLApi Hello World Example
  11 - Full Stack
  12 - Lambda EFS example
  13 - Serverless Connector Hello World Example
  14 - Multi-step workflow with Connectors
  15 - DynamoDB Example
  16 - Machine Learning
Template: 1

Use the most popular runtime and package type? (python3.13 and zip) [y/N]: y

Would you like to enable X-Ray tracing on the function(s) in your application? [y/N]: N

Would you like to enable monitoring using CloudWatch Application Insights? [y/N]: N

Would you like to set Structured Logging in JSON format on your Lambda functions? [y/N]: N

Project name [sam-app]: fcaj-book-shop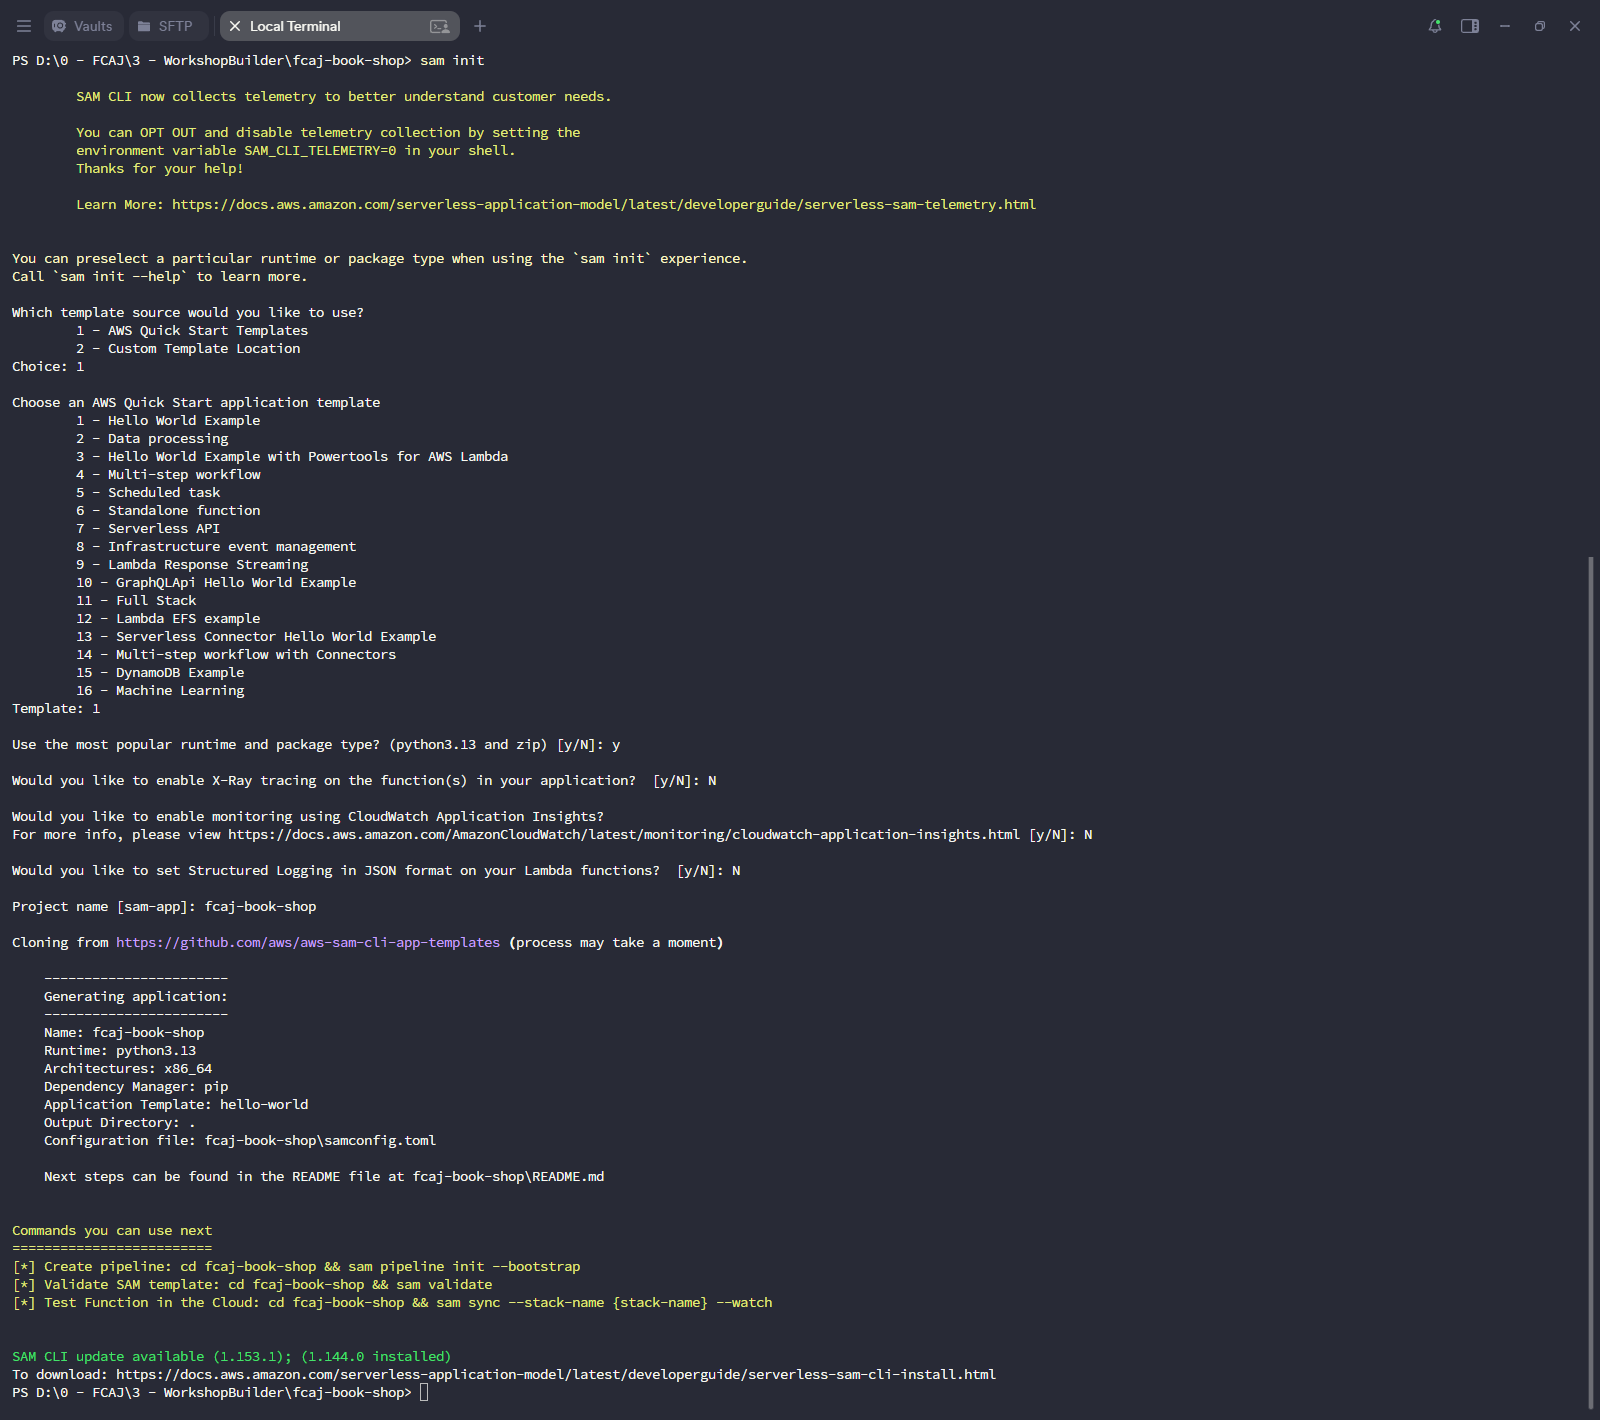
You have successfully created a sample SAM project. Next, we will edit that project according to our application architecture.