Deploy front-end
In this step, we will create an S3 bucket with Static web hosting enabled and publicly accessible based on SAM.
-
Open template.yaml file in fcj-book-shop folder that we created in part 1.
- Delete unnecessary part.
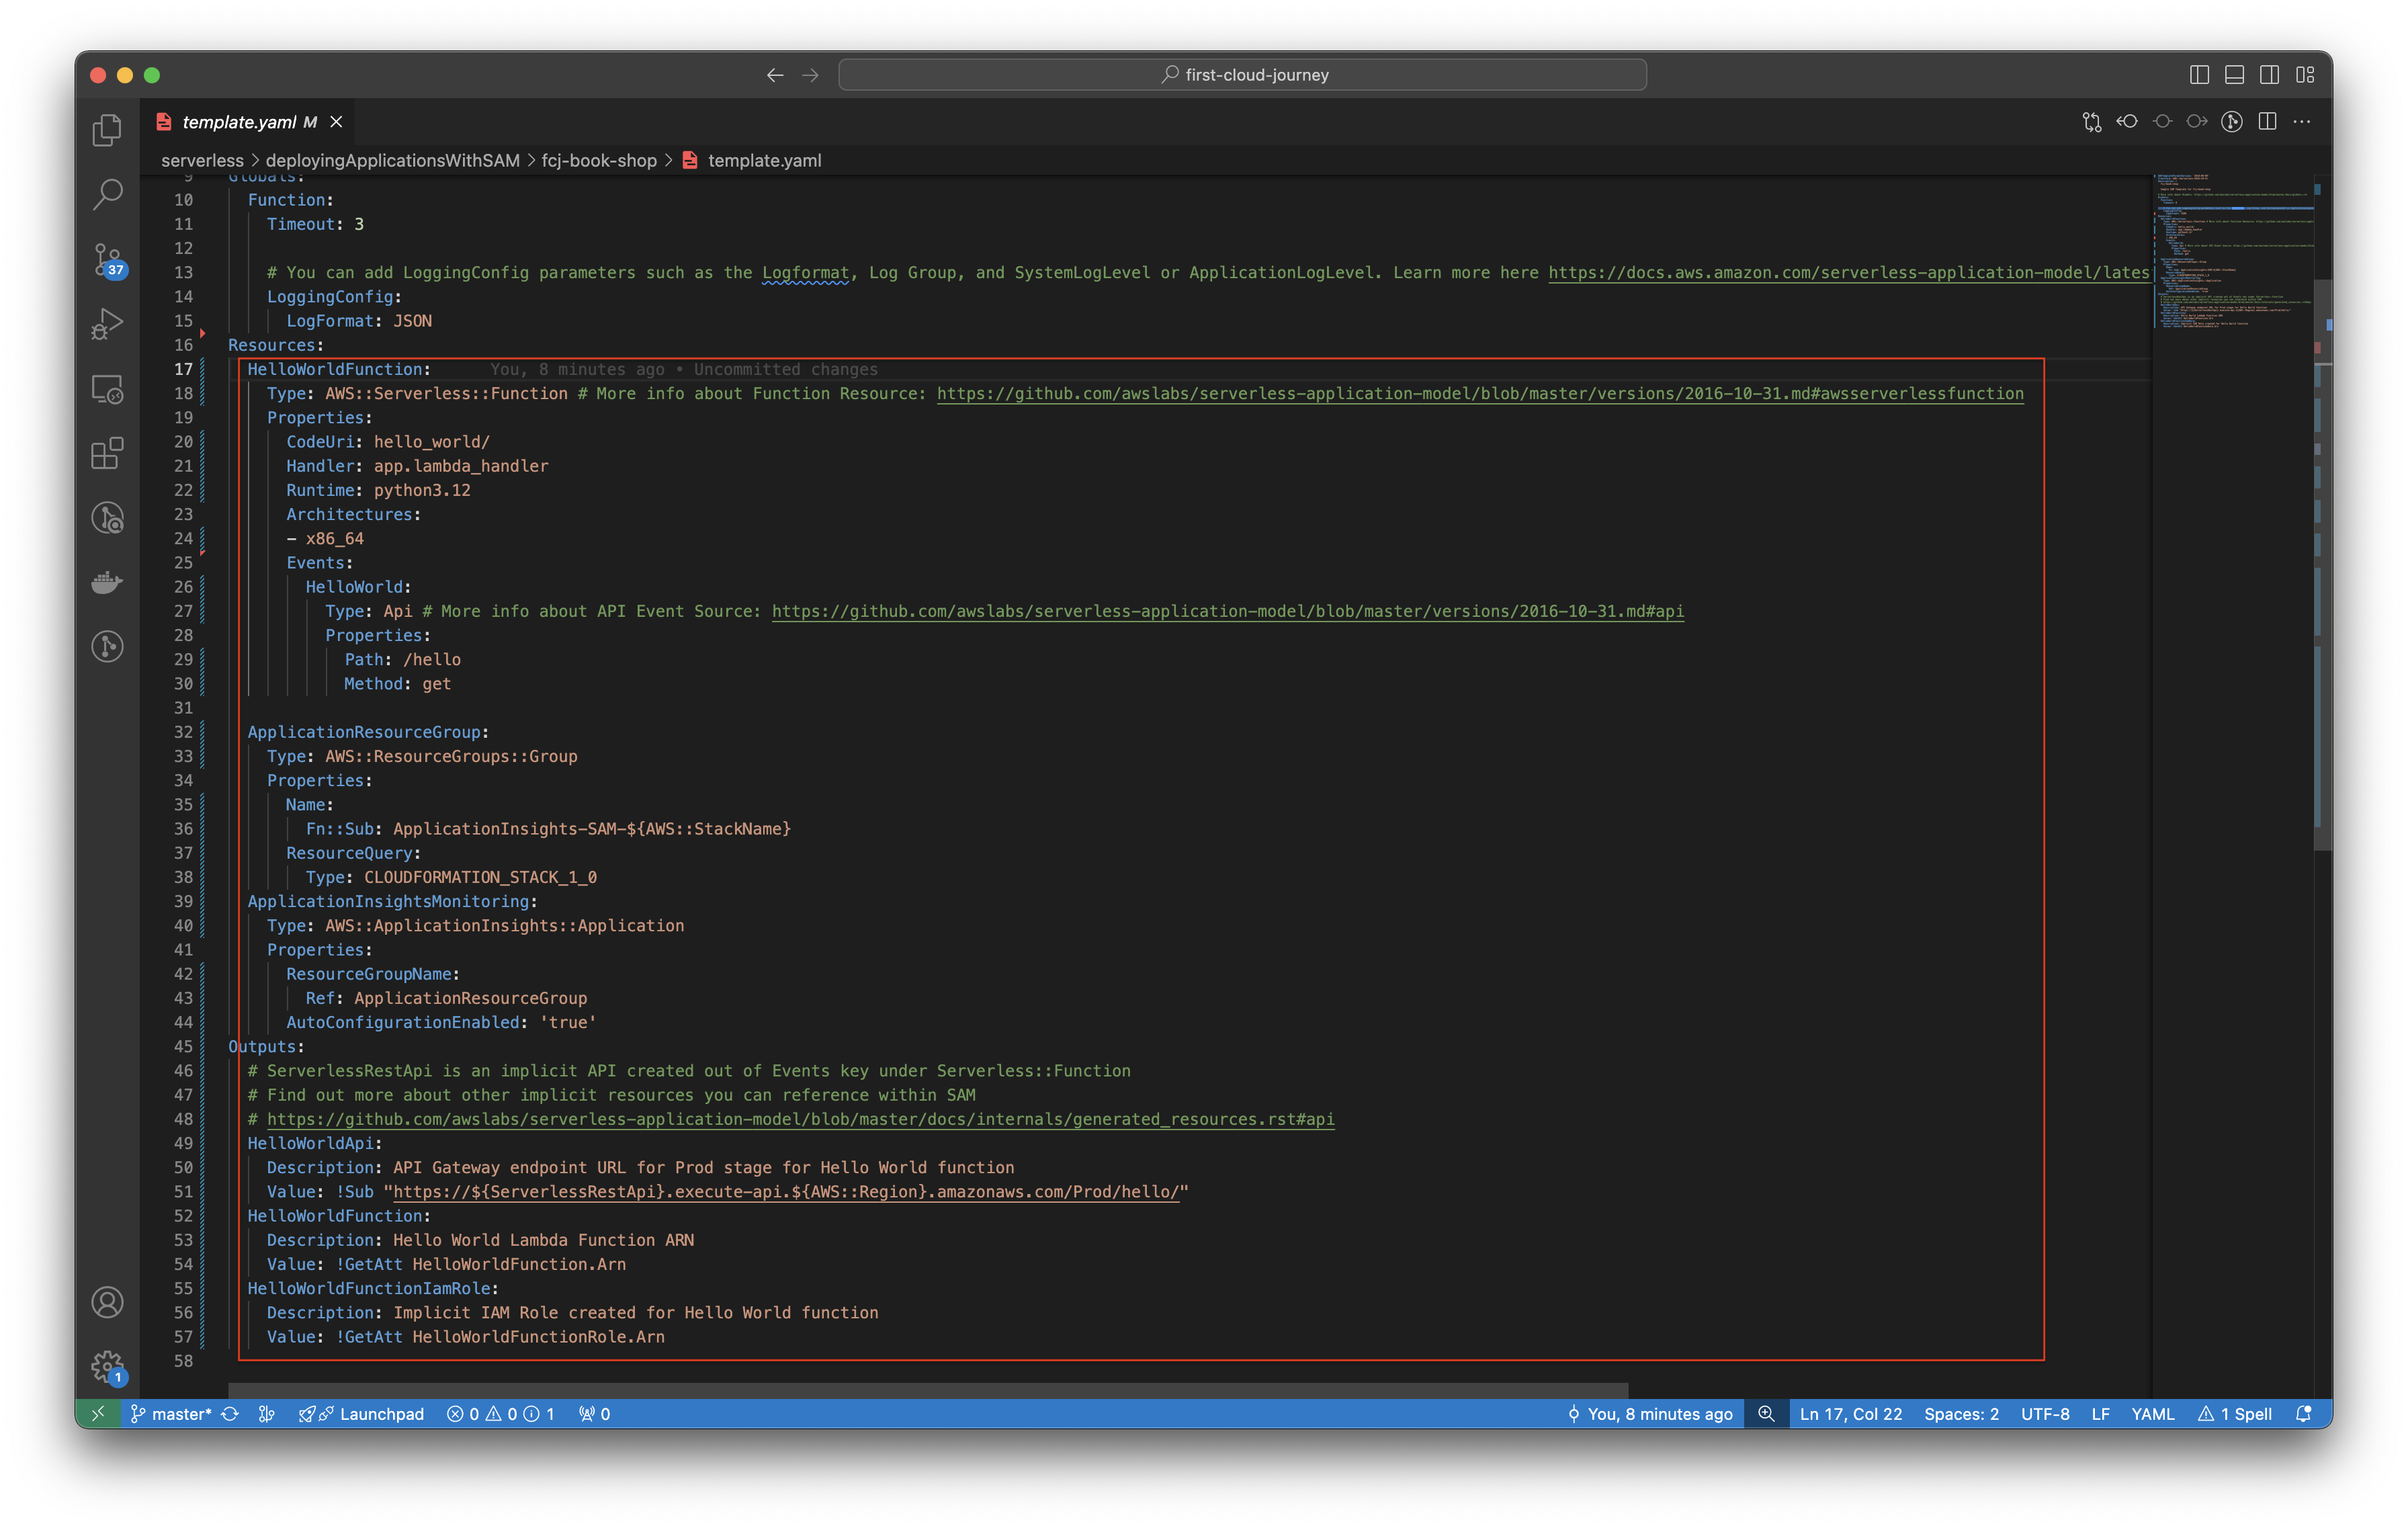
- Delete unnecessary part.
-
Copy the following scripts into that file.
Parameters:
  fcjBookShopBucketName:
    Type: String
    Default: fcj-book-shop-by-myself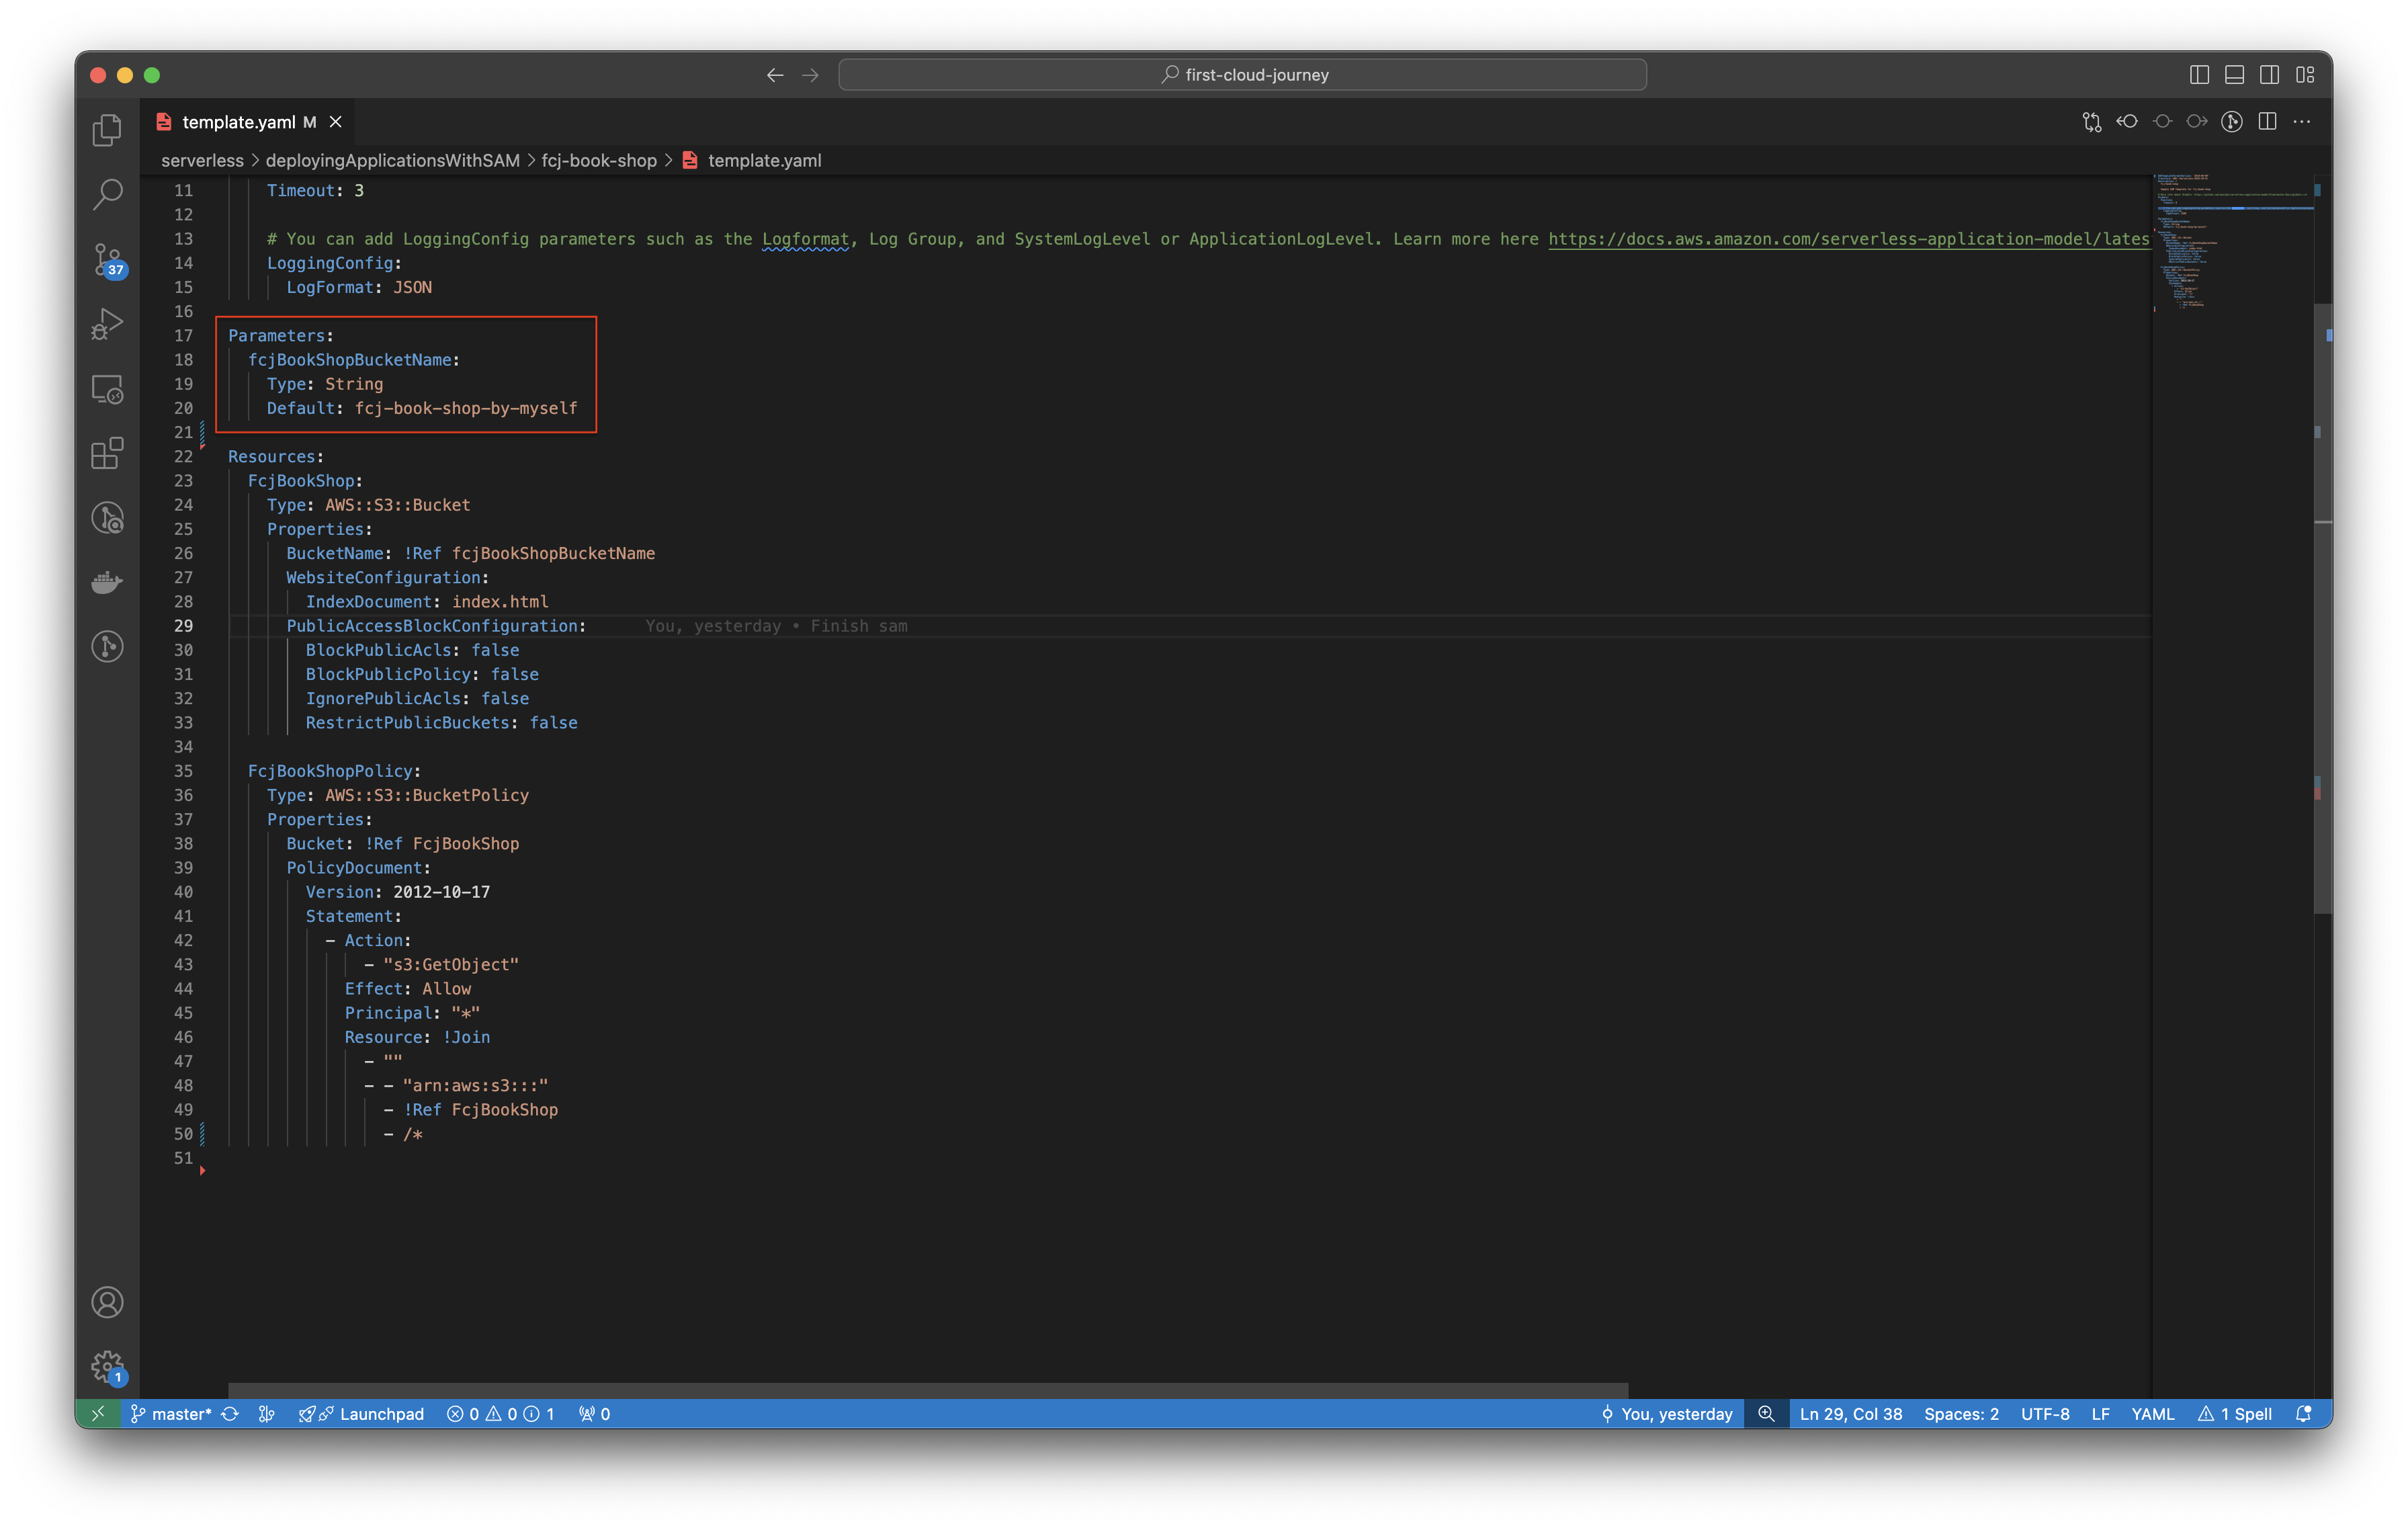
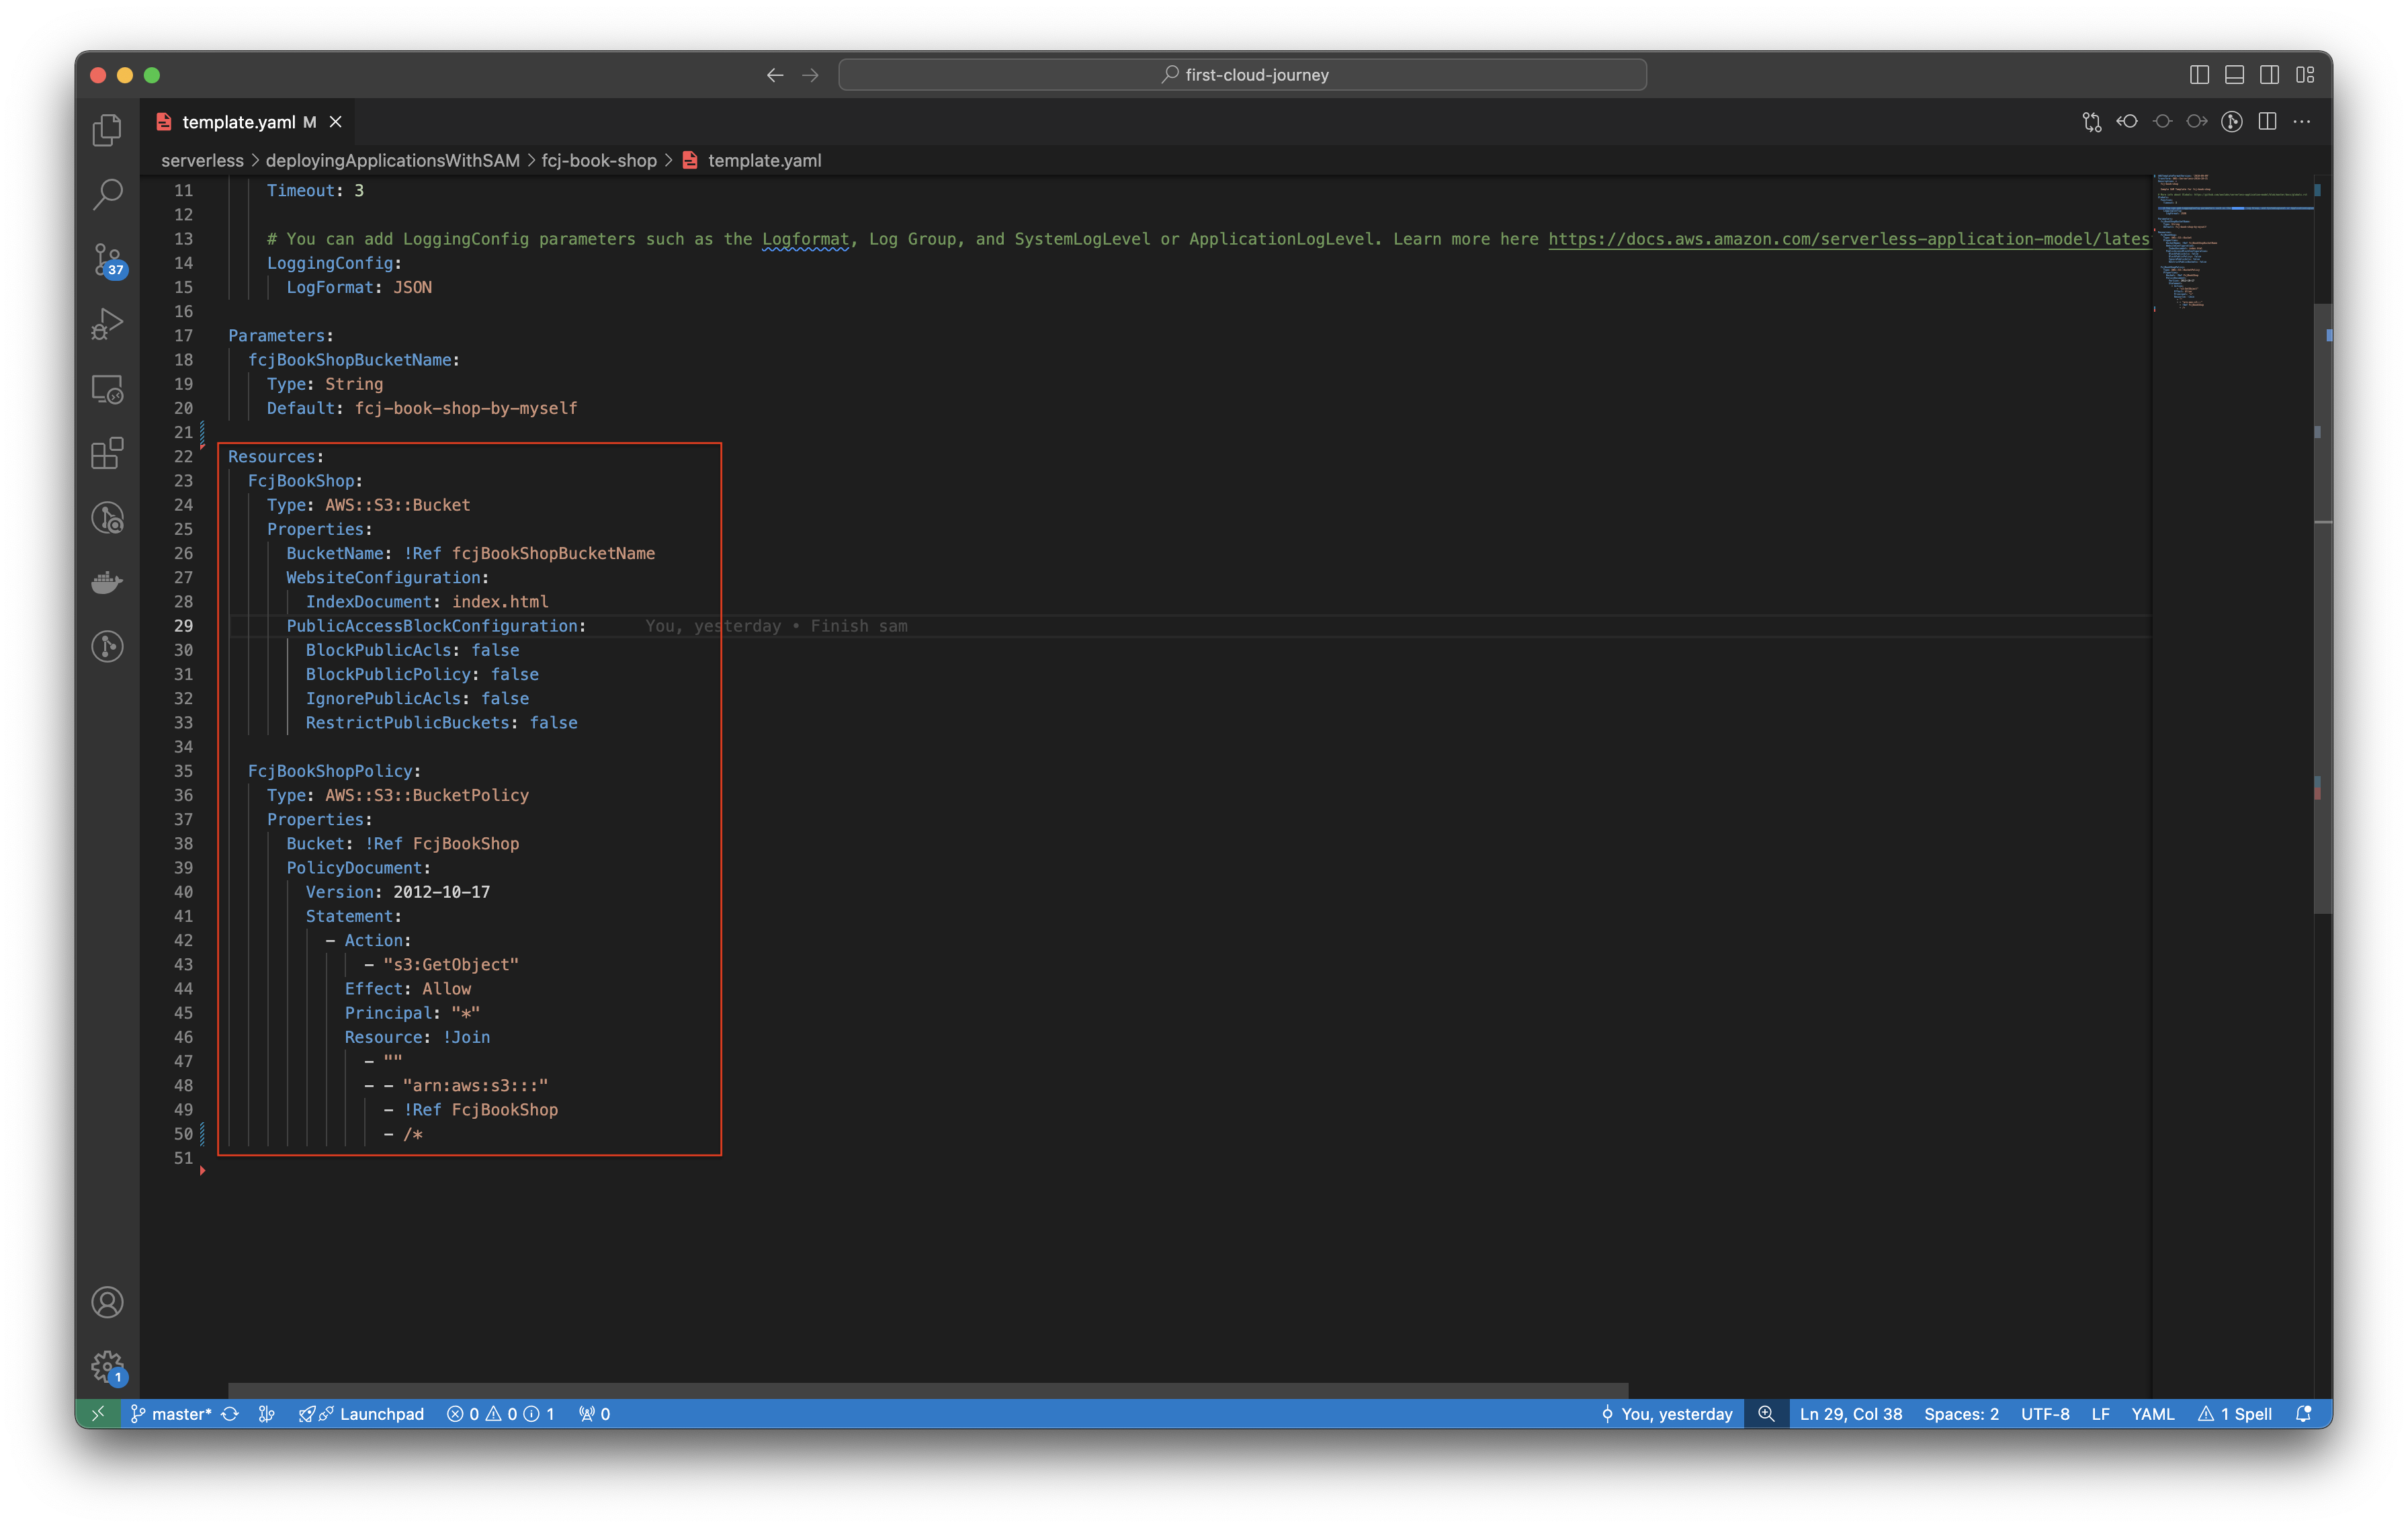
FcjBookShop:
  Type: AWS::S3::Bucket
  Properties:
    BucketName: !Ref fcjBookShopBucketName
    WebsiteConfiguration:
      IndexDocument: index.html
    PublicAccessBlockConfiguration:
      BlockPublicAcls: false
      BlockPublicPolicy: false
      IgnorePublicAcls: false
      RestrictPublicBuckets: false

FcjBookShopPolicy:
  Type: AWS::S3::BucketPolicy
  Properties:
    Bucket: !Ref FcjBookShop
    PolicyDocument:
      Version: 2012-10-17
      Statement:
        - Action:
            - "s3:GetObject"
          Effect: Allow
          Principal: "*"
          Resource: !Join
            - ""
            - - "arn:aws:s3:::"
              - !Ref FcjBookShop
              - /*
The above script defines an S3 bucket is fcj-book-shop with FcjBookShopPolicy policy - allow public access.
-
Run the below command.
-
To build at the directory of the SAM project: fcj-book-shop.
sam build -
To check the validation of the SAM template.
sam validate
-
To deploy SAM.
sam deploy --guided- Enter stack name:
fcj-book-shop - Enter the deployemnt region, such as:
us-east-1- should be the same as the default region. - Then enter other information as shown below.
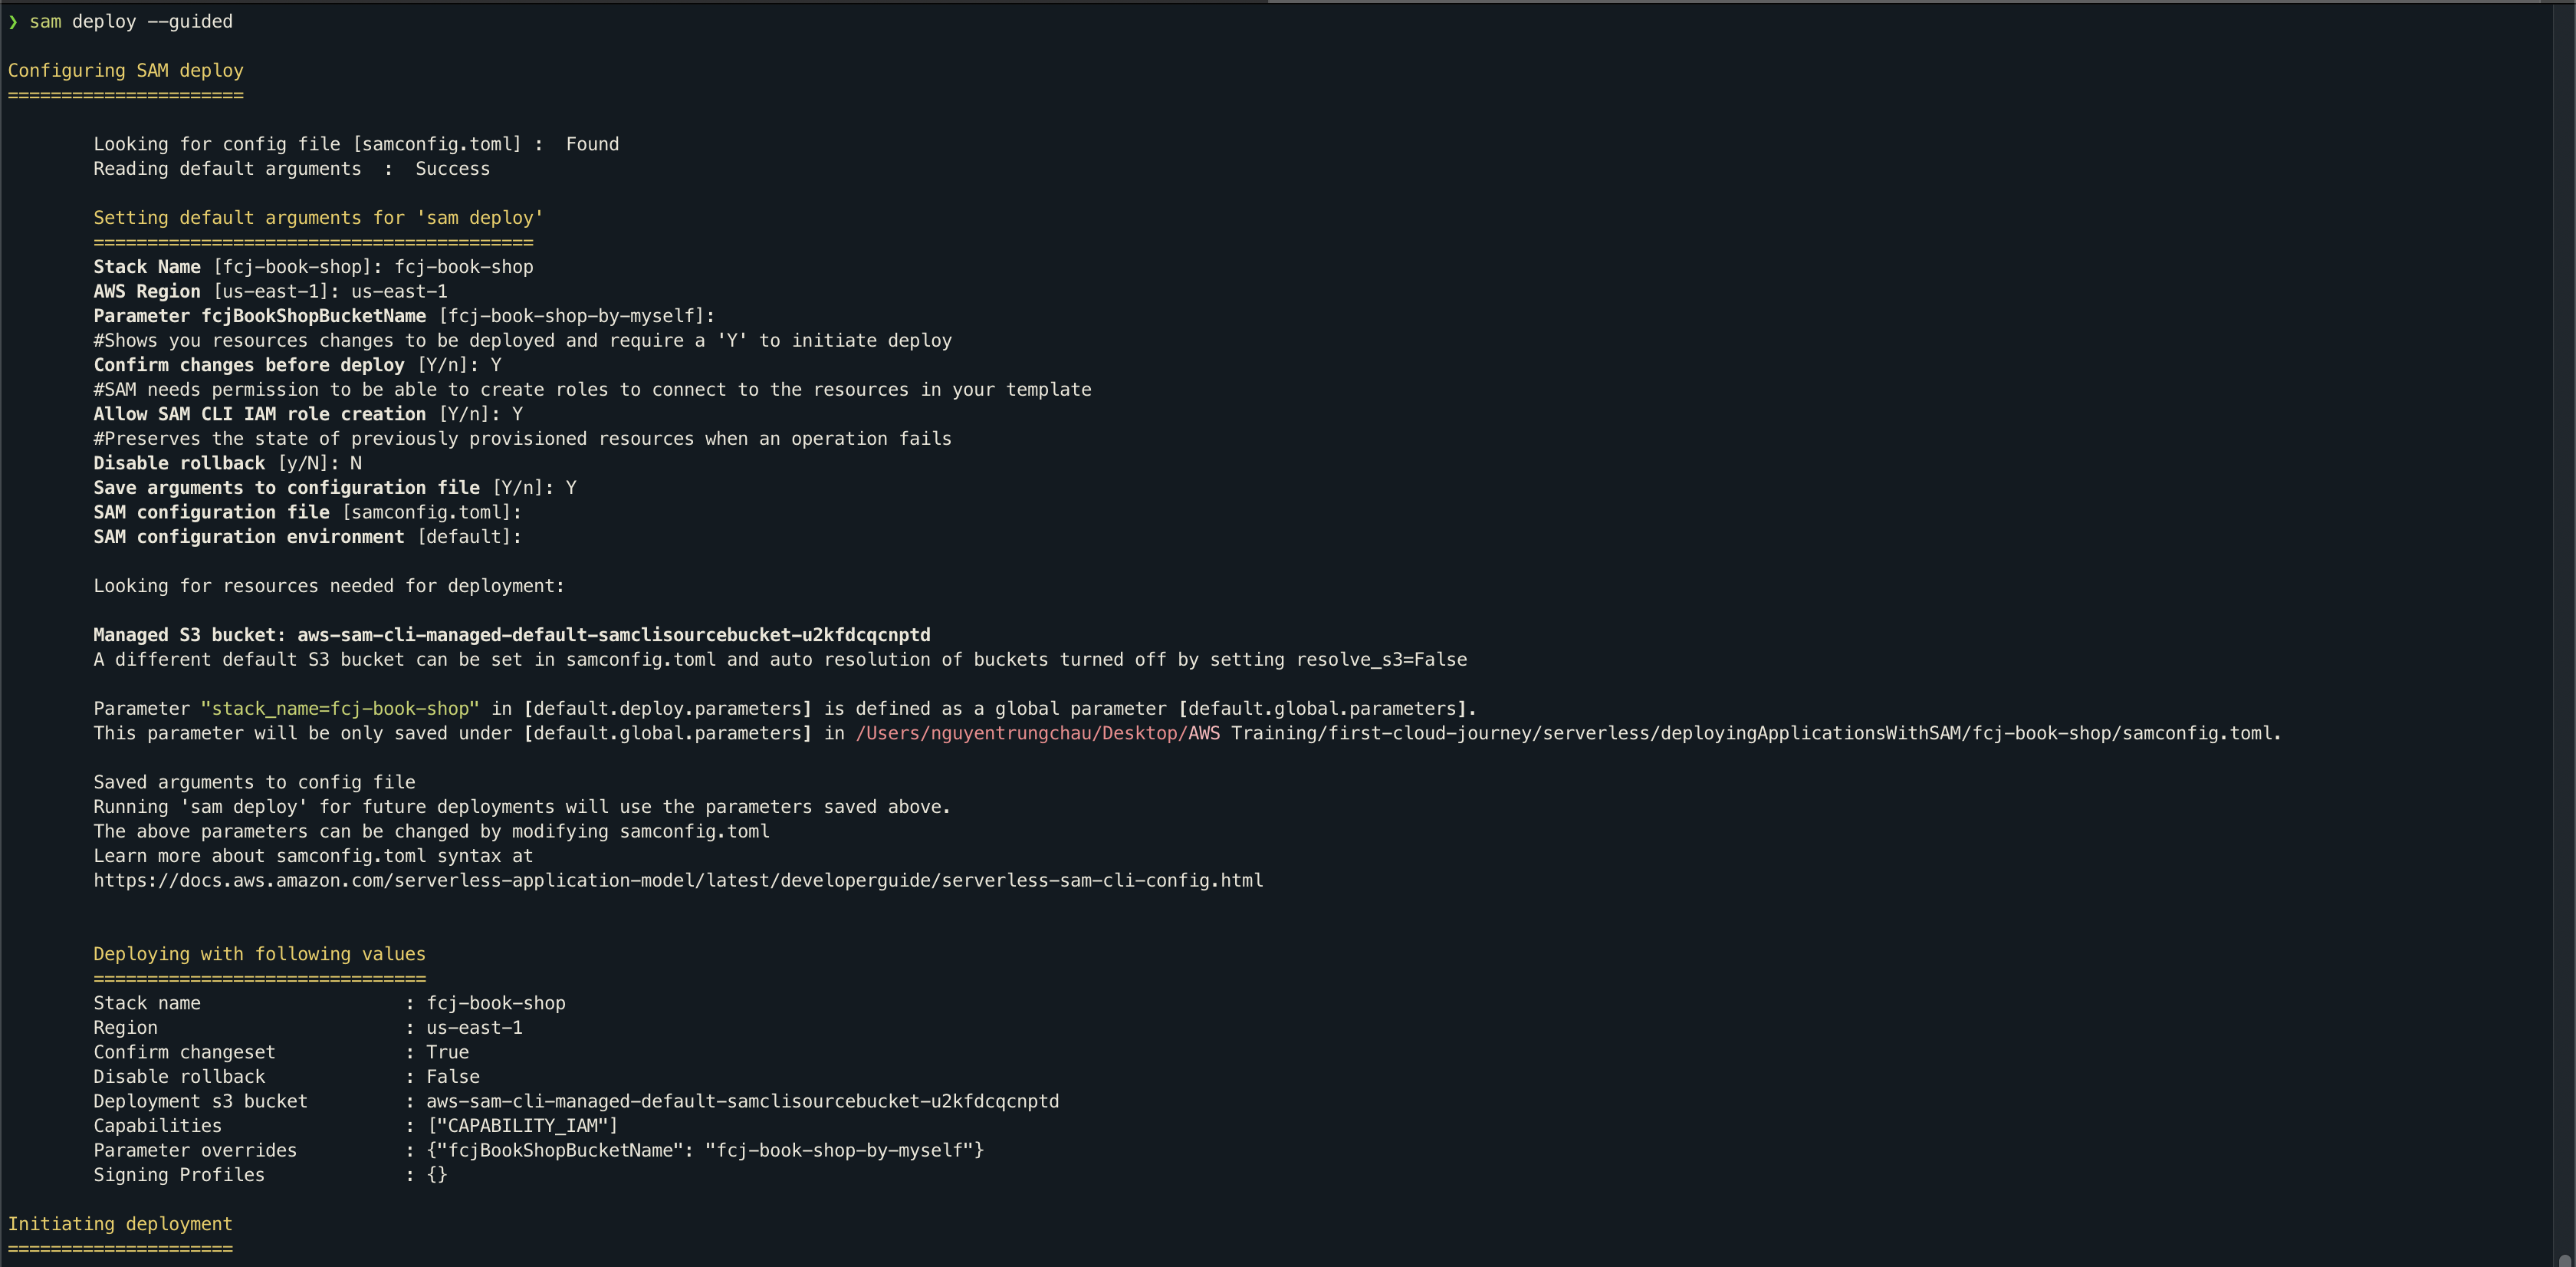
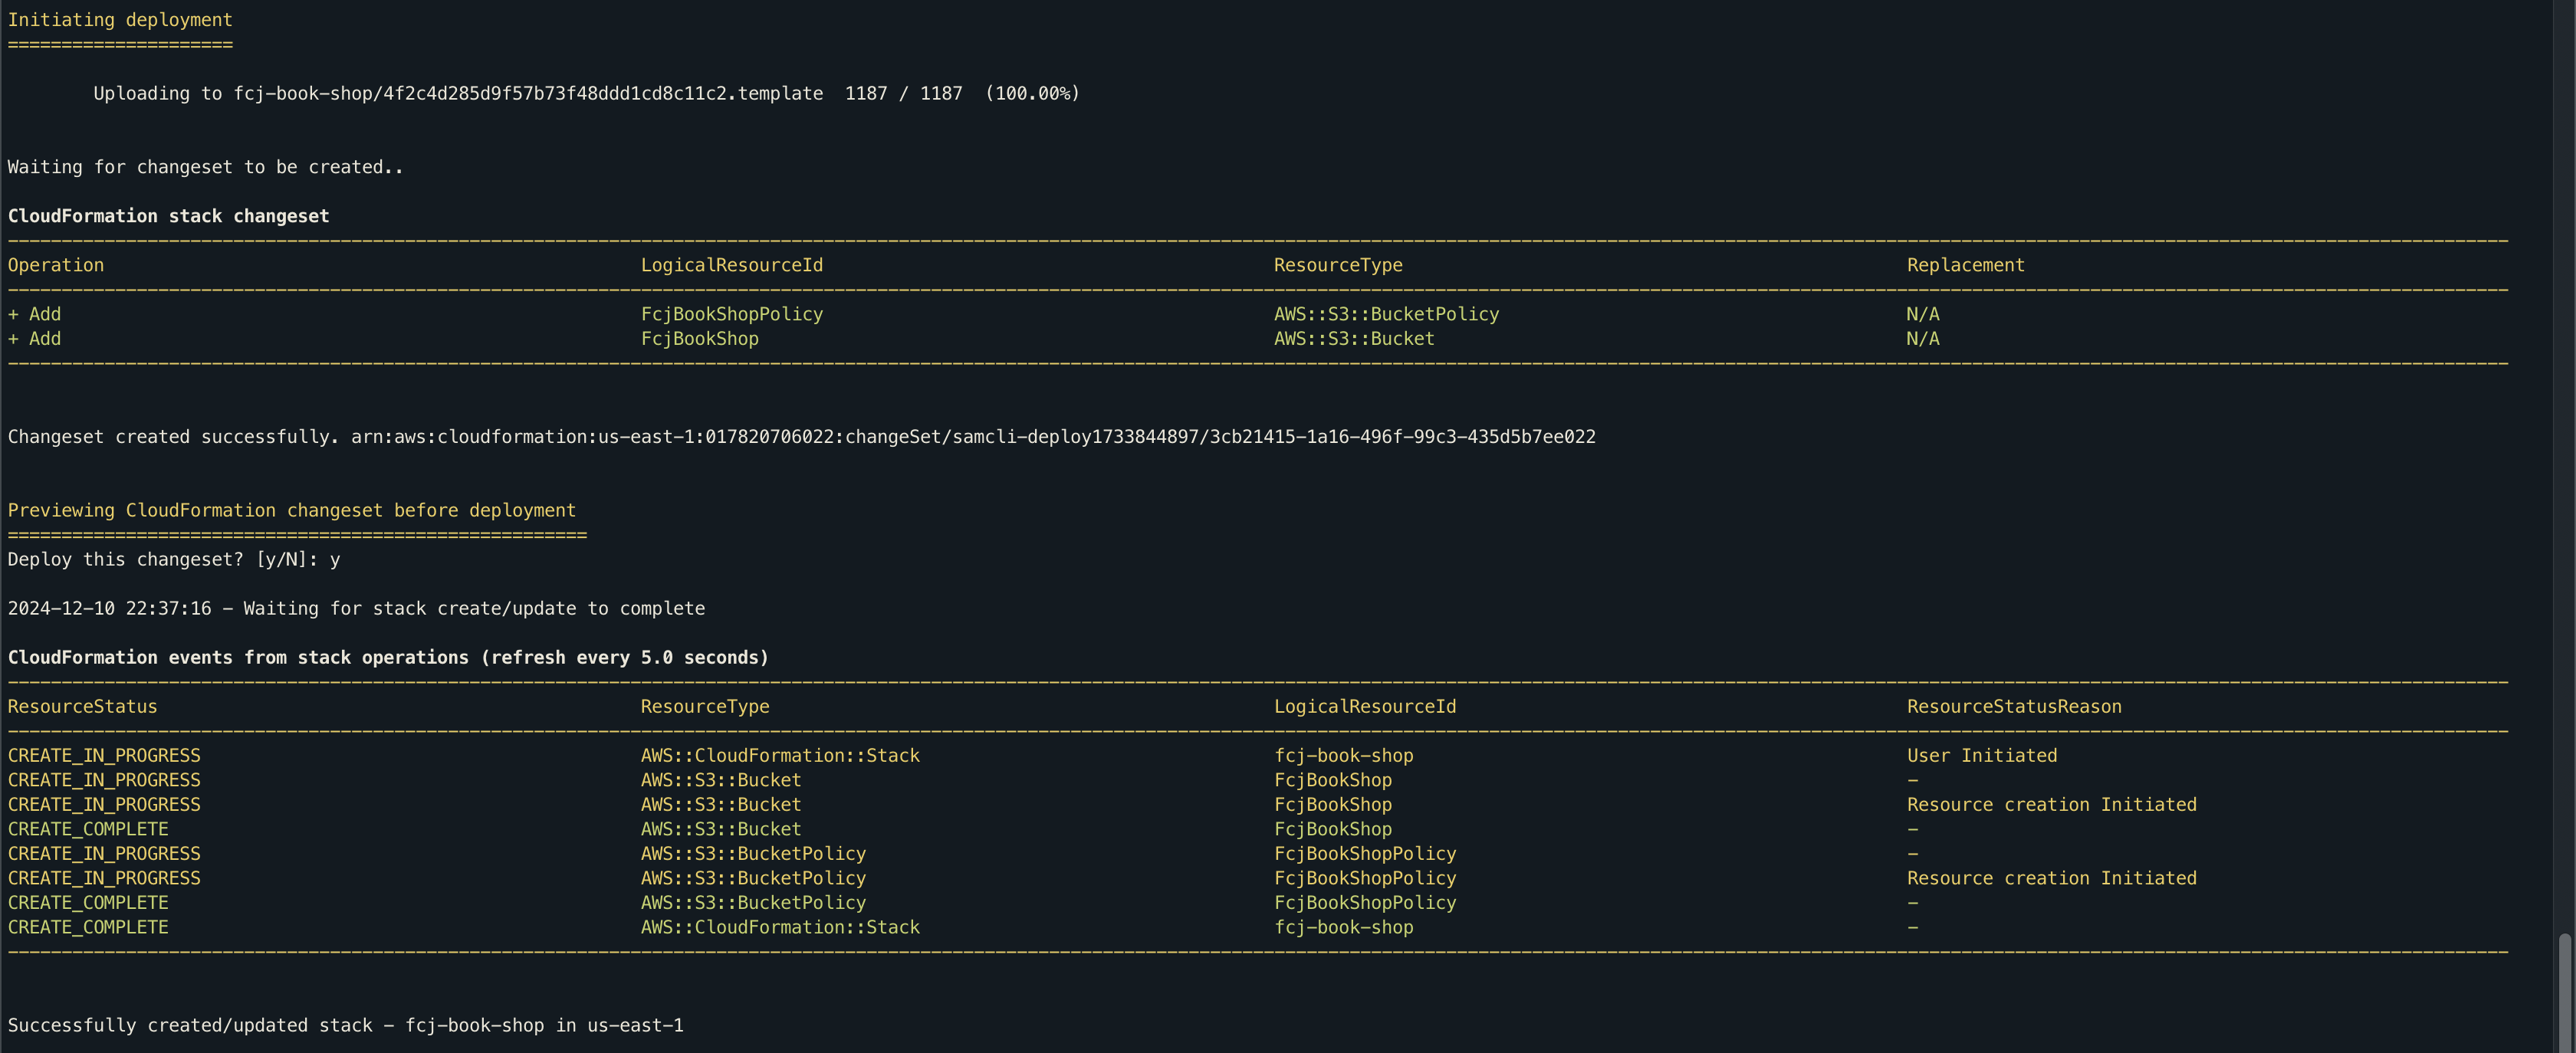
- Wait a while to create the CloudFormation stack changeset.
- Enter “y” when Deploy this changeset?.
- Enter stack name:
-
-
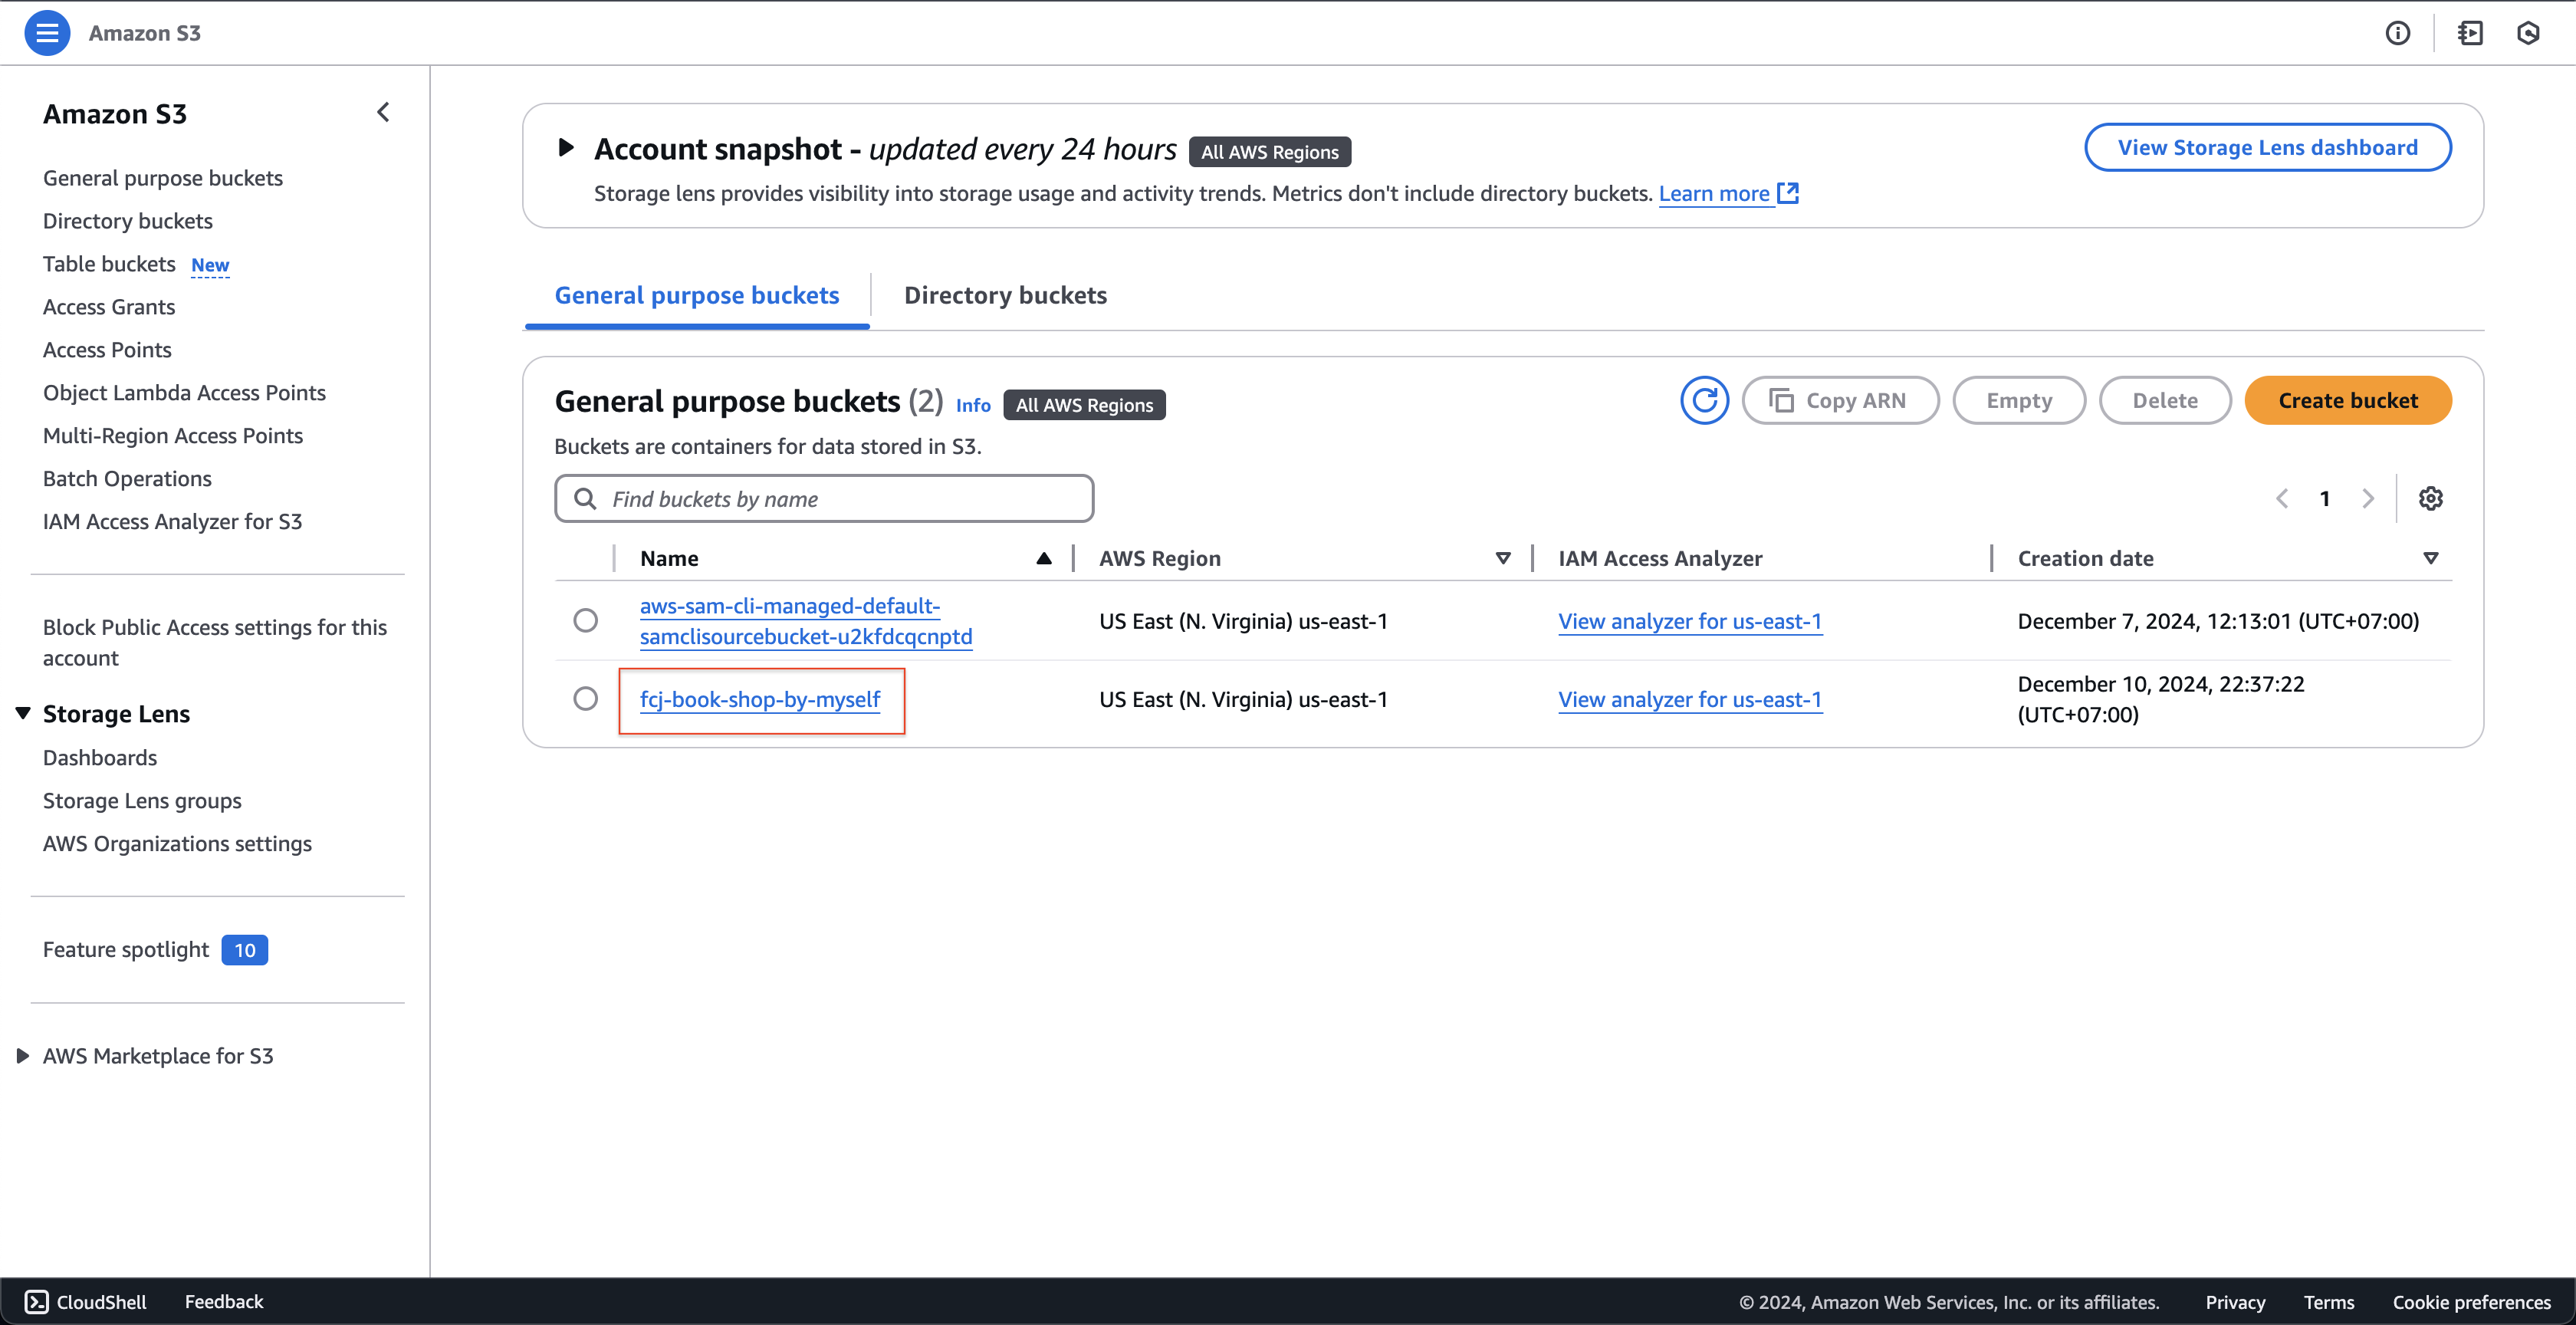
Open Amazon S3 console.
- Check if the bucket has been created or not, click fcj-book-shop-by-myself bucket.
- Check if the bucket has been created or not, click fcj-book-shop-by-myself bucket.
-
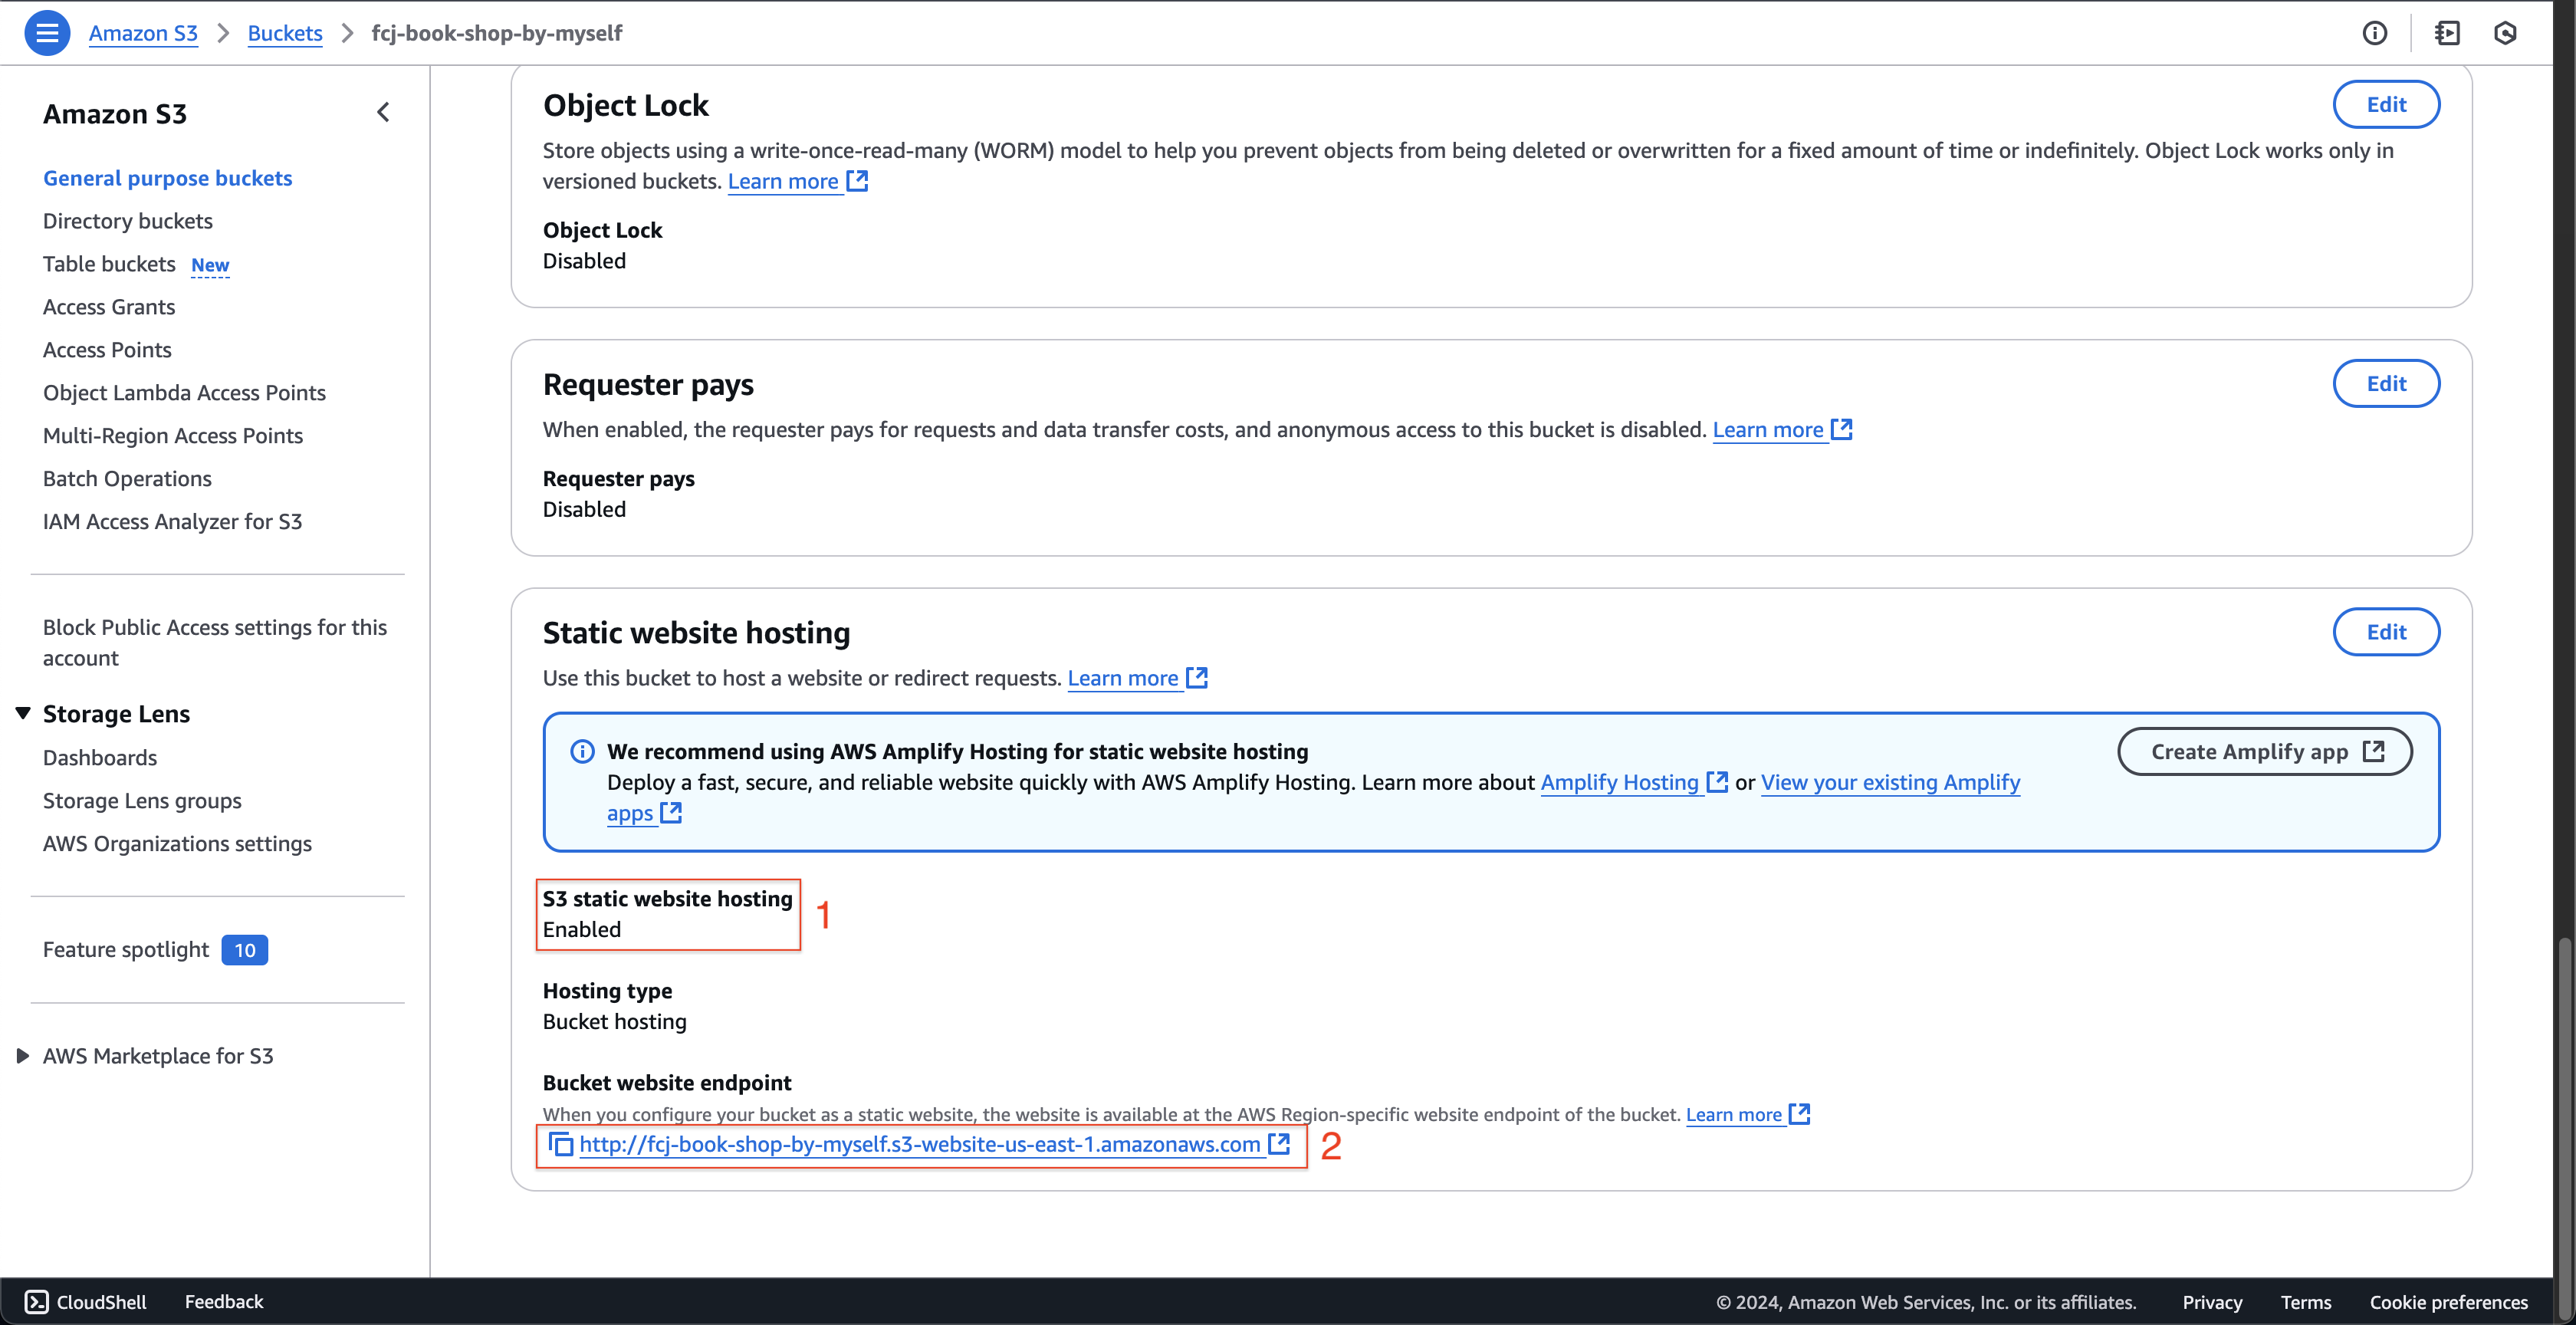
At fcj-book-shop-by-myself page.
- Click Properties tab.
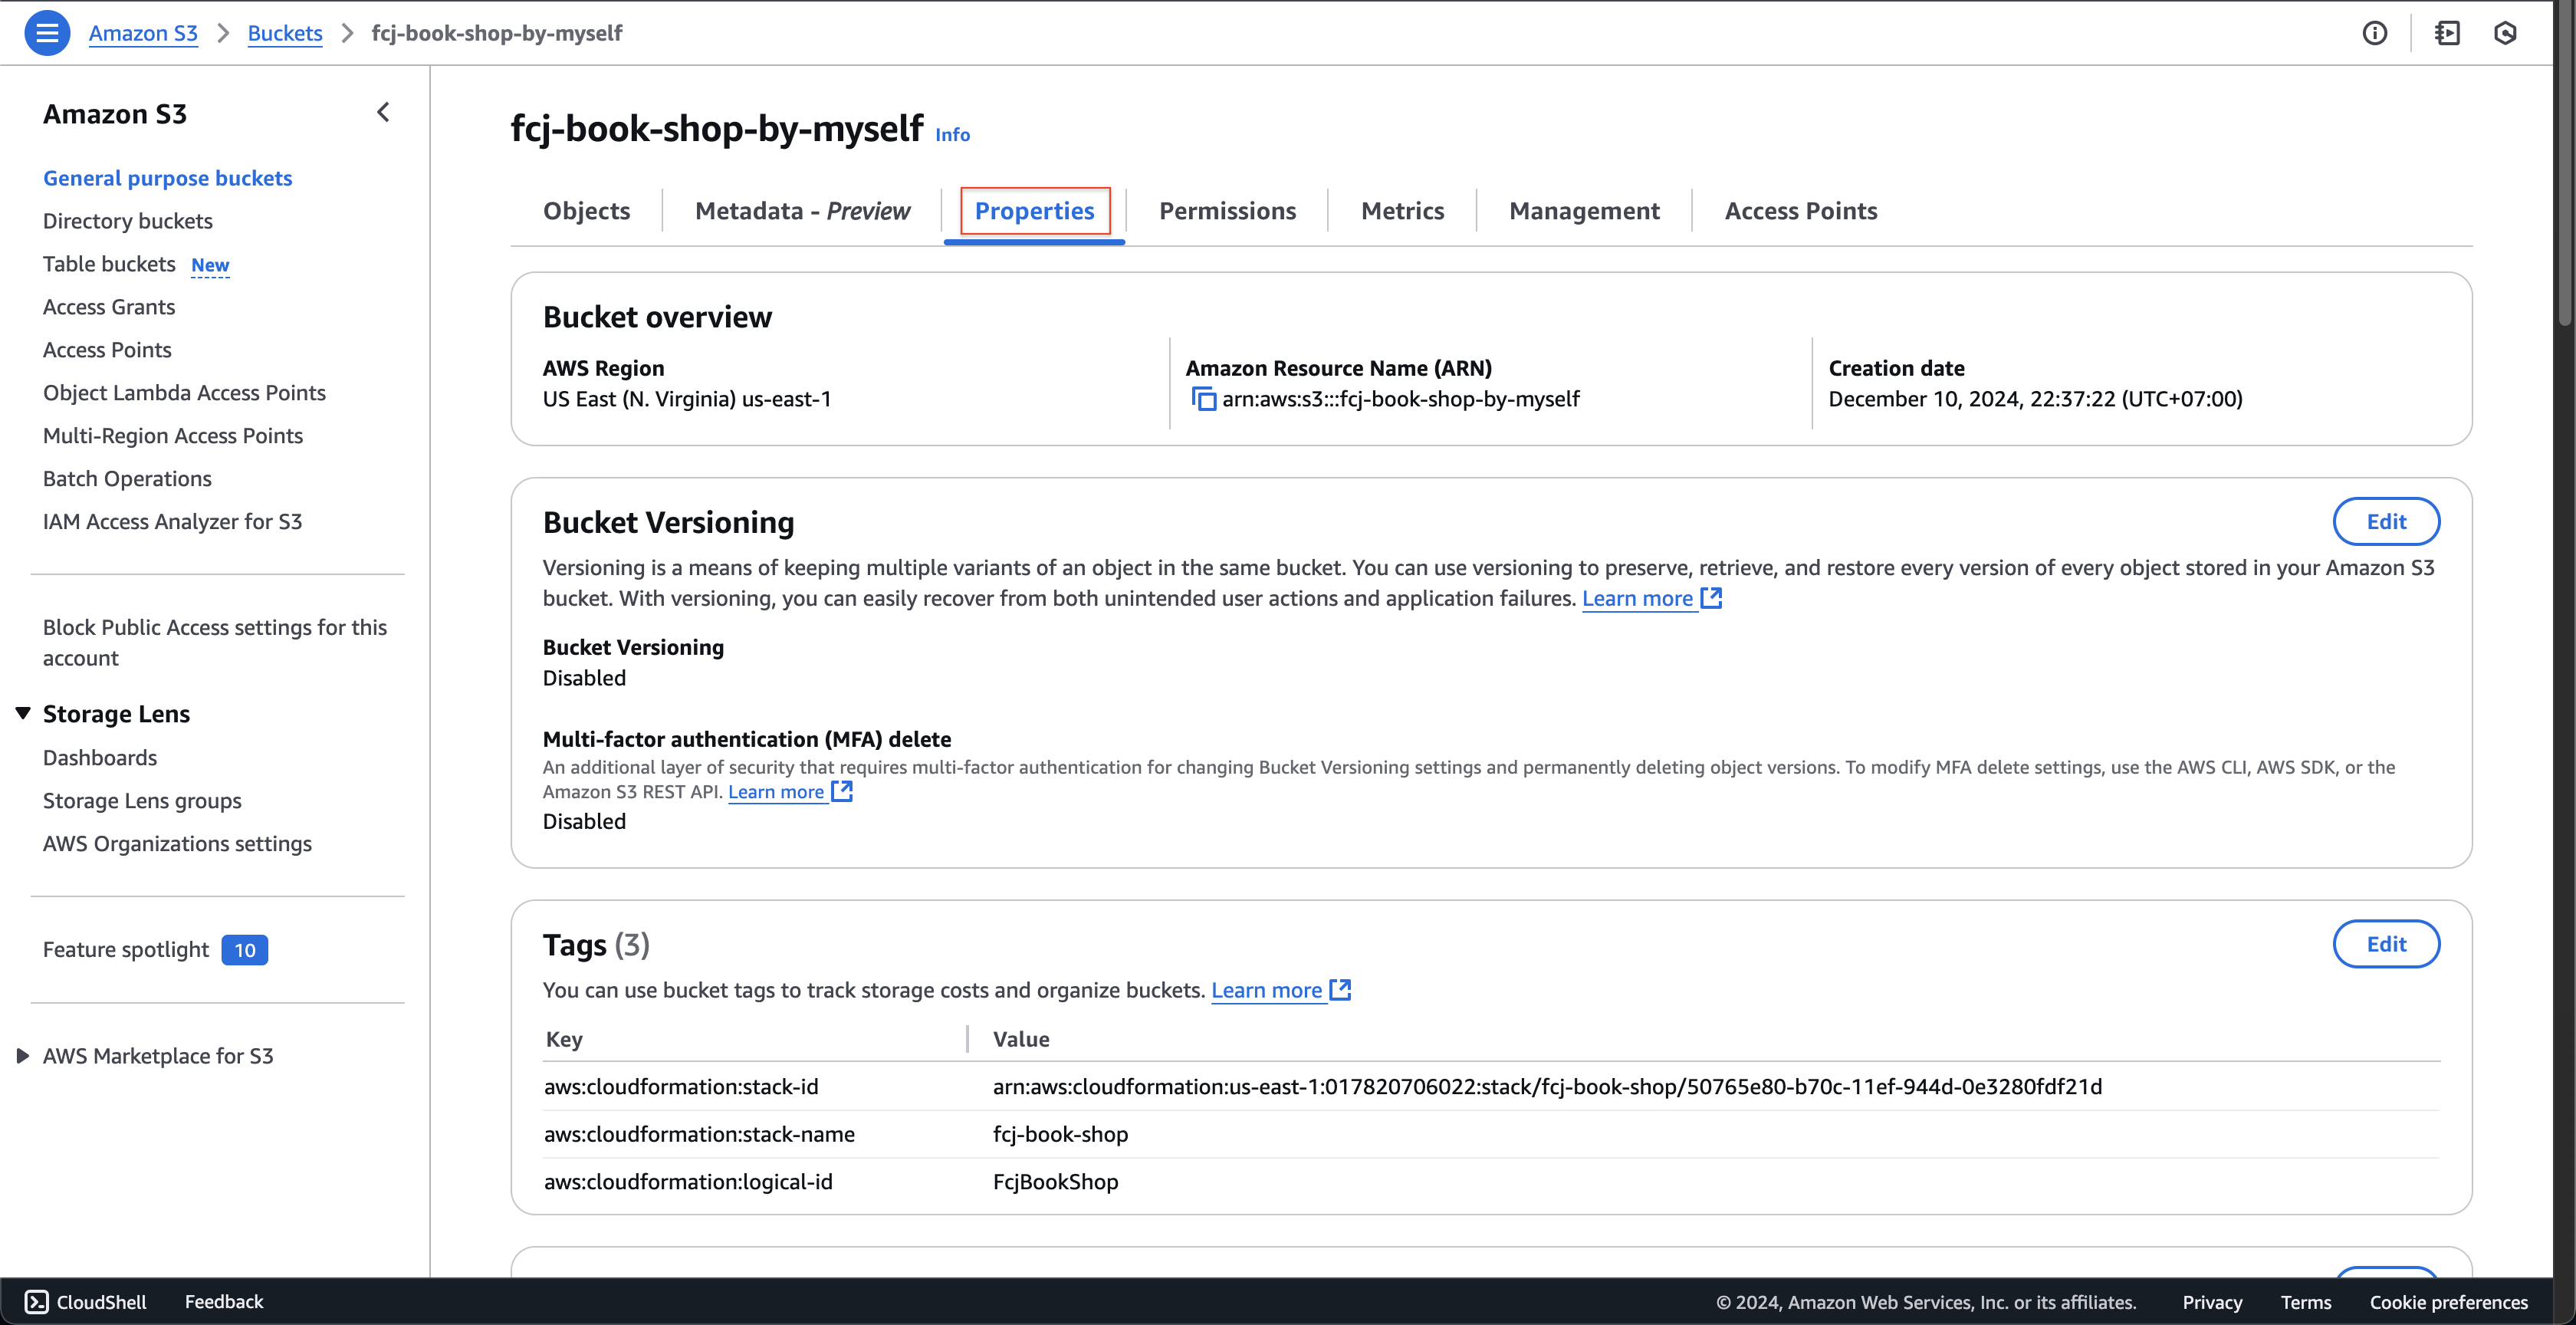
- Then scroll down, check state of Static website hosting.
- Record the endpoint of the website.
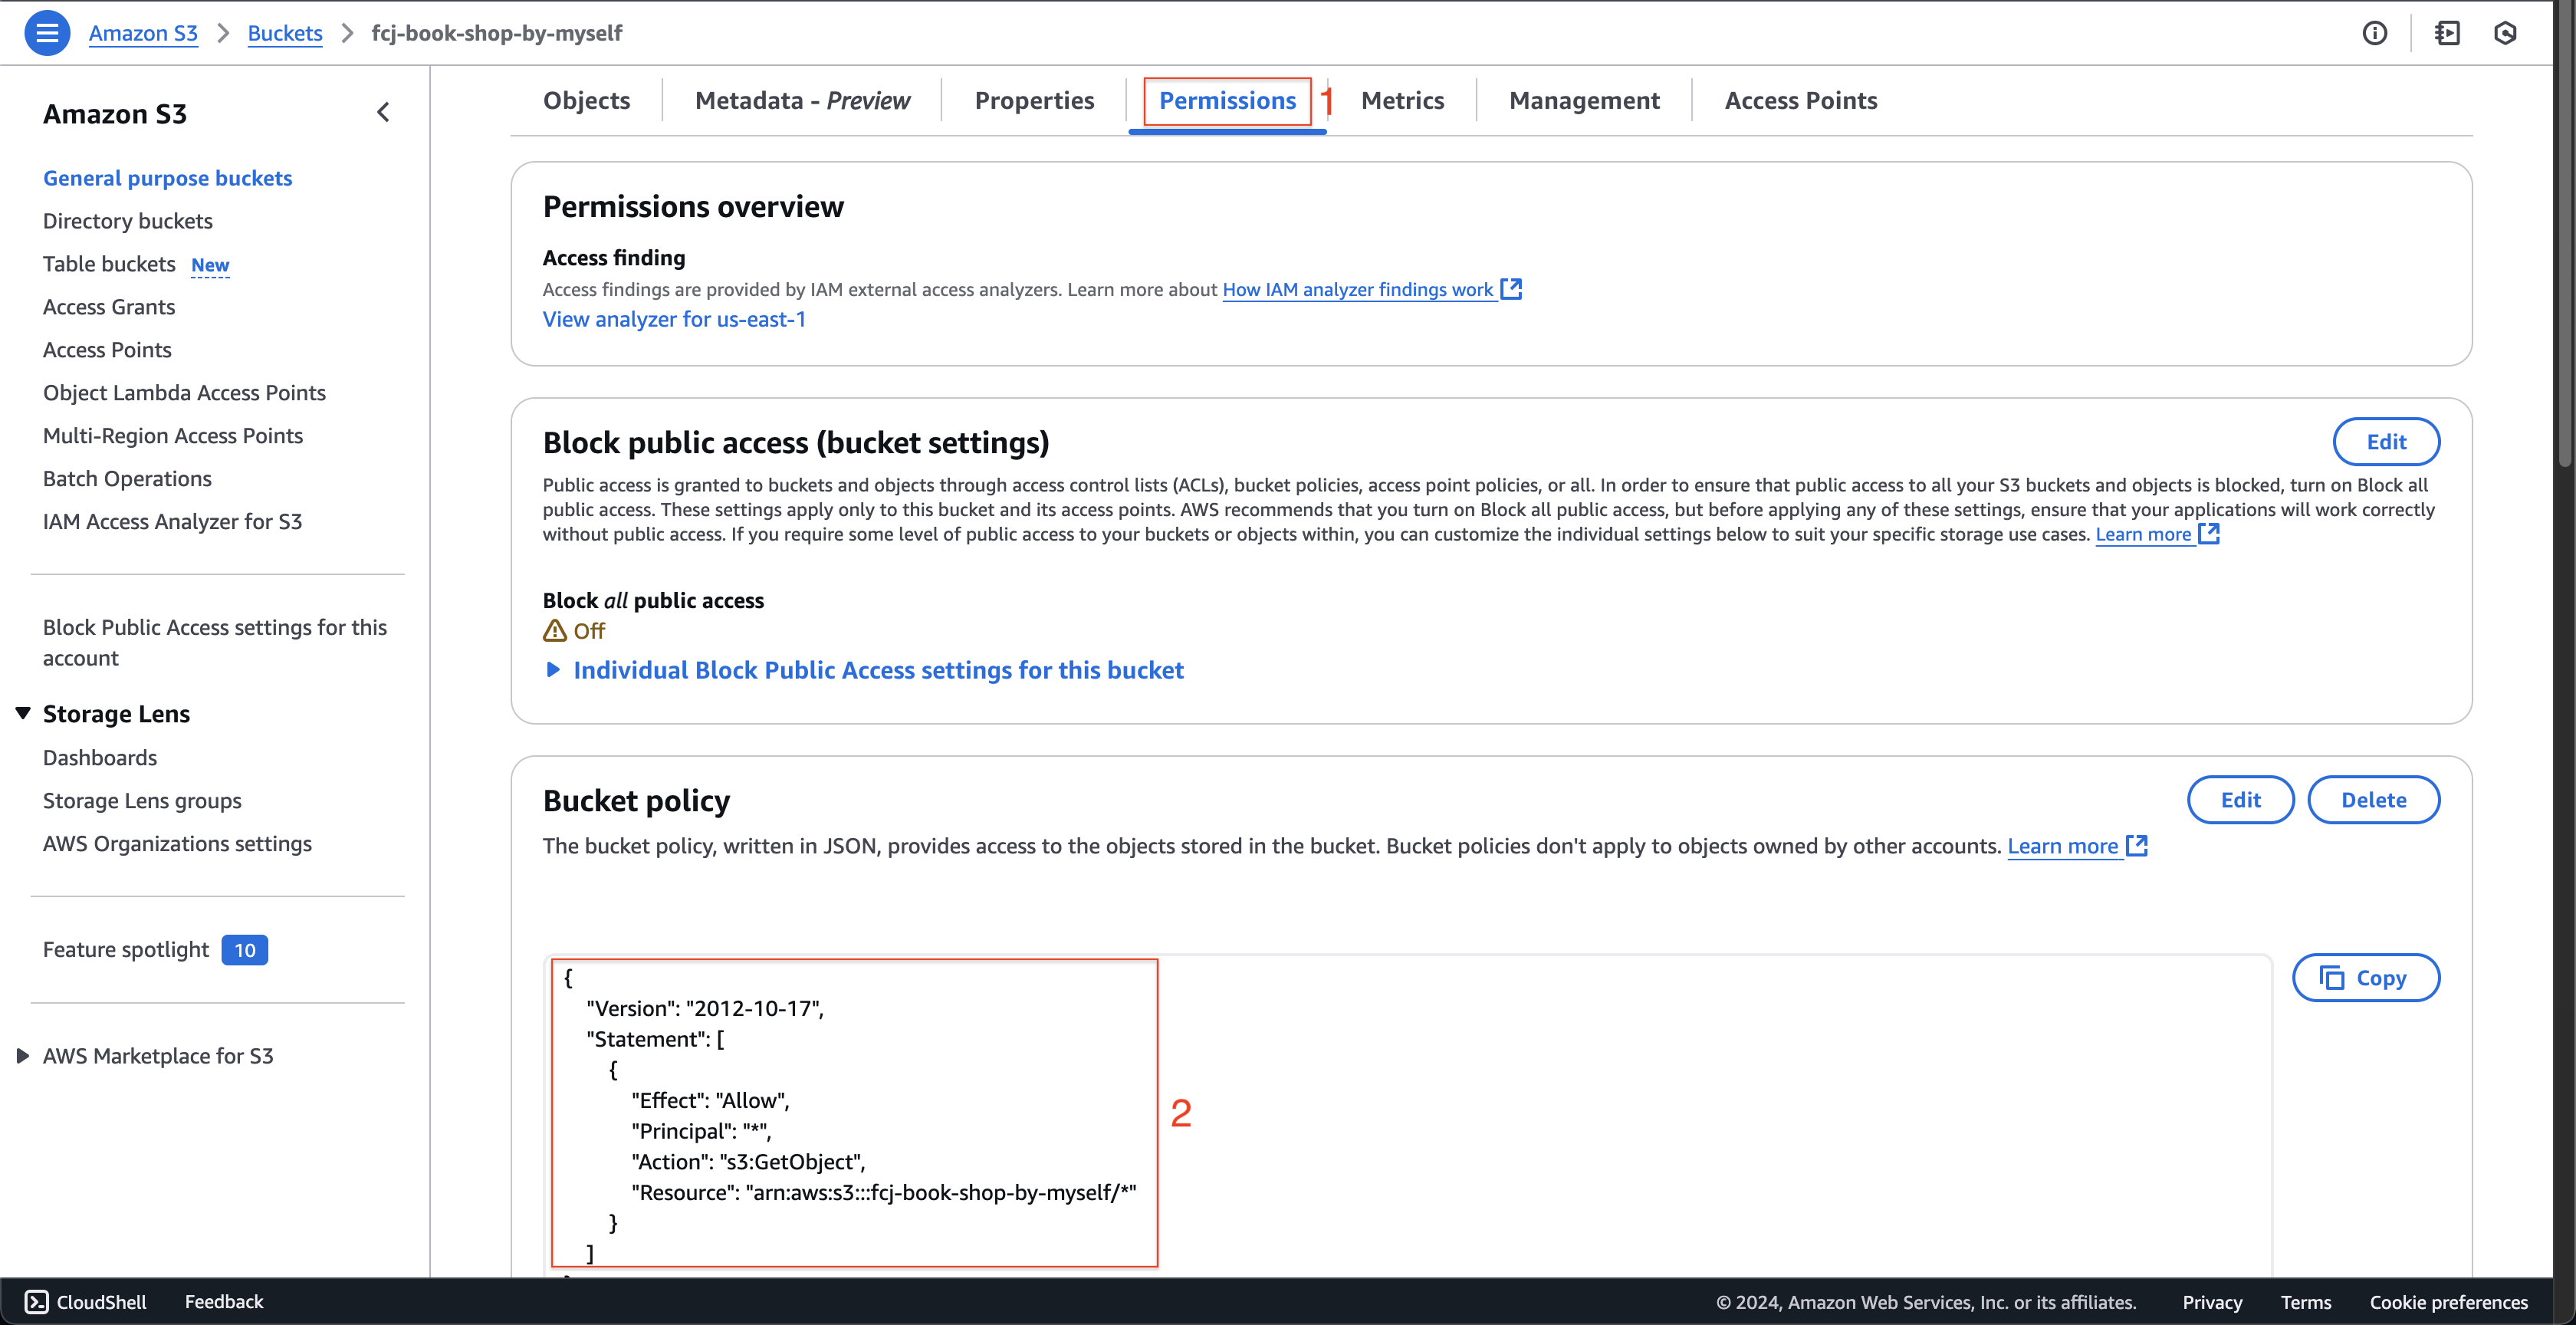
- Click Permissions tab.
- Check the policy has been added.
- Click Properties tab.
-
Open CloudFormation console. Two stacks have been created.
- Click fcj-book-shop stack.
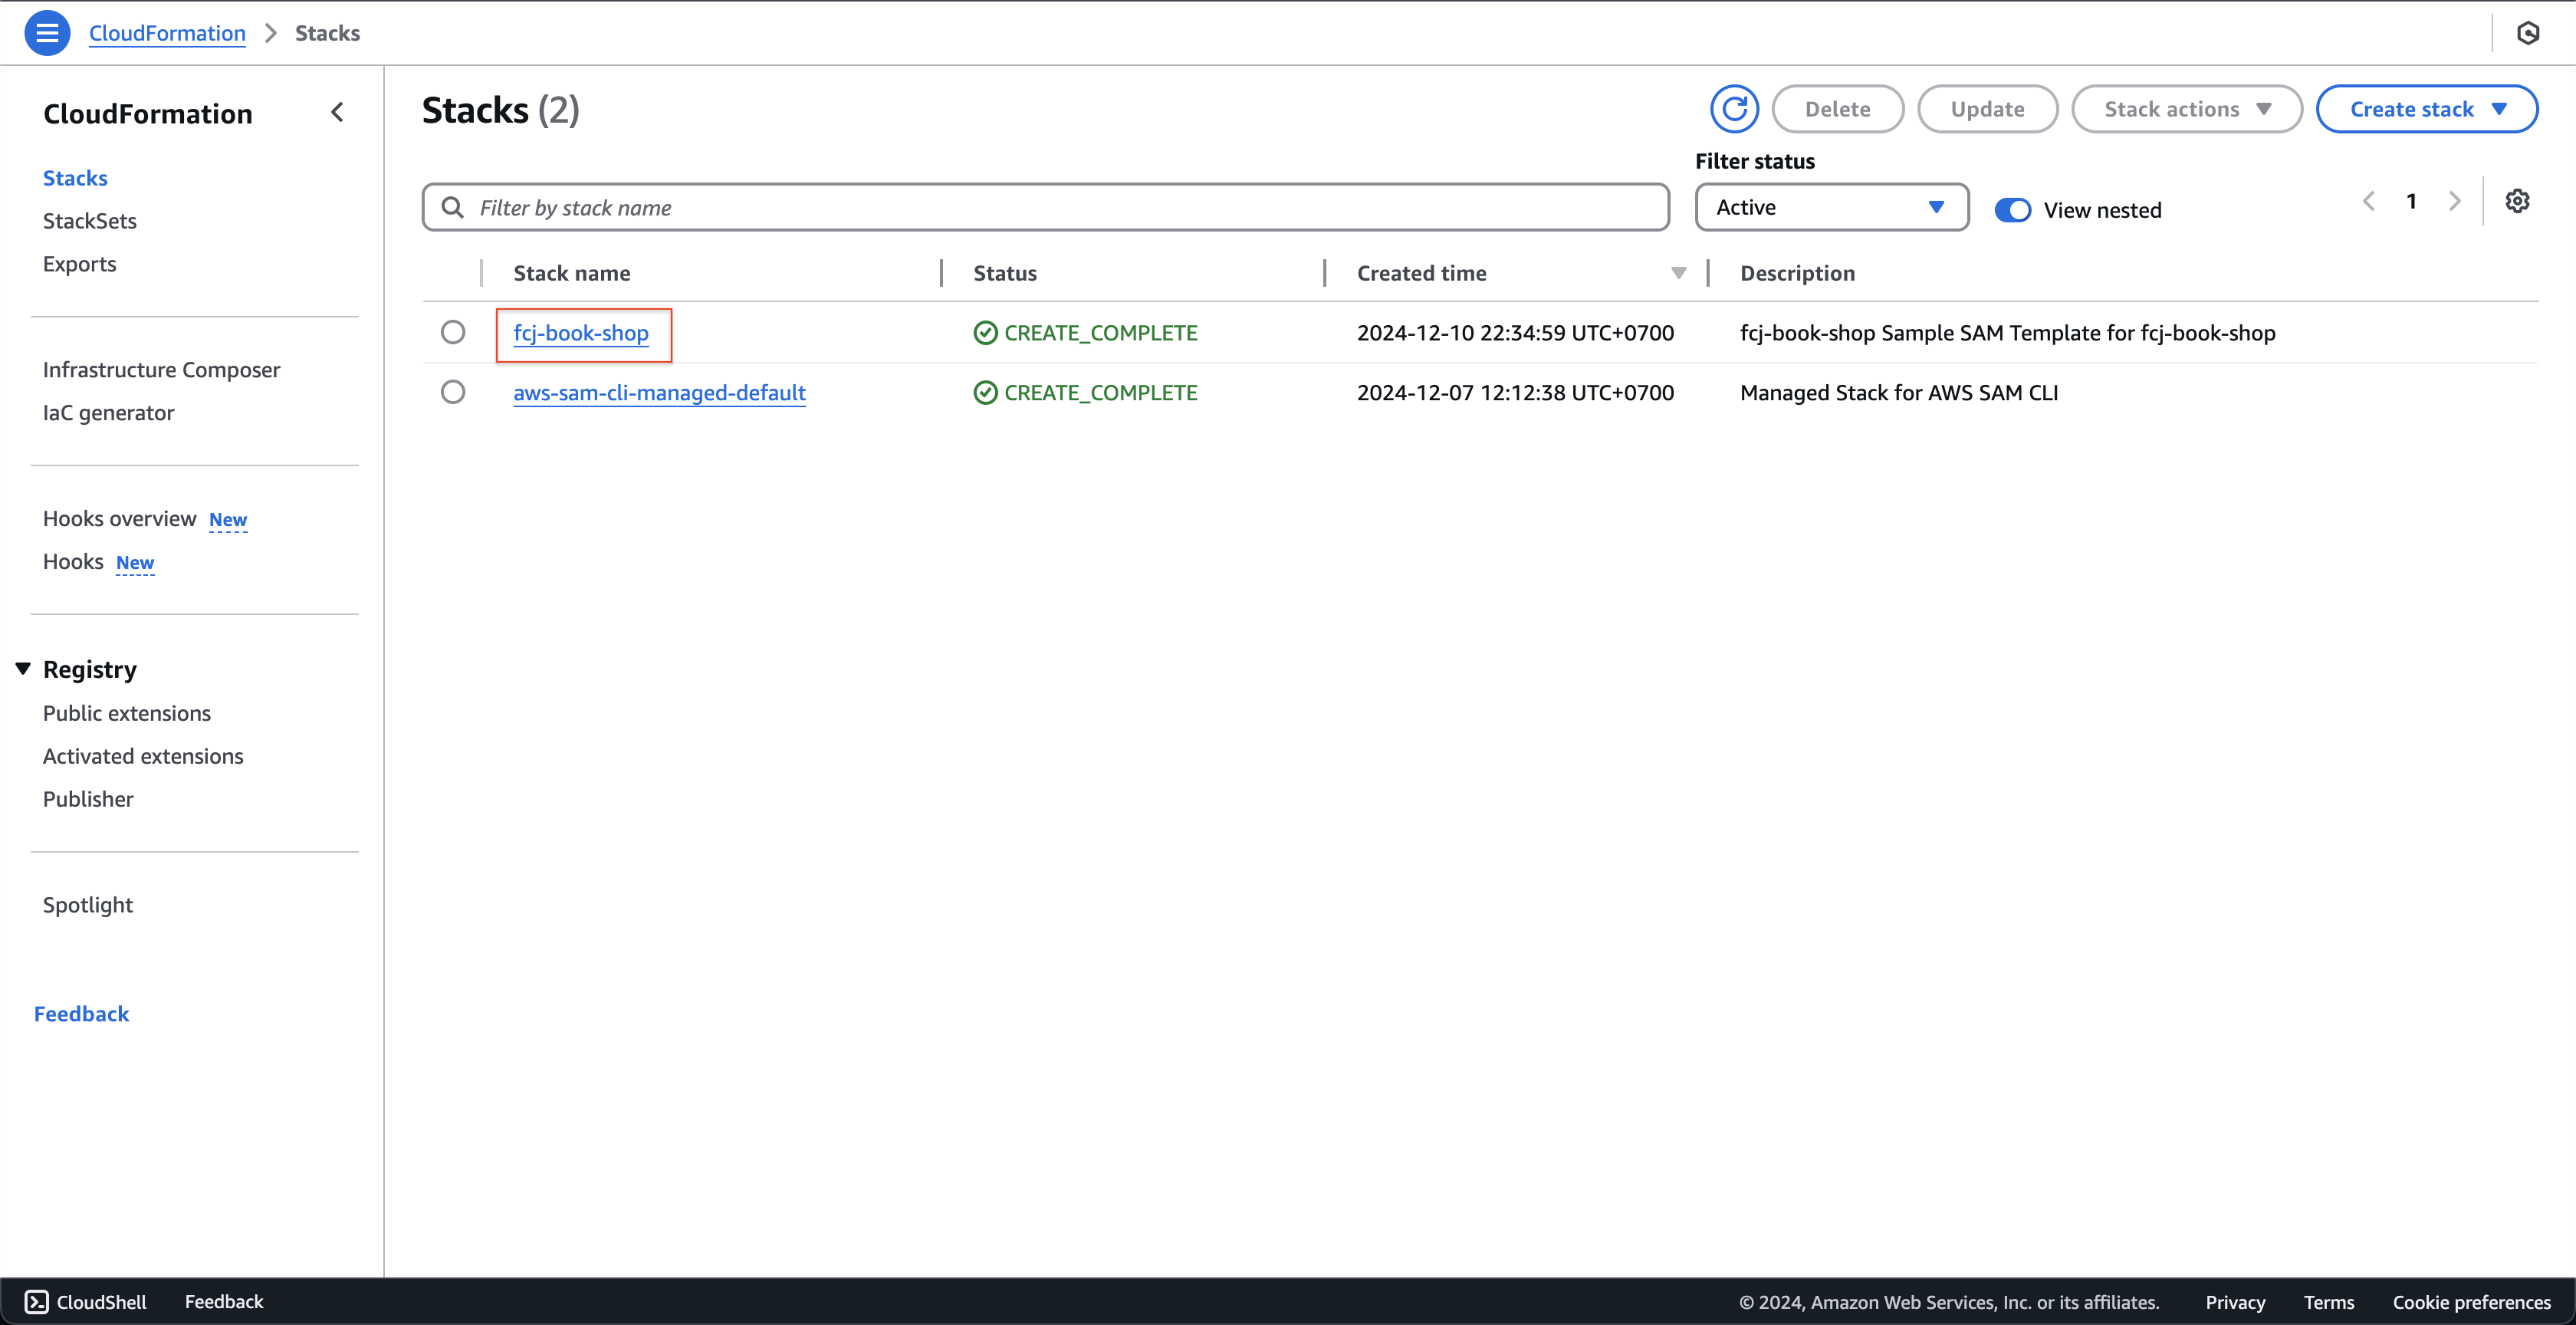
- Click fcj-book-shop stack.
-
At fcj-book-shop page.
- Click Resource tab, see the resources that CloudFormation has initialized.
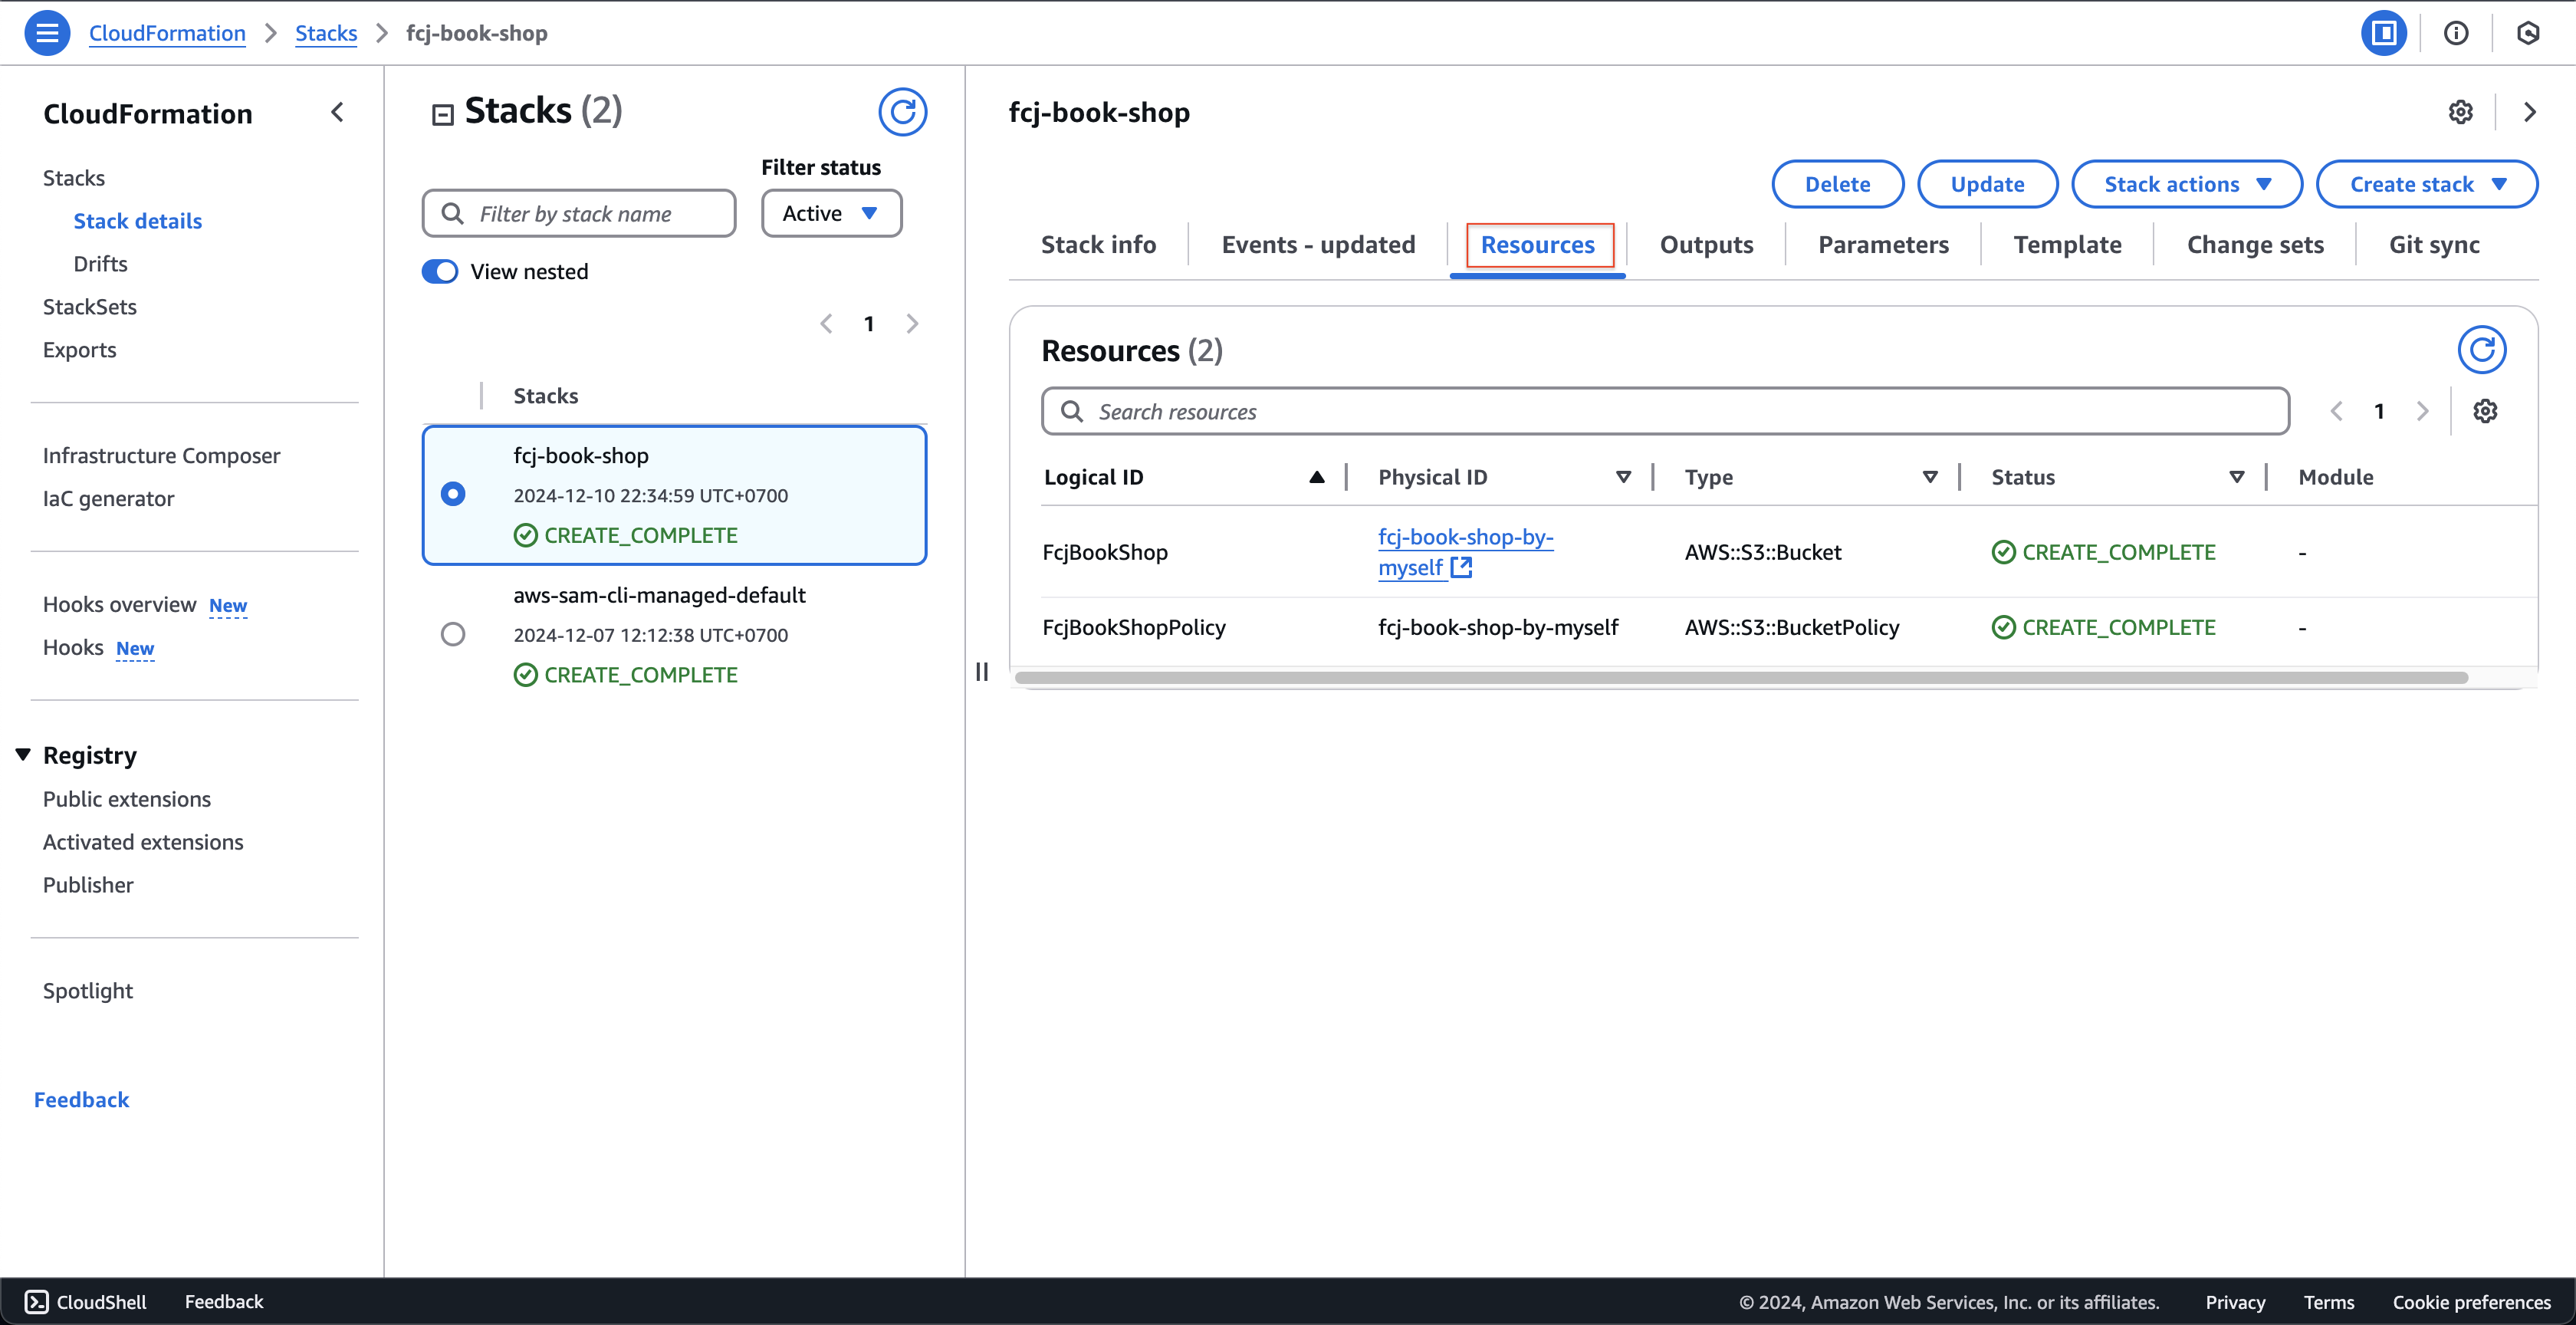
- Click to other stack and see other resources.
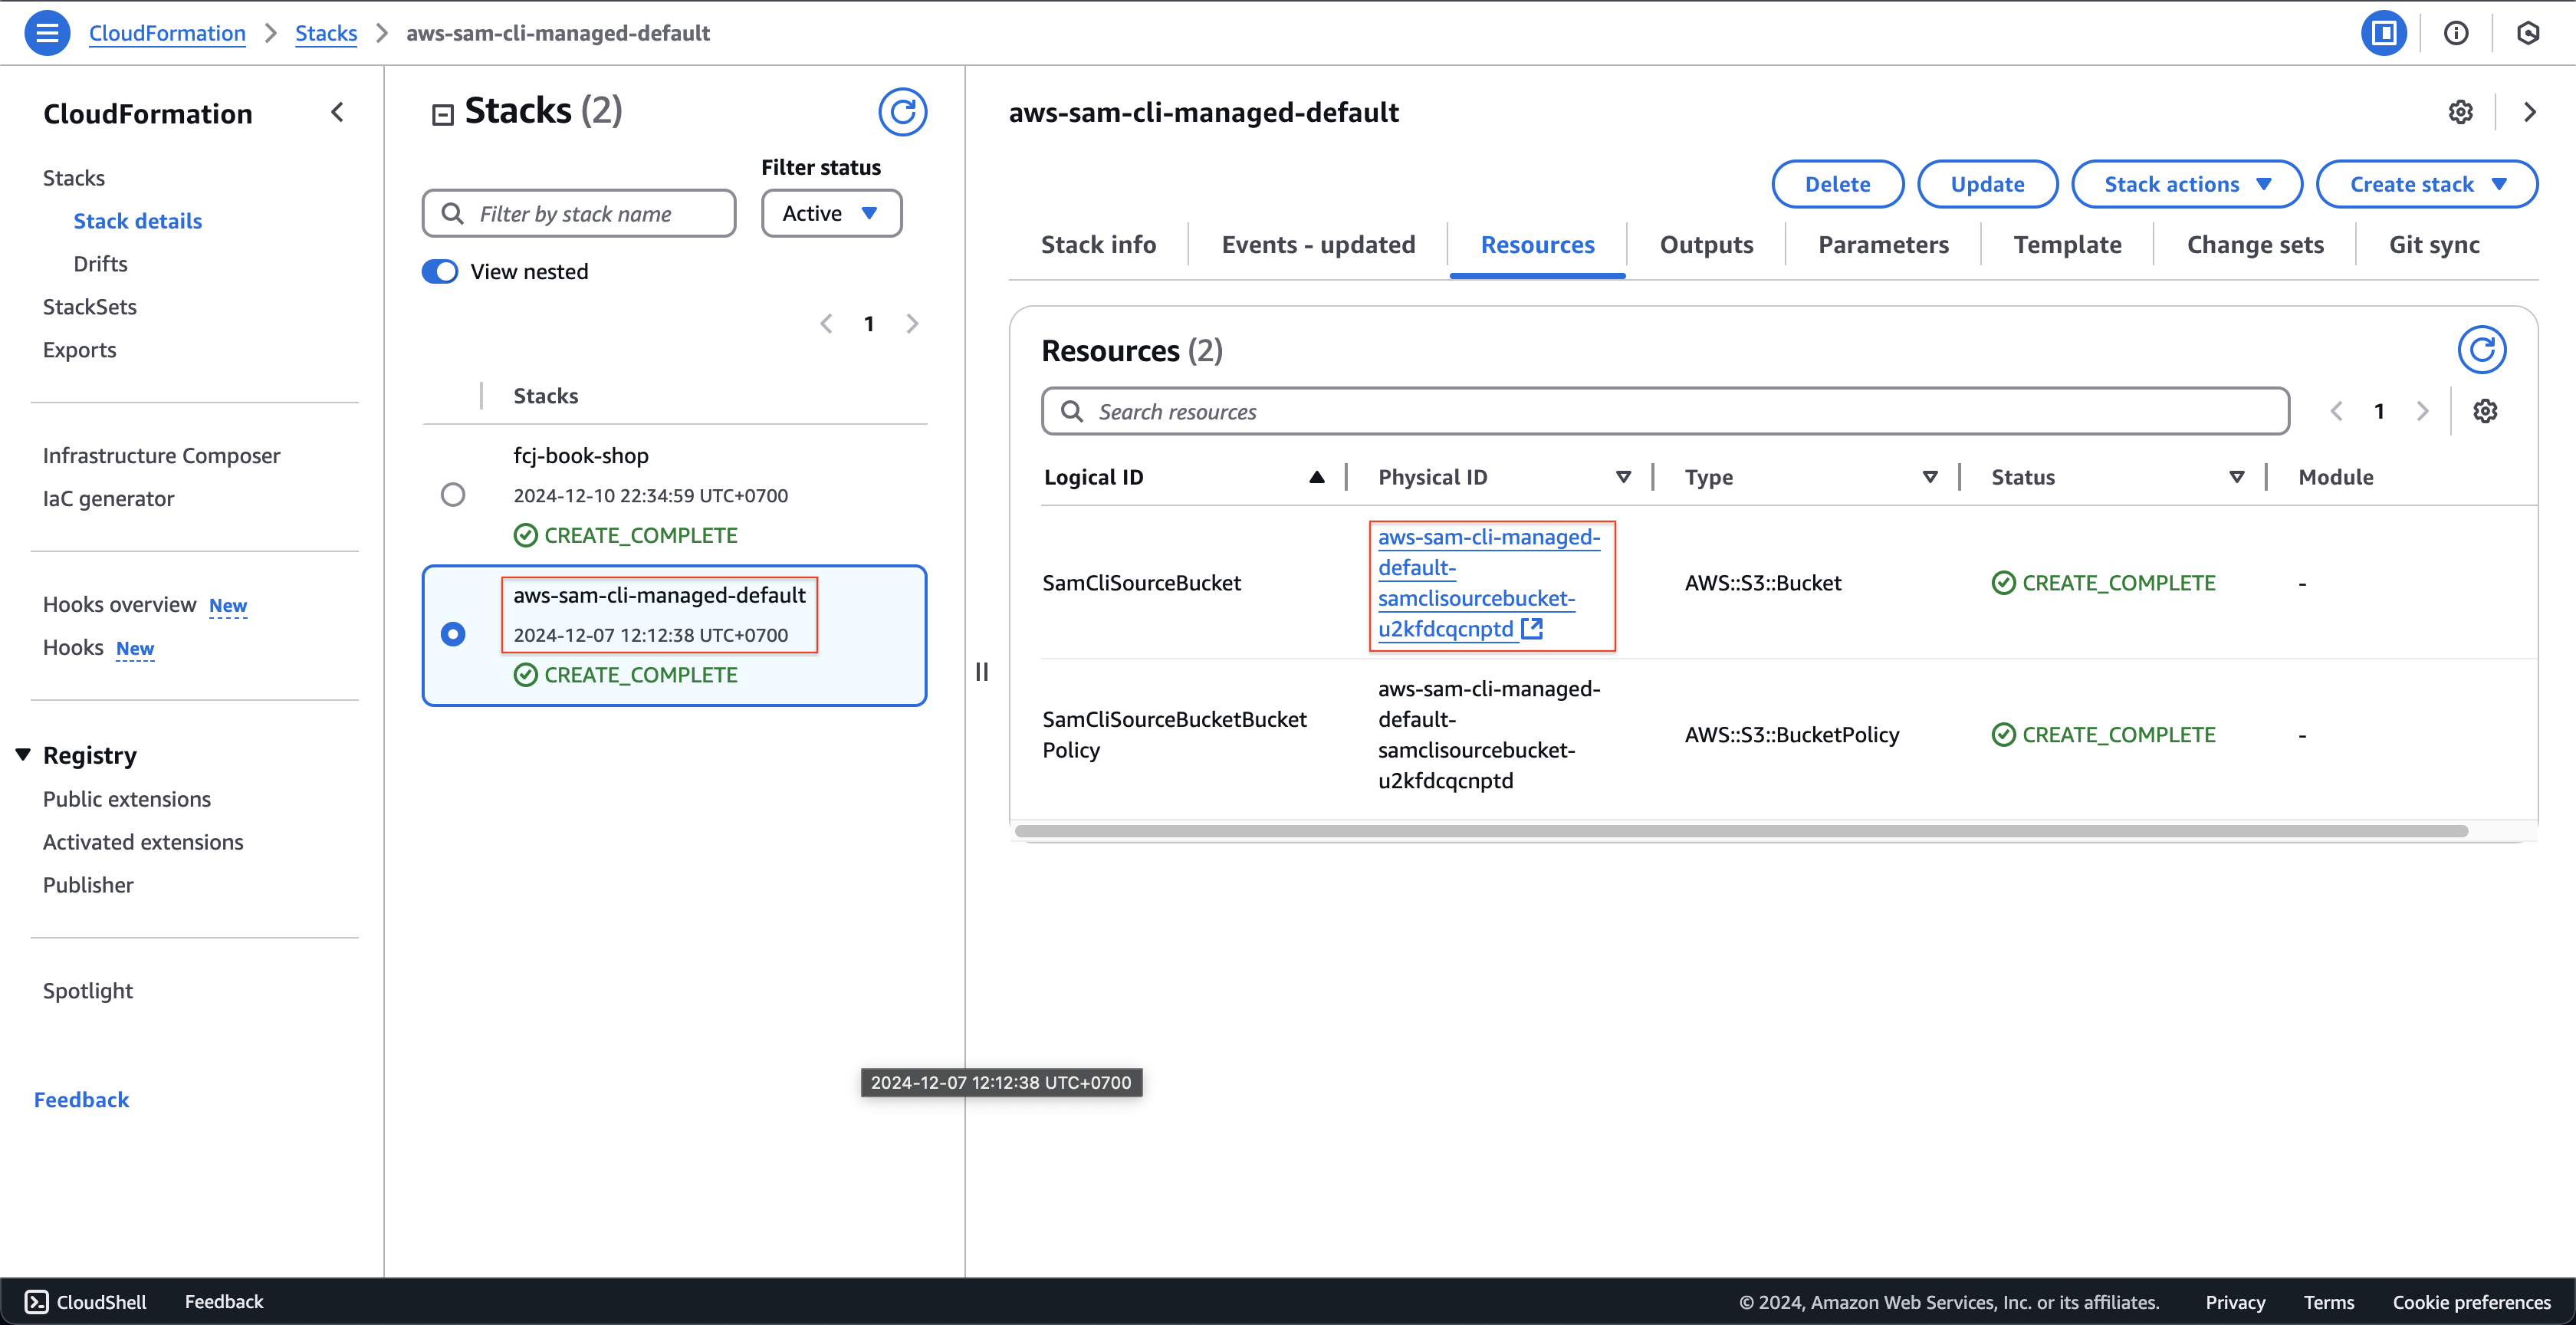
- Click Resource tab, see the resources that CloudFormation has initialized.
-
Download fcj-serverless-frontend code to your device
-
Open a terminal on your computer at the directory where you want to save the source code.
-
Copy and run the below command.
git clone https://github.com/AWS-First-Cloud-Journey/FCJ-Serverless-Workshop.git
cd FCJ-Serverless-Workshop
yarn
yarn build
-
-
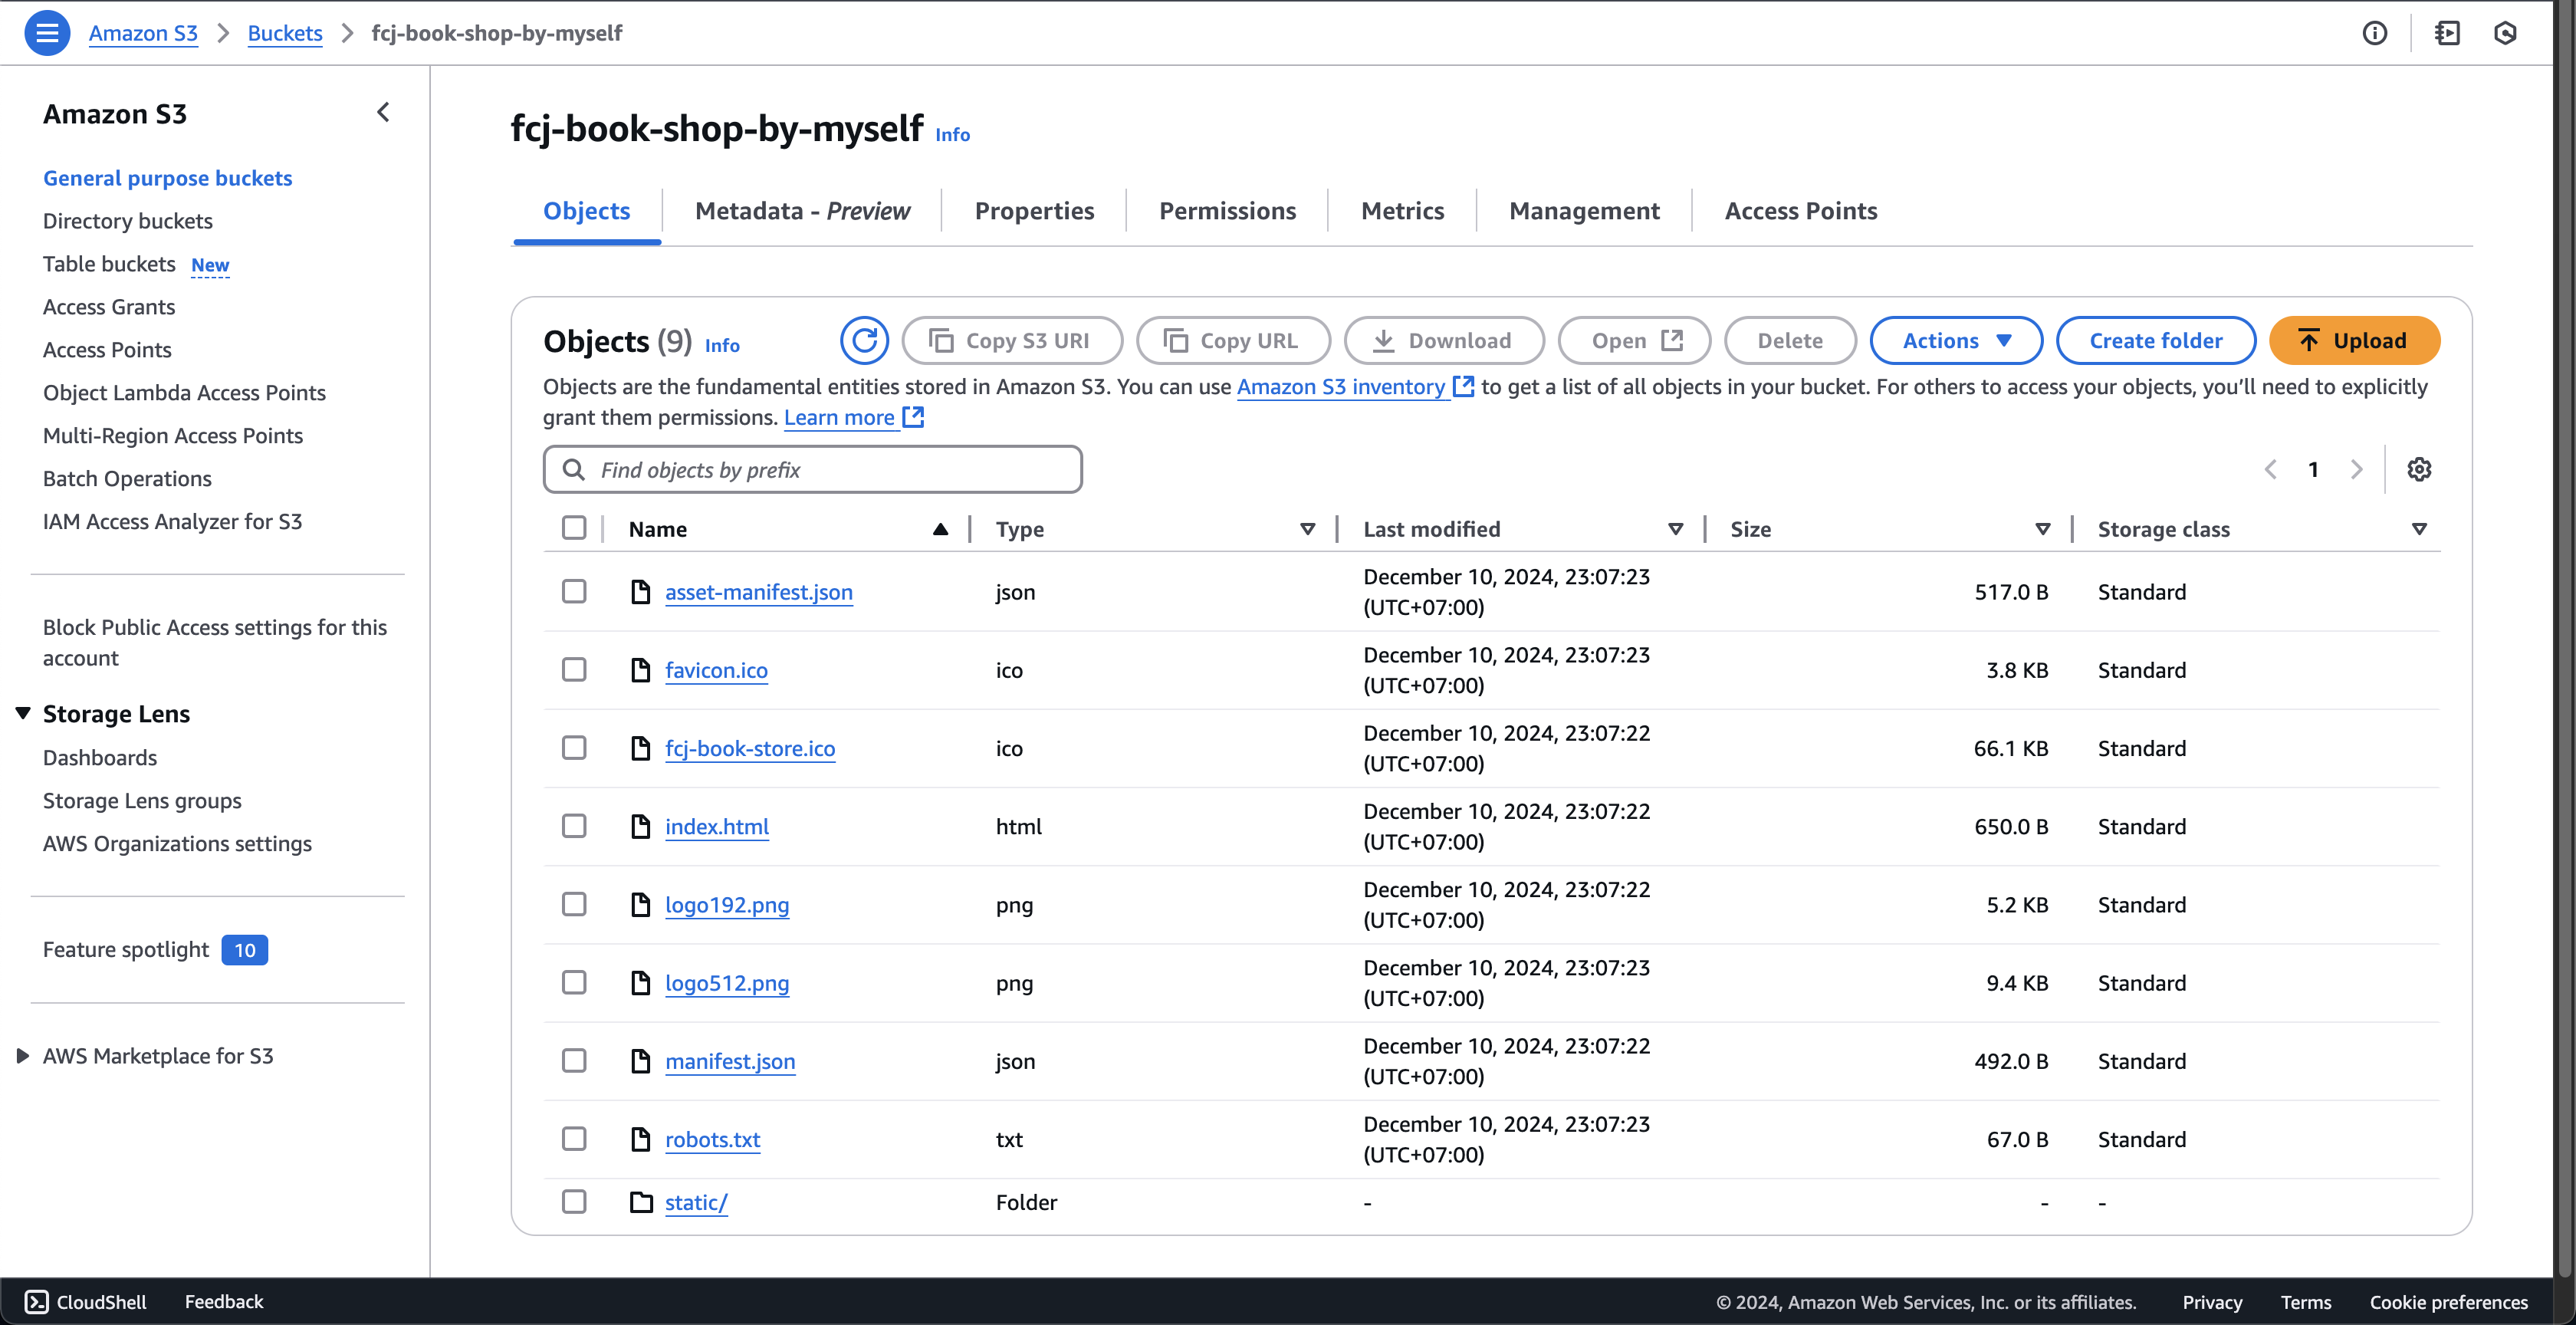
We have finished building the front-end. Next, execute the following command to upload the build folder to S3.
aws s3 cp build s3://fcj-book-shop-by-myself --recursiveResult after uploading: